
Introduction
Roses are timeless symbols of beauty and love, and having them in your garden is a dream for many gardening enthusiasts. Did you know you can grow beautiful rose plants right at home using cuttings? This cost-effective, rewarding method allows you to propagate your favorite varieties and expand your garden’s charm. With patience, the right tools, and care, you can create stunning rose bushes that thrive for years.
In this guide, we’ll walk you through the detailed process of growing roses from cuttings, from preparation to maintaining thriving blooms. Whether you’re a beginner or a seasoned gardener, these steps will set you up for success.
1. Gathering Materials
Before diving in, ensure you have everything ready for the process. Here’s what you’ll need:
- Healthy rose cuttings (6–8 inches long)
- Clean, sharp pruning shears
- Optional: Rooting hormone (powder or gel)
- Small pots or containers with drainage holes
- Well-draining soil mix (peat, perlite, vermiculite)
- Clear plastic bags or propagation domes
- A watering can or spray bottle
- Compost or garden soil for transplanting
2. Choosing and Preparing the Rose Cuttings
The key to propagating roses successfully is selecting the right cuttings. Follow these steps:
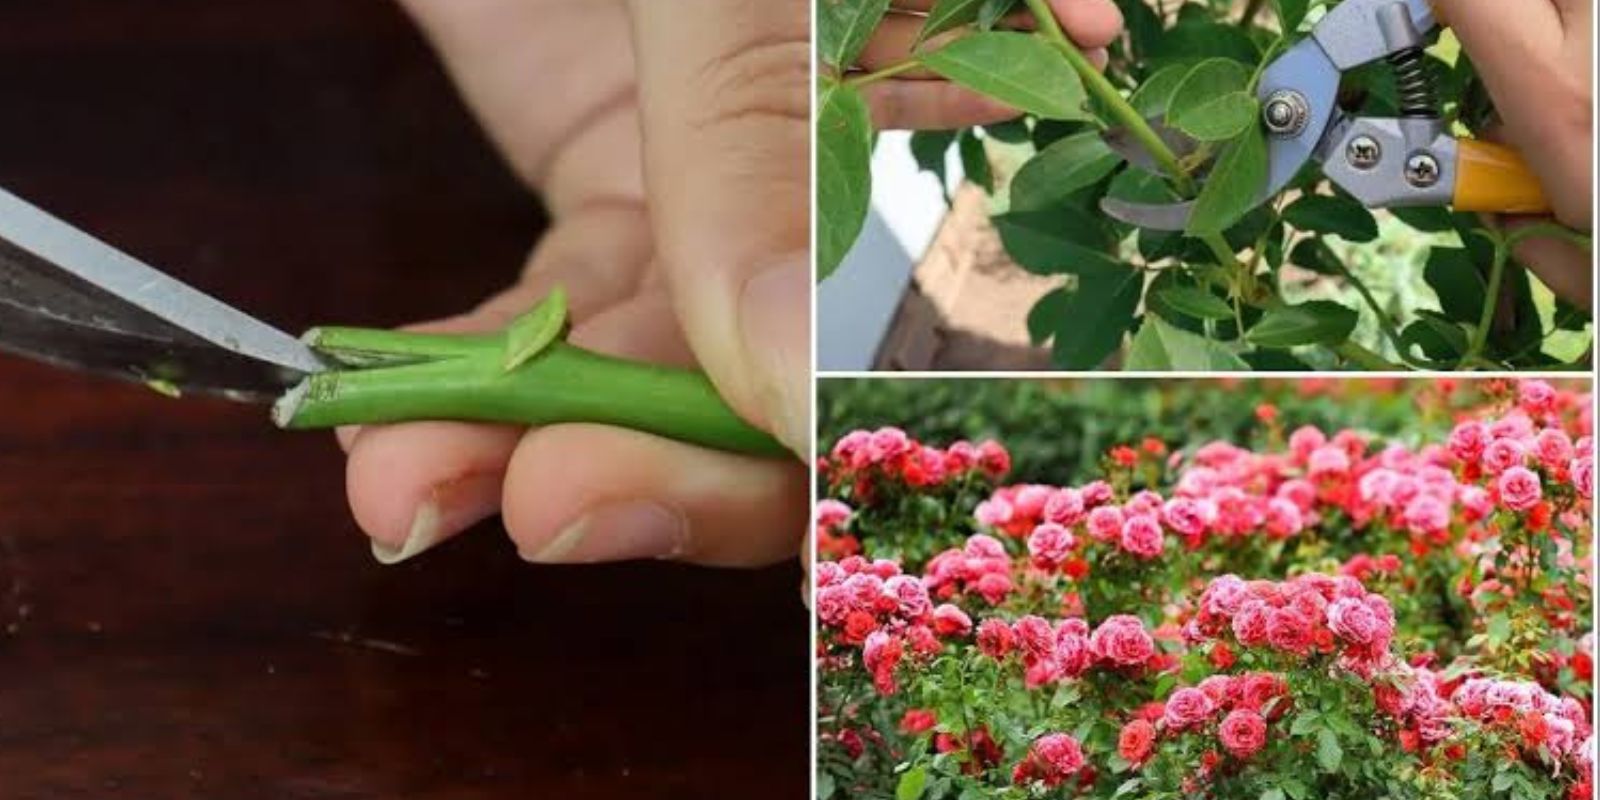
- Choose Healthy Stems: Look for healthy, disease-free stems from a rose bush. Semi-hardwood stems, which are neither too young nor too old, are ideal.
- Cut Correctly: Using clean pruning shears, cut 6–8-inch-long stems just below a leaf node. A slanted cut helps expose more surface area for rooting.
- Remove Unnecessary Parts: Remove flowers, buds, and leaves from the lower half of the cutting. This focuses the plant’s energy on root development.
- Optional: Dip the cut end into a rooting hormone. While not essential, it can significantly speed up the rooting process.
3. Planting the Cuttings
Proper planting is crucial for the success of your rose propagation.
- Prepare the Soil: Fill small pots or containers with a well-draining soil mix. Peat moss, perlite, and vermiculite are excellent options for promoting good aeration.
- Plant the Cutting: Create a small hole in the soil and insert the prepared cutting, ensuring at least two nodes are buried. The leaves should remain above the soil line.
- Firm the Soil: Gently press the soil around the cutting to hold it in place, and water lightly to settle it.
4. Creating a Humid Environment
Humidity is vital for cuttings to retain moisture while developing roots.
- Cover the pots with clear plastic bags, creating a mini-greenhouse effect. This traps humidity and promotes faster rooting.
- Place the pots in a location with bright, indirect light. Avoid direct sunlight, as it can overheat the cuttings and damage them.
- Ensure good air circulation inside the bag by making small holes or occasionally opening the bag to prevent mold.
5. Maintaining the Right Conditions
Consistency is key when caring for your rose cuttings.
- Watering: Keep the soil consistently moist but never soggy. Use a spray bottle or watering can to avoid overwatering.
- Temperature and Light: Roses thrive in warm conditions (65–75°F). Provide bright but indirect light to prevent stress on the cuttings.
6. Root Development and Growth
Be patient as your cuttings develop roots. This process can take 4–6 weeks.
- Look for signs of new growth, such as fresh leaves or stems. This indicates that roots are forming below the soil.
- Gently tug the cutting to check if it resists—this is a good sign that roots have established.
7. Transplanting to Larger Pots or Garden Soil
Once your cuttings have established roots, it’s time to give them a more permanent home.
- Choose the Right Soil: Use nutrient-rich garden soil mixed with compost for better growth.
- Transplanting: Carefully remove the rooted cutting from the pot and place it into a larger container or directly into the ground. Ensure the roots are not damaged during the process.
- Watering: Water thoroughly after transplanting to help the soil settle and support root expansion.
8. Caring for Transplanted Roses
After transplanting, it’s essential to nurture your roses for long-term success.
- Watering: Roses need consistent moisture but dislike waterlogged soil. Water deeply once or twice a week, depending on weather conditions.
- Sunlight: Provide 6–8 hours of sunlight daily for healthy growth and vibrant blooms.
- Fertilizing: Feed your roses with a balanced fertilizer during the growing season to encourage lush foliage and flowering.
9. Pruning and Maintenance
Regular pruning keeps your roses healthy and promotes a bushy growth habit.
- Pruning Tips: Trim dead, damaged, or diseased branches to maintain the plant’s health. Prune in late winter or early spring for optimal results.
- Deadheading: Remove spent flowers to encourage more blooms and improve the plant’s overall appearance.
10. Pest and Disease Management
Like any plant, roses can face pest and disease issues. Stay vigilant to keep your plants thriving.
- Common Pests: Watch for aphids, spider mites, and Japanese beetles. Use organic solutions like neem oil to control infestations.
- Diseases: Prevent fungal diseases like black spot and powdery mildew by ensuring good air circulation and avoiding overhead watering.
11. Enjoying Your Roses
With proper care, your roses will reward you with stunning blooms. Roses can be cut for bouquets, added to floral arrangements, or simply left to enhance your garden. Deadhead regularly to keep the blooms coming, and enjoy the beauty and fragrance of your hard work.
Conclusion
Growing roses from cuttings is an incredibly fulfilling gardening project that allows you to propagate your favorite varieties without spending much money. By following these steps and dedicating a little time and care, you can create a flourishing rose garden that’s uniquely yours.
🌟 “Have you tried growing roses at home? Share your favorite tips or questions in the comments below!” 🌟