
Grafting is a time-tested horticultural technique used to propagate plants, enhance crop production, and diversify species on a single tree. Among the different grafting methods, chip budding stands out for its versatility, simplicity, and high success rate. It’s a great choice if you’re looking to graft specific fruit or flowering varieties onto rootstocks that will support them, such as creating a tree with multiple apple types or a rose bush with different bloom colors. This article will take you through the art and science of chip budding grafting, from preparation to execution, and provide tips for a thriving, fruitful garden.
What is Chip Budding?
Chip budding is a grafting technique that involves attaching a “chip” or small piece of bark with a dormant bud from one plant (the scion) onto the rootstock of another. The main objective is to align the cambium layers (the actively growing tissue) of both the bud and the rootstock to create a healthy bond. Chip budding is particularly effective for propagating fruit trees, such as apples, pears, and cherries, and works well with many ornamental species, including roses.
Why Chip Budding?
Chip budding offers several benefits for plant enthusiasts and professional growers alike:
- Increases Variety: Chip budding allows you to grow different varieties on one tree, making it possible to enjoy multiple fruits or flower colors on a single plant.
- Greater Vigor: Rootstocks that are chosen for their resilience can lend disease resistance and improved hardiness to the grafted plant.
- Efficient Propagation: Chip budding is a relatively simple and reliable technique that often results in high success rates with minimal resources.
Ready to dive into the process? Let’s go through each step in detail.
Step 1: Choose Your Rootstock and Budwood
The first step in chip budding is selecting both a suitable rootstock and healthy budwood (scion).
- Rootstock: Choose a rootstock that’s healthy, disease-free, and compatible with the budwood variety. Rootstocks are chosen for traits like disease resistance, growth control, or tolerance to certain soil types.
- Budwood: Pick a branch from the desired variety that has plump, healthy buds. Ideally, the bud should be dormant, which often means it’s best to harvest budwood in early spring or late summer when growth is minimal.
Step 2: Prepare the Tools
Having the right tools on hand ensures clean cuts and reduces damage to both the budwood and rootstock.
- Sharp Grafting Knife: A sharp knife is essential for making precise cuts. Clean and sterilize the knife before use to avoid any disease transfer.
- Grafting Tape or Rubber Bands: This tape will hold the graft in place, ensuring the bud stays secure until it bonds.
- Rubbing Alcohol: Clean your tools between grafts to prevent spreading bacteria or fungi.
Step 3: Make the Bud Chip
Creating the bud chip is a critical step in chip budding. Follow these instructions to cut an effective chip:
- Hold the Budwood Firmly: Identify a healthy bud along the length of the budwood.
- Make an Angled Cut Below the Bud: Cut about 1–2 centimeters below the bud at a shallow angle and slice upward.
- Finish with a Top Cut: Cut above the bud and remove the chip from the budwood. Your chip should include the bud and a small amount of supporting wood and bark.
Step 4: Prepare the Rootstock for the Chip
Preparing the rootstock involves making a matching cut to hold the bud chip.
- Select the Grafting Spot: Choose a smooth section on the rootstock to make the cut—preferably lower on the stem for stability.
- Create a Matching Cut: Make a cut on the rootstock similar in size and angle to the bud chip. The cambium layers should match closely for a successful graft.
Step 5: Insert and Secure the Chip Bud
With both cuts prepared, it’s time to insert and secure the chip bud onto the rootstock.
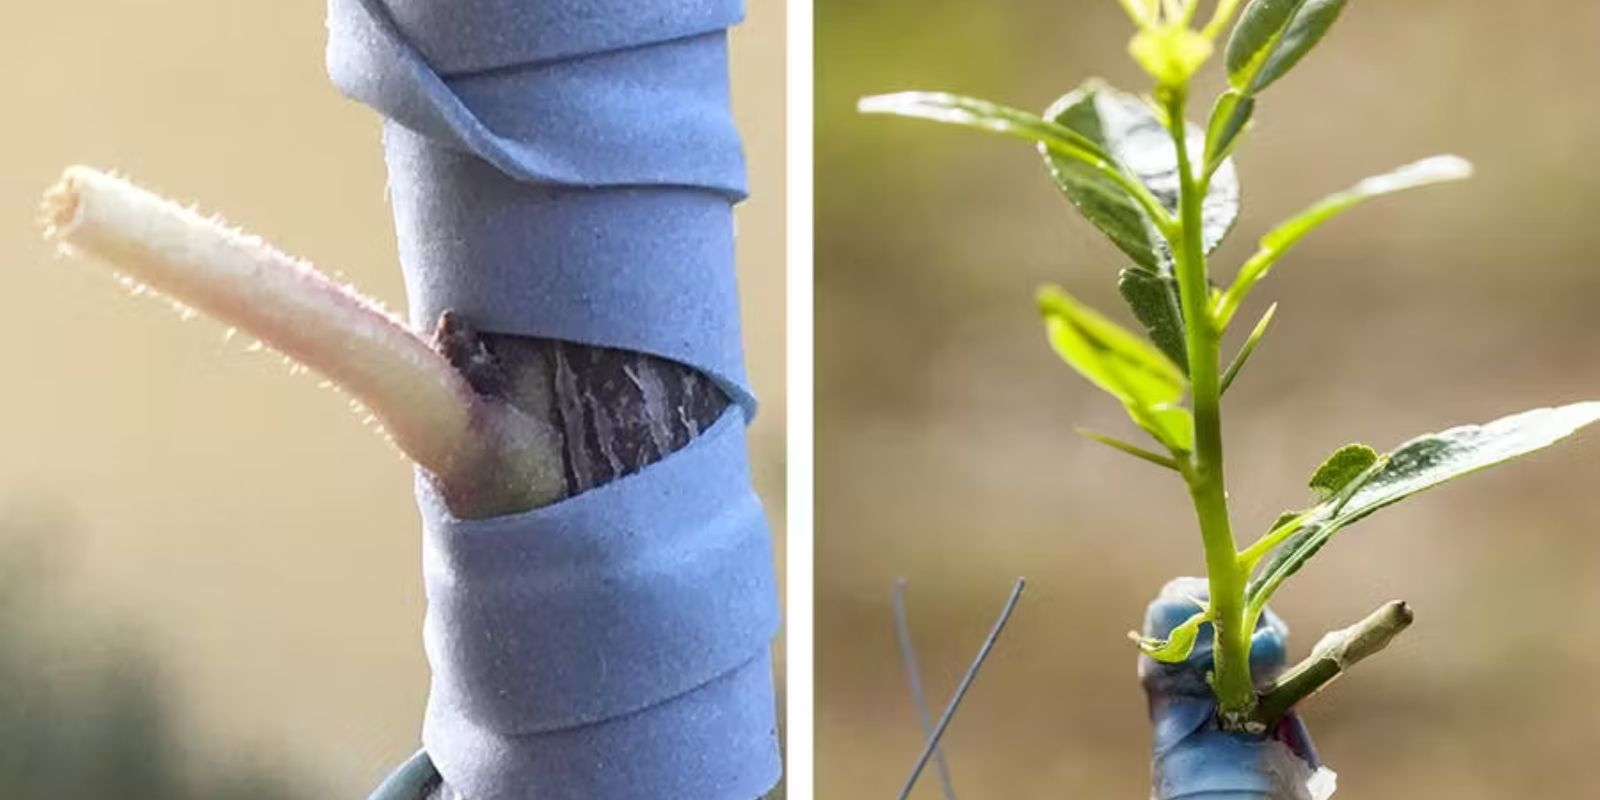
- Align the Cambium Layers: Place the bud chip into the rootstock cut, making sure the green cambium layers touch. This alignment is crucial for the bud to receive nutrients from the rootstock.
- Wrap with Grafting Tape: Carefully wrap the graft with grafting tape or rubber bands. The tape should be snug but not so tight that it restricts growth.
Step 6: Aftercare and Monitoring the Graft
Proper aftercare is essential to ensure the graft heals well and the bud grows successfully.
- Check for Growth: After 2-3 weeks, check for signs of growth around the graft. If the bud is taking, you’ll see signs of new growth emerging from it.
- Unwrap the Graft: Once the graft has healed, remove the grafting tape gently to avoid damaging the young growth.
- Prune Excess Growth: Trim back any shoots that appear from the rootstock below the graft to direct energy into the bud.
Tips for Successful Chip Budding
- Timing is Key: Perform chip budding in early spring or late summer when sap flow is lower. High sap flow may push the bud chip out of alignment.
- Ensure Cambium Contact: The cambium layers need to touch for nutrient transfer, so always align carefully when inserting the bud chip.
- Keep Tools Sterile: Bacteria or fungi on tools can infect the graft, so clean your knife with rubbing alcohol between cuts.
- Control Environmental Conditions: Humidity, temperature, and sunlight can all impact graft success. Aim for moderate, indirect light, and avoid exposing the graft to extreme conditions.
- Choose the Right Rootstock: Some rootstocks are better suited for certain scion varieties. For example, apple rootstocks often work with other apples but may not be compatible with other fruits.
The Benefits of Successful Chip Budding
Once you’ve mastered chip budding, you’ll enjoy numerous benefits in your garden:
- Increased Fruit Production: Grafted trees can produce more fruit than a single-variety tree.
- Extended Harvests: By grafting different varieties, you can stagger harvest times and enjoy fresh produce over a longer period.
- Unique Creations: Mix and match flower colors, fruit flavors, or tree forms to create a custom garden experience.
Common Issues and Troubleshooting
- Poor Cambium Contact: If buds fail to grow, the cambium layers may not have been aligned correctly. Next time, practice aligning more precisely.
- Infection or Rot: Infections can cause grafts to fail, so always sterilize tools and check for any signs of rot.
- Bud Rejection: If the bud chip falls off, it may indicate sap pressure was too high or the rootstock wasn’t compatible. Aim for early spring or late summer grafting to minimize this issue.
Conclusion: A Rewarding Journey into Plant Propagation
Chip budding is a rewarding skill that combines botanical science with the art of gardening. With practice, chip budding can yield remarkable results, transforming your garden into a diverse and abundant space. Whether you’re interested in growing multiple apple varieties on a single tree or experimenting with unique flower colors on your rose bush, chip budding provides a way to expand your garden’s possibilities.
So why not give chip budding a try? With a bit of patience and practice, you’ll be able to create beautiful, multi-variety trees that offer variety, resilience, and a bountiful harvest for years to come.
“Transform your garden into a living work of art. Start chip budding and enjoy the beauty and bounty of multi-variety plants!”