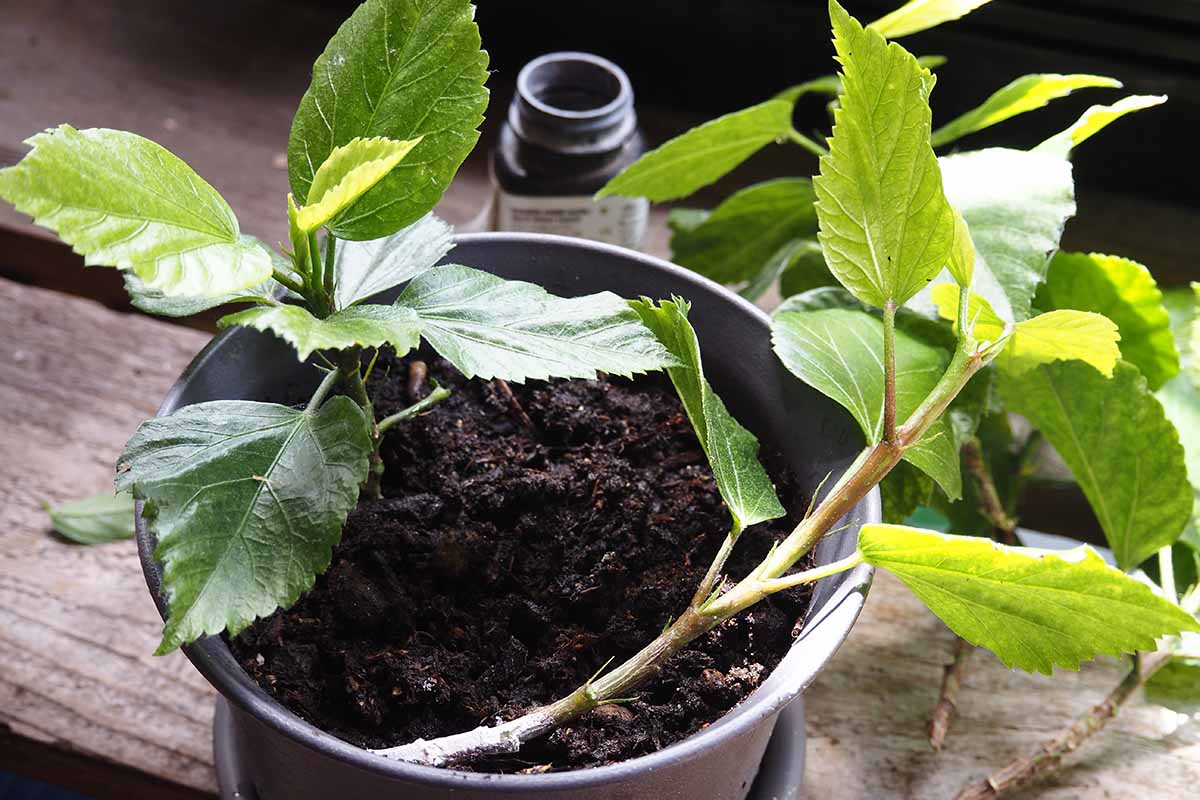
If you’ve ever admired the bright, tropical blooms of a hibiscus and wished you had more of them in your garden, the good news is—you can! Learning how to propagate hibiscus plants is easier than most people think. Whether you want to expand your garden, gift plants to friends, or save money, propagating hibiscus is one of the most rewarding gardening projects you can try.This ultimate guide will walk you step-by-step through every method, including cuttings, layering, and seeds, plus expert tips to ensure fast rooting and healthy growth.🌿 Why Propagate Hibiscus?Propagating hibiscus comes with several benefits:Free new plantsGenetically identical clones of your favourite hibiscus varietyReliable rooting with the right techniquesIdeal for both tropical hibiscus and hardy hibiscusWhether you’re growing hibiscus outdoors or in containers, this is the easiest way to multiply your collection.🌱 Best Time to Propagate HibiscusPropagate hibiscus during:SpringEarly summerLate summer (warm climates)These seasons provide warm temperatures and natural moisture, which encourage strong rooting.🌸 1. Propagating Hibiscus from Cuttings (Most Popular Method)This is the fastest and most successful method for beginners.🌼 Step-by-Step GuideStep 1: Choose Healthy StemsSelect semi-hardwood stems (neither too soft nor too woody).Length: 4–6 inchesMust include 2–4 leaf nodesStep 2: Make a Clean CutUse clean, sharp scissors or pruning shears.Cut just below a leaf node, where rooting hormones are strongest.Step 3: Remove Lower LeavesKeep only the top 1–2 leaves.Removing excess leaves prevents moisture loss.Step 4: Optional—Dip in Rooting HormoneThis boosts success and speeds up rooting, especially for tropical hibiscus.Step 5: Plant the CuttingUse a light, airy mix:50% perlite50% peat moss or coco peatInsert the cutting 1–2 inches deep.Step 6: Create a Mini GreenhouseCover the cutting with:A clear plastic bagA plastic bottle domeA propagation tray with a lidThis keeps humidity high.Step 7: Place in Bright, Indirect LightAvoid harsh sun at this stage.Rooting Time:3–6 weeks depending on temperature and humidity.🌱 2. Propagating Hibiscus in Water (Super Easy Beginner Method)A great way to observe roots growing!How to Do ItPrepare a glass of clean, room-temperature water.Place your prepared cutting into the water (remove lower leaves).Keep in bright, indirect light.Change water every 3–4 days.Rooting Time:2–4 weeks for hardy hibiscus,3–6 weeks for tropical hibiscus.Once roots reach 2–3 inches, transplant into soil.🌿 3. Propagation by Air Layering (For Large, Woody Hibiscus Plants)Use this method when you want a well-established, larger baby plant.How It WorksChoose a healthy stem.Make a shallow cut halfway through the stem.Dust with rooting hormone.Pack moist sphagnum moss around the cut.Wrap with plastic wrap and secure with tape.Keep moist for 4–8 weeks.When roots form inside the moss ball, cut below the root zone and pot the new plant.🌱 4. Propagating Hibiscus from SeedsThis method is fun but seed-grown hibiscus may not match the parent plant.How to Do ItCollect seeds from mature, dried seed pods.Soak seeds in warm water overnight.Plant in seed-starting mix ¼ inch deep.Keep warm (70–85°F / 21–29°C).Maintain even moisture.Germination:1–4 weeks, depending on variety.🌞 Ideal Soil Mix for New Hibiscus PlantsHibiscus thrive in well-draining, fertile soil.Best mix:50% potting soil25% perlite25% coco peat or compostYou can also add a handful of worm castings for natural nutrients.💧 Watering Tips for Freshly Propagated HibiscusKeep soil lightly moist, never soggy.Water when the top 1 inch feels dry.Avoid overhead watering to prevent disease.🌡️ Temperature & Light RequirementsHibiscus prefers:Warm temperatures: 65–85°F (18–29°C)Bright indirect light for young cuttingsFull sun once matureAvoid cold drafts and strong afternoon heat.🌿 Fertilizing Newly Rooted HibiscusFor the first 4–6 weeks:❌ No fertilizer — roots are delicate.After that, use:A balanced liquid fertilizer (10-10-10)OR a bloom booster when you want flowersFeed lightly every 2–3 weeks.🪴 When to Transplant Your New HibiscusMove your propagated plant into a larger pot when:Roots reach the drainage holesIt shows new leaf growthIt feels firm and anchored in the soilChoose a pot 2 inches larger than the current one.🌺 Common Problems and Solutions1. Leaves Turning YellowOverwatering—let soil dry slightly between watering.2. Cutting WiltingHumidity too low—use a plastic dome.3. Mold on SoilReduce moisture and increase airflow.4. No Root Growth After 6 WeeksTemperature too coldCutting too woodyTry fresh semi-hardwood cuttings🌼 Expert Tips for Fast, Successful Hibiscus Propagation🌿 Use semi-hardwood cuttings from mid-season growth🌿 Keep humidity high (70–85%)🌿 Provide bottom heat with a seedling mat🌿 Always use sterile tools🌿 Don’t overwater🌿 Mist lightly instead of soaking the soil🌿 Choose strong parent plants for best results🌺 Conclusion: Your Ultimate Guide to How to Propagate Hibiscus Plant!Propagating hibiscus is an enjoyable, creative process that lets you grow new plants without spending money. Whether you choose cuttings, water propagation, air layering, or seeds, each method is simple and rewarding.With patience, warmth, and the right care, your new hibiscus plants will thrive and reward you with vibrant, tropical blooms year after year.