
Vanilla orchids are cherished not just for their aromatic flavoring but also for their stunning beauty. The vanilla orchid, scientifically known as Vanilla planifolia, is a tropical vine that can produce delightful, fragrant flowers. However, getting these orchids to bloom can often feel like a daunting task for many plant enthusiasts. In this article, we will explore the essential steps to successfully make a vanilla orchid bloom, sharing tips, tricks, and insights that will help you achieve this rewarding goal.
Understanding Vanilla Orchids
A Brief Overview
Vanilla orchids are native to tropical regions of Mexico and Central America, where they thrive in warm, humid climates. These climbing vines can grow quite tall, reaching up to 30 feet in the wild, but can be successfully cultivated indoors or in greenhouses. The plant produces long, slender stems that can develop clusters of beautiful, fragrant flowers, which are the source of the vanilla pods we know and love.
The Importance of Blooming
The flowers of the vanilla orchid are not just visually appealing; they are essential for the production of vanilla beans. Each flower is hermaphroditic, containing both male and female reproductive organs, but they are typically self-sterile. This means that pollination, which can occur naturally by specific species of bees or manually by growers, is necessary for fruit development. Without successful blooming and subsequent pollination, the plant will not produce the sought-after vanilla pods.
Step-by-Step Guide to Encourage Blooming
Step 1: Create the Ideal Environment
The first step to nurturing your vanilla orchid is to create an environment that mimics its natural habitat. Here are the key factors to consider:
Temperature
Vanilla orchids thrive in warm temperatures. Aim to keep your orchid in a range of 75°F to 85°F (24°C to 29°C) during the day. At night, temperatures can drop slightly, ideally to around 65°F to 70°F (18°C to 21°C). Avoid exposing the plant to temperatures below 50°F (10°C), as this can stunt growth and affect blooming.
Humidity
High humidity levels are crucial for vanilla orchids. Ideally, aim for humidity levels between 50% to 70%. To increase humidity, consider using a humidifier, misting the plant regularly, or placing it on a tray filled with water and pebbles. This will help create a microclimate that encourages growth and blooming.
Step 2: Provide Proper Light
Light is another critical factor in encouraging vanilla orchids to bloom. While they do enjoy bright conditions, direct sunlight can scorch their delicate leaves. Here’s how to strike the right balance:
Bright, Indirect Light
Place your vanilla orchid in a location that receives bright, indirect light for about 6 hours a day. South or east-facing windows are often ideal. If you notice the leaves turning yellow, it may be a sign of too much direct light; conversely, dark green leaves can indicate insufficient light.
Supplementing Light
If natural light is limited, consider using grow lights to provide the necessary illumination. Full-spectrum LED grow lights can mimic natural sunlight and can be set on a timer to ensure your plant receives consistent light exposure.
Step 3: Watering Techniques
Watering is a critical aspect of orchid care that can significantly impact blooming. Follow these guidelines to ensure your vanilla orchid stays hydrated without becoming waterlogged:
Watering Schedule
Water your orchid when the top inch of the soil feels dry to the touch. Generally, this may translate to watering every 1 to 2 weeks, but factors like temperature, humidity, and potting medium can affect this timing.
Avoiding Overwatering
Be cautious of overwatering, as this can lead to root rot. Ensure that your pot has proper drainage holes and that excess water can escape. If your orchid is in a decorative pot without drainage, consider repotting it into a container that allows for proper drainage.
Step 4: Fertilization
A well-fertilized vanilla orchid is more likely to thrive and bloom. Use a balanced, water-soluble fertilizer that promotes healthy growth. Here’s how to fertilize effectively:
Fertilizer Type
Opt for a fertilizer that is high in phosphorus, as this nutrient is essential for blooming. A general-purpose fertilizer with an N-P-K ratio of 30-10-10 or similar can work well. Alternatively, you can use a specialized orchid fertilizer.
Application Frequency
Feed your orchid every 2 to 4 weeks during the growing season, which typically runs from spring to early fall. Dilute the fertilizer to half-strength to avoid over-fertilizing, which can harm the plant.
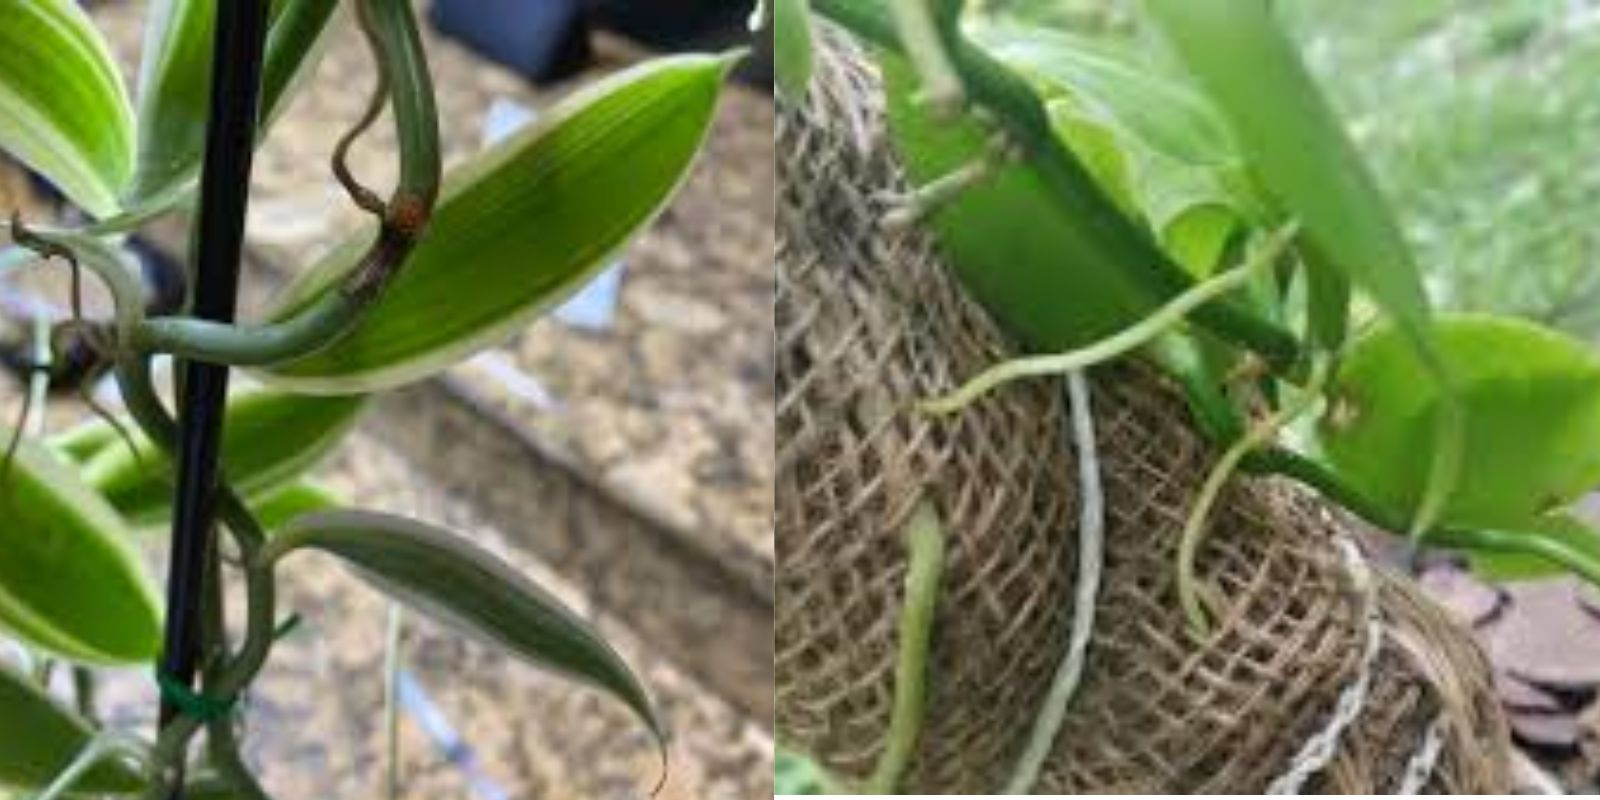
Step 5: Support Growth with Structure
Vanilla orchids are climbing plants that require support to thrive. Proper support not only helps the plant grow upward but also encourages light exposure and air circulation. Here’s how to provide support:
Use a Trellis or Stake
Consider using a trellis, stake, or a moss pole to give your orchid something to climb on. Ensure that the support is sturdy enough to hold the weight of the plant as it grows.
Encourage Growth Direction
Train the vine to grow upwards by gently tying it to the support structure. This will help expose more leaves to light, promoting healthier growth and potential blooming.
Step 6: Practice Patience
Patience is vital when it comes to blooming vanilla orchids. The process can take time, and it’s important to allow your plant to acclimate to its environment and care regimen. Here are some tips to keep in mind:
Observe the Growth Cycle
Vanilla orchids typically take 3 to 4 years to mature before they will begin to bloom. Keep track of your plant’s growth cycle, and be prepared for some variability in blooming times based on environmental factors.
Celebrate Progress
Monitor the overall health of your plant and celebrate the small milestones along the way. A healthy, well-cared-for orchid is more likely to reward you with stunning blooms in due time.
Troubleshooting Common Issues
Despite your best efforts, you may encounter challenges along the way. Here are some common issues and how to address them:
Yellowing Leaves
If your orchid’s leaves are turning yellow, it may be a sign of overwatering or too much direct light. Adjust your watering schedule and ensure it’s in a location with bright, indirect light.
Dropping Flowers
If your orchid blooms but the flowers drop prematurely, this could be due to fluctuating temperatures or humidity levels. Ensure that your plant is in a stable environment with minimal drafts.
Lack of Blooms
If your vanilla orchid is healthy but not blooming, it may require more light or the right type of fertilizer. Evaluate its growing conditions and make adjustments as needed.
Conclusion
Growing a vanilla orchid and encouraging it to bloom can be a fulfilling experience for any gardener. By providing the right environment, light, water, and nutrients, you can unlock the secrets to making your vanilla orchid flourish. With patience and care, you’ll soon be rewarded with beautiful blooms that fill your space with their enchanting fragrance.
Get started on your journey to growing a thriving vanilla orchid today, and don’t forget to share your progress with fellow gardening enthusiasts! 🌱💚
Call to Action
Transform your home with the beauty of blooming vanilla orchids and share your journey with the gardening community. Your success could inspire others to take up the challenge of growing these amazing plants! #VanillaOrchid #OrchidCare #BloomingBeauty #GardeningGoals #PlantLovers