
Hydrangeas are among the most beloved flowering plants, known for their lush blooms and vibrant colors that bring charm to any garden. If you dream of a garden bursting with hydrangeas but don’t want to spend a fortune buying multiple plants, you’re in luck! You can easily propagate hydrangeas from a single plant using simple, effective methods.
In this article, we’ll walk you through the step-by-step process of propagating hydrangeas successfully, ensuring that your garden is filled with these gorgeous flowers season after season.
Why Propagate Hydrangeas?
Before we dive into the process, let’s explore why propagating hydrangeas is a great gardening strategy:
✔ Cost-Effective: Instead of purchasing new plants, you can multiply the ones you already have for free!
✔ Sustainable Gardening: Propagating plants naturally reduces waste and promotes eco-friendly gardening practices.
✔ Better Garden Design: Fill your space with matching hydrangea varieties to create a cohesive, stunning look.
✔ Perfect for Gifting: A home-grown hydrangea plant makes a thoughtful and unique gift for fellow garden lovers.
Best Time to Propagate Hydrangeas
The ideal time to propagate hydrangeas is during the late spring or early summer when new growth is soft and flexible. This stage, known as the softwood phase, allows cuttings to develop roots more quickly.
However, you can also take semi-hardwood cuttings in late summer or early fall for propagation, though the rooting process may take longer.
Step-by-Step Guide to Propagating Hydrangeas
Follow these eight simple steps to successfully propagate hydrangeas from cuttings:
Step 1: Choose a Healthy Stem
Look for a non-flowering stem that is about 4-6 inches long with at least 3-4 sets of leaves. Non-flowering stems focus energy on root development rather than blooming, increasing the success rate of propagation.
Step 2: Cut Below a Node
Using clean and sharp pruning shears, cut the stem just below a leaf node (the small bump where leaves emerge). This is where new roots will form.
Step 3: Remove Lower Leaves
Gently remove the bottom two sets of leaves, leaving only the top ones. This helps reduce moisture loss and encourages the cutting to focus on root development.
Step 4: Dip in Rooting Hormone
Although optional, dipping the cut end into rooting hormone significantly increases success rates. Rooting hormone encourages faster and stronger root growth.
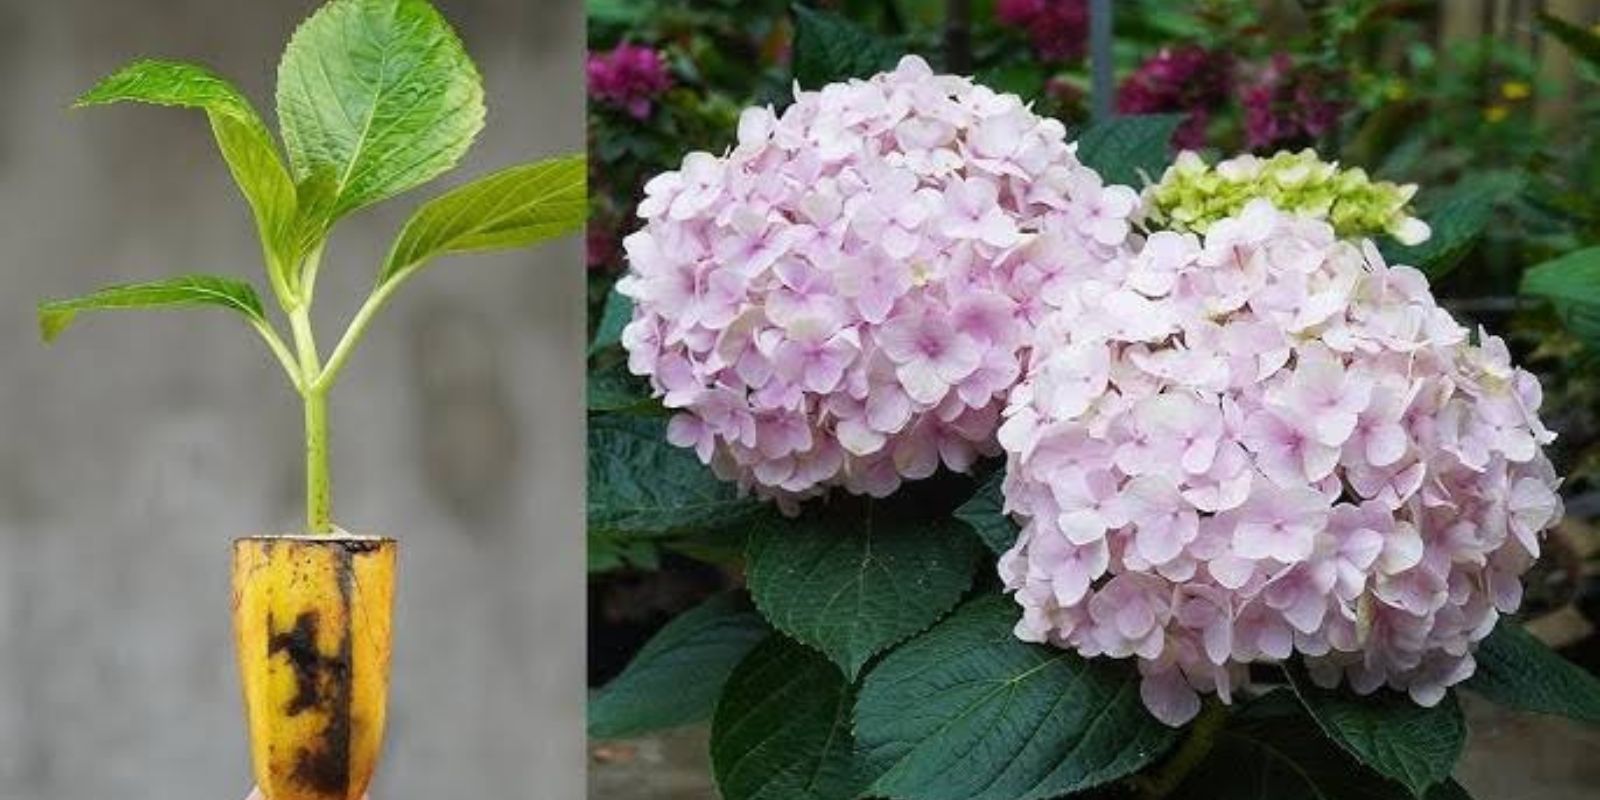
Step 5: Plant in Moist Soil
Prepare a well-draining potting mix using a blend of peat moss, perlite, and sand. Insert the cutting about 2 inches deep into the soil and press gently to secure it.
Step 6: Cover for Humidity
To create a mini greenhouse effect, cover the pot with a clear plastic bag or container. This retains humidity and prevents the cutting from drying out. Ensure the plastic doesn’t touch the leaves to allow airflow.
Step 7: Place in Indirect Light
Position the cuttings in a bright, indirect light location. Avoid direct sunlight, as it can cause wilting and dehydration.
Step 8: Wait for Root Development
Roots typically develop within 4-6 weeks. Check for resistance by gently tugging on the cutting—if there’s resistance, roots have formed! Once the roots are strong enough, transplant the cutting into a larger pot or directly into the garden.
Caring for Newly Propagated Hydrangeas
To ensure your propagated hydrangeas thrive, follow these care tips:
✔ Keep Soil Moist – Water regularly but avoid waterlogging. Hydrangeas love moist but well-drained soil.
✔ Provide Partial Shade – Hydrangeas thrive in morning sun and afternoon shade.
✔ Fertilize Wisely – Use a balanced fertilizer every 4-6 weeks to promote strong growth.
✔ Mulch for Moisture – Adding a layer of mulch around the plant helps retain soil moisture.
✔ Prune as Needed – Trim dead or weak stems to encourage new growth.
Alternative Hydrangea Propagation Methods
In addition to stem cuttings, you can try these propagation methods:
1. Propagating by Layering
- Choose a low-growing branch and bend it toward the soil.
- Make a small cut in the underside of the stem and bury it in soil while keeping the tip exposed.
- Secure it with a rock or garden pin and keep the soil moist.
- In a few months, the buried section will develop roots and can be cut from the parent plant and transplanted.
2. Propagating from Root Division
- Dig up a mature hydrangea and carefully divide its root ball into sections.
- Replant each division in a separate location and water well.
- This method works best for hydrangea varieties that grow in clumps, like Hydrangea paniculata.
Common Mistakes to Avoid
🚫 Using Flowering Stems: Stems with flowers take longer to root, making propagation less successful.
🚫 Skipping Rooting Hormone: While optional, rooting hormone increases success rates.
🚫 Overwatering Cuttings: Too much water can cause rotting—keep the soil moist but not soggy.
🚫 Placing Cuttings in Direct Sunlight: Harsh sun exposure can dry out or scorch young cuttings.
Enjoy a Garden Full of Hydrangeas!
By following these simple propagation techniques, you can grow a flourishing garden full of hydrangeas from just one plant! With a little patience and care, you’ll soon enjoy an endless supply of vibrant, stunning blooms.
💬 Have you ever propagated hydrangeas? Share your experience in the comments below! 🌿🌸