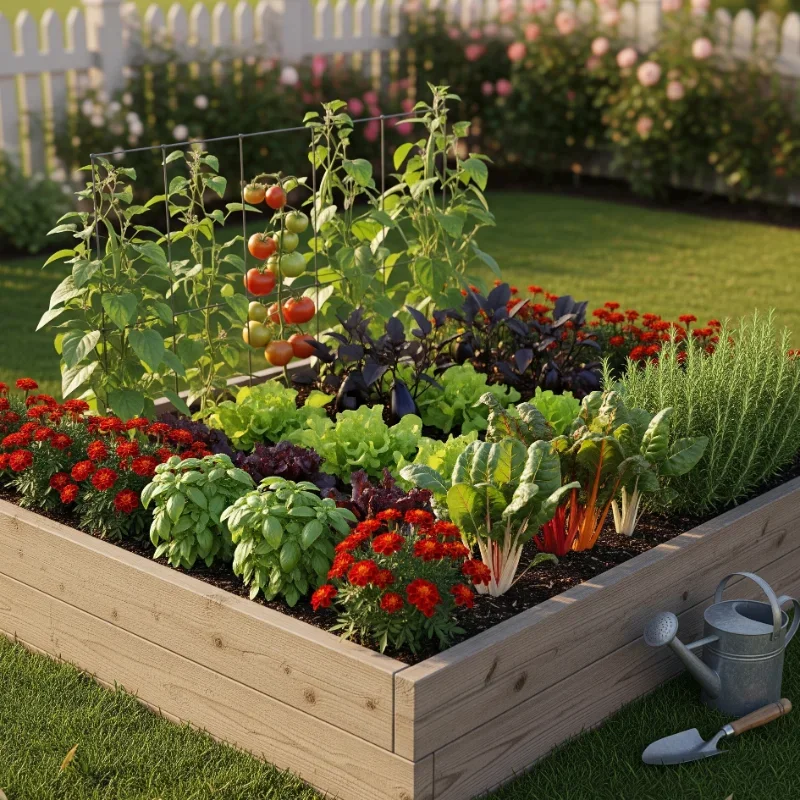
Before you grab a shovel, it helps to understand why people keep saying, “You have to Try this amazing Raised garden beds idea!”H2: Key Benefits of Raised Garden BedsH3: 1. Better Soil (Instantly)In-ground soil can be:RockyCompactedHeavy clayFull of weedsWith raised beds, you choose the soil. You can fill them with a rich mix of compost and topsoil, giving plants a healthy start from day one—no double digging or years of amending.H3: 2. Less Bending, Easier AccessBecause the soil is elevated, you don’t have to bend or kneel as much. That makes gardening more accessible for:People with back or knee issuesAnyone who just doesn’t enjoy crouching in the dirt for hoursIf you Try this amazing Raised garden beds idea! with taller sides, you can even garden while sitting on the edge.H3: 3. Fewer Weeds and PestsRaised beds help you:Start with clean, weed-free soilAdd a weed barrier or cardboard underneathClearly define where your crops are (and where weeds aren’t)They can also help discourage some pests—like keeping plants just a bit further from slugs or neighborhood pets.H3: 4. Better Drainage and Warmer SoilIn many areas of the U.S., U.K., and Canada, heavy spring rains can waterlog in-ground beds. Raised beds drain more easily, so roots don’t sit in puddles. They also tend to warm up faster in spring, helping you start growing sooner.Choosing the Best Raised Bed Style for Your SpaceThere’s no one “right” way to Try this amazing Raised garden beds idea! You can adapt it to almost any situation.H2: Materials You Can UseH3: WoodMost common and easy to work withCedar and larch are naturally rot-resistantUntreated pine is cheaper but won’t last as longAvoid wood treated with old-style toxic preservatives if you’re worried about food safety; modern pressure-treated wood in many regions is safer, but if you’re unsure, stick to natural, untreated options.H3: MetalGalvanized steel or corrugated metal beds look modernLong-lasting and sturdyCan warm up quickly in full sun (great in cooler climates, but monitor in very hot areas)H3: Brick, Stone, or Concrete BlocksVery durable and visually appealingGood if you want something permanentHeavier and more work to installH3: Fabric or “Grow Bags”Portable and flexibleGreat for renters or balconiesNot technically a “bed,” but the same raised garden idea: contained soil in a defined areaPlanning Your Raised Garden Bed LayoutTo really make the most of this raised garden beds idea, a little planning goes a long way.H2: Where to Place Your BedsThink about:SunlightMost veggies and many flowers need 6–8 hours of sun. Watch where the light hits during the day.Access to WaterYou’ll need to water regularly. Being close to an outdoor tap or rain barrel makes life much easier.Paths and MovementLeave enough space to walk, kneel, or push a wheelbarrow between beds—usually at least 18–24 inches (45–60 cm).H2: Ideal Bed SizeCommon raised bed dimensions:Width: 3–4 feet (90–120 cm)So you can reach the center from both sides without stepping on the soilLength: 4, 6, 8, or even 12 feet—whatever fits your spaceHeight: 8–12 inches (20–30 cm) is common; 18–24 inches (45–60 cm) is great if you want less bendingIf you’re not sure where to start, a 4×8 ft (1.2×2.4 m) bed about 12 inches high is a classic, versatile size.How to Build and Fill a Raised Garden BedOnce you’ve decided to Try this amazing Raised garden beds idea!, here’s a simple step-by-step approach.H2: Step 1 – Assemble the BedMark the area using string, chalk, or placing the frame where you want it.Level the ground as best you can—beds sit better and soil stays evenly distributed.Build your frame using your chosen material (wood boards screwed together, metal kit, bricks, etc.).Optional: Line the inside with landscape fabric or cardboard if you want extra weed suppression.H2: Step 2 – Prepare the Ground UnderneathIf the existing ground is lawn or weedy, cut the grass short.Lay down a layer of cardboard or several sheets of newspaper.Water it lightly so it starts to soften and break down.This helps smother the grass and reduce weeds coming up into your beautiful new bed.H2: Step 3 – Fill with Soil MixYou want a rich, well-draining mix. A popular formula is:1/3 topsoil1/3 compost (homemade or store-bought)1/3 soilless mix (like peat-free mix, coconut coir, or leaf mold)Or look for a bagged “raised bed” or “vegetable” mix at your local garden center.Fill to just below the top of the bed, remembering that soil will settle a bit over time. Now you’re ready to really Try this amazing Raised garden beds idea! and start planting.What to Grow in Raised Garden BedsOne of the coolest things about this raised garden beds idea is how flexible it is. You can grow:VegetablesHerbsFlowersSmall fruitsOr a mix of all of the aboveH2: Great Plants for Raised BedsH3: Easy VeggiesLeafy greens: lettuce, spinach, kaleRoot crops: carrots, radishes, beetsBush beansPeas (with a small trellis)Compact tomatoes and peppers (with stakes or cages)H3: HerbsBasil, parsley, cilantroThyme, oregano, chivesMint (best kept in its own container so it doesn’t spread too much)H3: FlowersMarigolds (also help deter some pests)Nasturtiums (edible, pretty, and attract beneficial insects)Zinnias and cosmos for bright colorYou can easily design a “salad bed,” a “pasta sauce bed” (tomatoes, basil, oregano), or a “pollinator bed” full of flowers.Practical Tips to Make Raised Beds Even EasierThis is where your decision to Try this amazing Raised garden beds idea! turns into long-term success.H2: Mulch to Save Time and WaterAfter planting, add a layer of mulch (straw, shredded leaves, wood chips around perennials).Mulch reduces weeds, keeps moisture in, and makes the bed look tidy.H2: Water WiselyRaised beds drain better, which is great—but it also means they can dry out faster, especially in hot summers.Check soil moisture by sticking your finger 1–2 inches into the soil.If it feels dry, it’s time to water.Water deeply but less often, so roots grow down rather than staying shallow.Consider a simple drip irrigation kit or soaker hoses if you have several beds or live in a dry region.H2: Rotate Crops and Refresh SoilEach season or year:Rotate what you grow in each area (for example, don’t plant tomatoes in the same spot year after year).Add a layer of compost on top in spring or fall to refresh nutrients.This keeps your raised bed soil productive and healthy.H2: Protect Your Beds from CrittersIf you have trouble with:Rabbits or deer: Use simple fencing or netting around the bed.Cats or small animals: Temporary mesh or chicken wire can discourage digging.Birds: Lightweight netting over seedlings works well.You don’t want to Try this amazing Raised garden beds idea! and then watch your crops become a buffet for wildlife.Adapting Raised Beds for Small Spaces and RentersRaised beds aren’t just for big gardens.On a balcony or patio, use raised troughs, large containers, or fabric grow bags in the same “raised bed” style.In a rental, choose beds that sit on the surface and don’t permanently alter the ground. You can take them with you when you move.If you only have a tiny yard, a single raised bed can still provide lots of herbs, salad greens, and flowers.Even one well-planned bed lets you Try this amazing Raised garden beds idea! without needing a huge space.ConclusionWhen you decide to Try this amazing Raised garden beds idea!, you’re doing more than just building a box of soil. You’re creating:A defined, beautiful growing spaceEasier access for planting, weeding, and harvestingHealthier soil and happier plantsA flexible system that works in different climates and sizes of garden, from city patios to big backyards in the U.S., U.K., and CanadaStart with one bed. Choose a sunny spot, fill it with good soil, plant a few favorite veggies or flowers, and see how it changes your gardening experience. From there, you can add more beds, experiment with layouts, and turn your outdoor space into a productive, gorgeous mini-farm or flower haven.