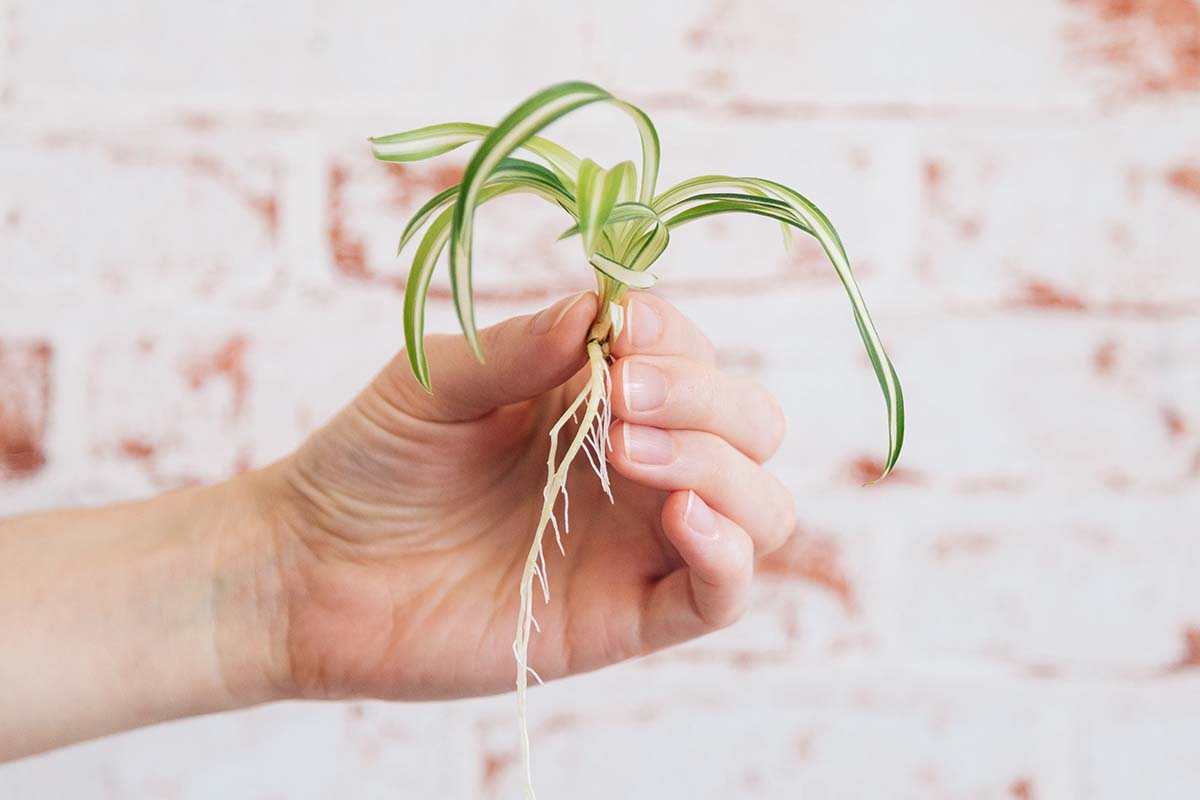
Spider plants (Chlorophytum comosum) are among the most resilient and charming houseplants you can grow. With their arching green leaves and tiny offshoots called “pups” or “plantlets,” they’re not just decorative—they’re incredibly easy to propagate. Once you learn the secret, you can multiply your spider plants effortlessly and share them with friends or fill your home with lush greenery.This guide walks you through multiple tried-and-true methods so you can propagate spider plants like a pro.🌿 Why Propagate Spider Plants?Cost-effective: Turn one plant into many for free.Giftable: Spider plant pups make perfect green gifts.Easy: Ideal for beginner gardeners or kids learning plant care.Resilient: Spider plants root quickly with minimal fuss.🌱 1. Propagating Spider Plants Using WaterThis is the fastest and most visual method—you’ll actually see roots grow.Step-by-Step:Identify a Healthy PlantletLook for a small offshoot (pup) with tiny leaves and visible nodes on its stem.Cut the PlantletUse clean scissors to snip the plantlet from the mother plant.Place in WaterFill a glass with water and submerge only the base of the plantlet, leaving the leaves above water.Position in Indirect LightPlace near a bright window but avoid direct sun.Wait for RootsRoots usually appear in 2–4 weeks. Change water every few days to keep it fresh.PottingOnce roots are about 1–2 inches long, plant the pup in a small pot with well-draining soil.🌿 2. Propagating Spider Plants Directly in SoilThis method skips water entirely and is great if you want to avoid transplant shock.Step-by-Step:Choose a Healthy PlantletSelect a pup with at least a few leaves and a small node.Plant in Moist SoilUse a small pot filled with a light, well-draining potting mix.Secure the PupPress the base gently into the soil. You can use a toothpick or small stick to keep it upright if needed.Water LightlyKeep soil evenly moist but not soggy.Wait for GrowthNew roots develop in 2–4 weeks, after which the pup can thrive as an independent plant.🌿 3. Propagating via DivisionSpider plants grow clumps naturally, and you can separate them without using pups.Step-by-Step:Remove Mother Plant from PotGently lift the plant out, loosening the soil around the roots.Divide the Root BallLook for natural clumps and separate them carefully, keeping roots intact.Repot Each DivisionPlace each section in a new pot with fresh, well-draining soil.Water and CareWater thoroughly and place in bright, indirect light. Divisions establish quickly.🌱 Tips for Successful PropagationUse clean scissors or pruners to avoid disease.Keep the environment humid—covering with a plastic bag can help.Avoid direct sunlight—indirect light promotes healthy root growth.Be patient—spider plants root quickly but need a few weeks to establish.Fertilize lightly after roots are strong and growth begins.🌿 Common Mistakes to AvoidOverwatering: Roots can rot if soil is soggy.Cutting too early: Tiny pups without nodes may fail to root.Direct sun exposure: Can scorch delicate new roots.Neglecting water changes (if propagating in water): Stale water slows root growth.🌸 Creative Ideas Once Your Spider Plant is RootedHang multiple small spider plant pots in macrame plant hangers.Place potted pups on shelves or windowsills for natural décor.Combine different sized pups in a mini indoor garden.Share rooted pups with friends and family—green gifts are always appreciated!🌟 ConclusionPropagating spider plants is fun, easy, and incredibly rewarding. By using water, soil, or division, you can try this amazing how to propagate spider plant idea to grow new plants effortlessly. In just a few weeks, you’ll have healthy, vibrant spider plants ready to beautify your home or share with loved ones.Once you master propagation, your spider plant collection can grow endlessly—green thumbs rejoice!