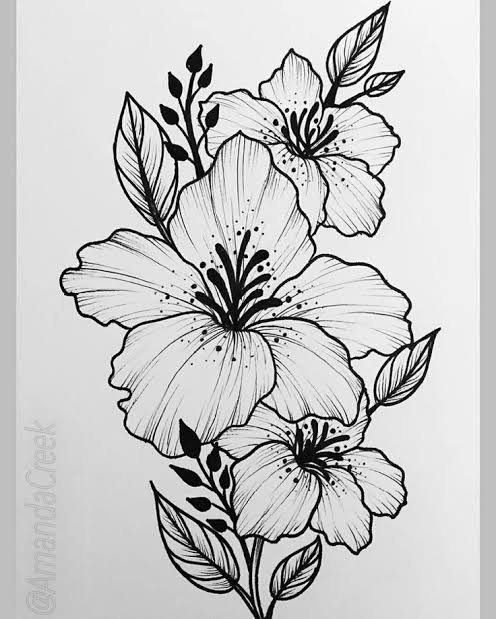
Flowers are one of the most inspiring subjects for artists, whether you’re a beginner picking up a pencil for the first time or an experienced illustrator looking to expand your portfolio. If you’ve ever wanted to create beautiful floral art, then you’ll love this amazing drawing ideas flowers idea!In this guide, we’ll explore creative techniques, easy step-by-step methods, and practical tips for drawing flowers that pop off the page. From realistic roses to whimsical wildflowers, these ideas are perfect for artists in the United States, United Kingdom, Canada, or anywhere in the world!H2: Why Draw Flowers?Drawing flowers isn’t just about creating pretty pictures. It’s a wonderful way to:🎨 Enhance creativity: Flowers come in endless shapes, colors, and patterns.✍️ Practice technique: Working with petals, stems, and shading improves precision and skill.🌿 Relax and de-stress: Focusing on floral designs is meditative and calming.📚 Build your portfolio: Flower illustrations are versatile and popular in art prints, cards, and digital designs.Whether you want realistic botanicals or stylized doodles, flowers are a timeless and rewarding subject.H2: Essential Tools for Flower DrawingBefore you start, gather the right materials to make the process smooth and enjoyable:Basic Tools:Pencils (HB for sketching, 2B–6B for shading)Erasers (kneaded and standard)Pencil sharpenerDrawing paper or sketchbookOptional Tools:Colored pencils or markersWatercolor paints for a soft, artistic touchFine-liner pens for outlinesBlending stumps or cotton swabs for shading💡 Tip: Start simple with pencil sketches, then gradually experiment with color and texture.H2: Simple Flower Drawing Ideas for BeginnersIf you’re just starting, these easy flower types are perfect for practice:1. DaisiesDraw a small circle for the center.Add long, oval petals radiating outward.Shade the center lightly and add petal lines for texture.2. TulipsDraw a curved “U” shape for the cup.Add overlapping petals with smooth, pointed tips.Include a slender stem and simple leaves.3. SunflowersStart with a large circle for the center.Add layers of pointed petals around the circle.Fill the center with dots or cross-hatching to create texture.4. RosesDraw a small spiral for the center.Add petals around the spiral, gradually increasing their size.Use soft shading for a 3D effect.💡 Tip: Don’t worry about perfection — flowers naturally vary in shape, so embrace irregularities.H2: Advanced Flower Drawing TechniquesOnce you’re comfortable, try these techniques to take your flower art to the next level:1. Shading and DepthUse light and dark pencil strokes to create dimension.Focus on how light hits petals, leaving highlights and shadows.2. Cross-HatchingCreate texture in petals and leaves using overlapping lines.Experiment with line density to vary shadow intensity.3. Colored Pencil LayeringStart with a base color and gradually layer darker tones.Blend with a light pencil or blending stump for smooth transitions.4. Watercolor TechniquesWet-on-wet: Apply water before color for soft gradients.Wet-on-dry: Apply watercolor directly on dry paper for sharper lines.Mix colors to create natural petal variations.H2: Creative Drawing Ideas Flowers IdeaHere are some fun ways to get creative and make your flower drawings unique:🌸 Combine Flowers and Patterns: Add geometric shapes or mandalas around your flowers.🌿 Floral Lettering: Use flowers to form letters or words in your sketchbook.🌺 Fantasy Flowers: Mix real and imaginary flower shapes for whimsical designs.🖌️ Mini Botanical Illustrations: Draw a series of small flowers in a grid to practice variety.🎨 Floral Scenes: Create bouquets, garden scenes, or wildflower fields.💡 Tip: Look at real flowers for inspiration — photos, gardens, or even grocery store bouquets!H2: Step-by-Step Example: Drawing a RoseLet’s walk through a simple rose drawing:Draw the center: Start with a tight spiral for the bud.Add inner petals: Wrap curved lines around the spiral, overlapping slightly.Draw outer petals: Make petals larger and wavier as they radiate outward.Sketch the stem: Draw a straight or slightly curved line for the stem.Add leaves: Draw simple oval-shaped leaves with jagged edges.Shade and detail: Add shading inside petals and on leaves for realism.Once you master this basic rose, try other flowers using the same step-by-step layering technique.H2: Practical Tips for Flower Drawing SuccessHere are some simple tricks to ensure your flower drawings turn out beautifully:✏️ Start light: Begin with soft pencil lines so you can erase easily.🌈 Observe real flowers: Study shapes, colors, and petal arrangements.🖌️ Layer gradually: Build color and texture slowly for more depth.📏 Experiment with angles: Draw flowers from different perspectives.🖼️ Practice regularly: Even 10 minutes a day improves skill significantly.H2: Using Your Flower DrawingsYour finished flower drawings can be used in many ways:Home décor: Frame your sketches or create a gallery wall.Greeting cards: Handmade floral cards are always appreciated.Digital art: Scan your drawings and add color digitally.Journals and scrapbooks: Decorate pages with floral designs.Gifts: Personalized drawings make thoughtful presents.💡 Tip: Mix different flower types in one composition for dynamic, eye-catching artwork.ConclusionFlowers are endlessly inspiring, and with this amazing drawing ideas flowers idea!, you now have the tools to create stunning floral art. From simple sketches to advanced techniques, there’s a world of possibilities at your fingertips.Remember: the key is practice, observation, and creativity. Whether you’re drawing daisies, roses, or imaginative floral designs, each stroke brings you closer to mastering your craft.So grab your pencils, open your sketchbook, and try this amazing drawing ideas flowers idea today! 🌸✏️