
Petunias are among the most beloved flowering plants in gardens across the world. Known for their bright, colorful blooms and long-lasting flowering period, petunias can instantly transform any outdoor or indoor space. If you already own a petunia plant and want to expand your collection, propagating petunias from cuttings is a fantastic and cost-effective way to do so. By following a few straightforward steps, you can multiply your petunias without buying new plants from the nursery.
This detailed guide will walk you through the process of propagating petunias from cuttings and provide you with expert tips to ensure success. Whether you’re a seasoned gardener or a beginner looking to grow new plants, propagating petunias will be a satisfying project that you’ll love.
Why Propagate Petunias from Cuttings?
Propagating petunias from cuttings offers several benefits:
- Cost-Effective: Instead of purchasing new petunias each year, you can multiply your current plants for free.
- Faster Results: Starting from cuttings allows you to grow plants that are identical to the parent plant, often reaching flowering stage faster than starting from seeds.
- Preserving Traits: Cuttings ensure that the new plants will have the same traits as the parent plant, such as color, size, and growth habits.
- Increased Variety: You can experiment with various petunia colors and types by propagating multiple plants from different parent varieties.
Materials Needed
Before you begin propagating your petunias, gather the following materials:
- Healthy Petunia Plant: Choose a strong, healthy petunia with no pests or diseases.
- Sharp Scissors or Pruning Shears: Clean, sharp tools will ensure that you make clean cuts that heal quickly.
- Rooting Hormone (Optional): While not necessary, rooting hormone can encourage faster rooting.
- Small Pots or Containers: Choose containers with good drainage for the cuttings.
- Well-Draining Potting Mix: A light, well-draining mix made from peat moss and perlite works well.
- Plastic Bag or Dome: This will help maintain humidity around the cuttings as they develop roots.
- Watering Can or Spray Bottle: Keep the cuttings moist without overwatering.
- Bright, Indirect Light: Ensure your cuttings are placed in a location with adequate but not direct sunlight.
Step-by-Step Guide to Propagating Petunias from Cuttings
Step 1: Select the Right Petunia Plant
To begin, choose a healthy, mature petunia plant. The plant should not show any signs of disease or pest infestations. Healthy petunias will produce vibrant blooms and sturdy stems that will yield the best results when propagated. Select a plant that is actively growing, as this will increase your chances of success.
Step 2: Take the Cutting
Once you’ve selected your plant, use sharp, sterilized scissors or pruning shears to cut a 4-6 inch long stem. The best cuttings are taken from the tips of the stems or from side shoots that are just starting to grow. Make the cut just below a leaf node, which is the part of the stem where leaves or branches grow. This area is key for root formation, and cutting just below it will help encourage rooting.
Step 3: Remove the Lower Leaves
After cutting the stem, remove the lower leaves from the bottom half of the cutting. This prevents the leaves from rotting when they come into contact with the soil. Leave a couple of leaves at the top of the cutting to help with photosynthesis, which will support the rooting process.
Step 4: Optional – Dip in Rooting Hormone
Although petunias can root on their own without the use of rooting hormone, dipping the cutting in rooting hormone can increase your chances of success and promote faster root development. Simply dip the cut end of the stem into the hormone powder, tapping off any excess. Be sure to use hormone designed for softwood cuttings like petunias.
Step 5: Prepare the Potting Mix
Choose a small pot or container that has drainage holes. Fill the pot with a well-draining potting mix. A good mix for petunias is a combination of peat moss and perlite or a commercial seed-starting mix. The potting mix should be light and airy, ensuring the cuttings don’t rot due to excessive moisture retention.
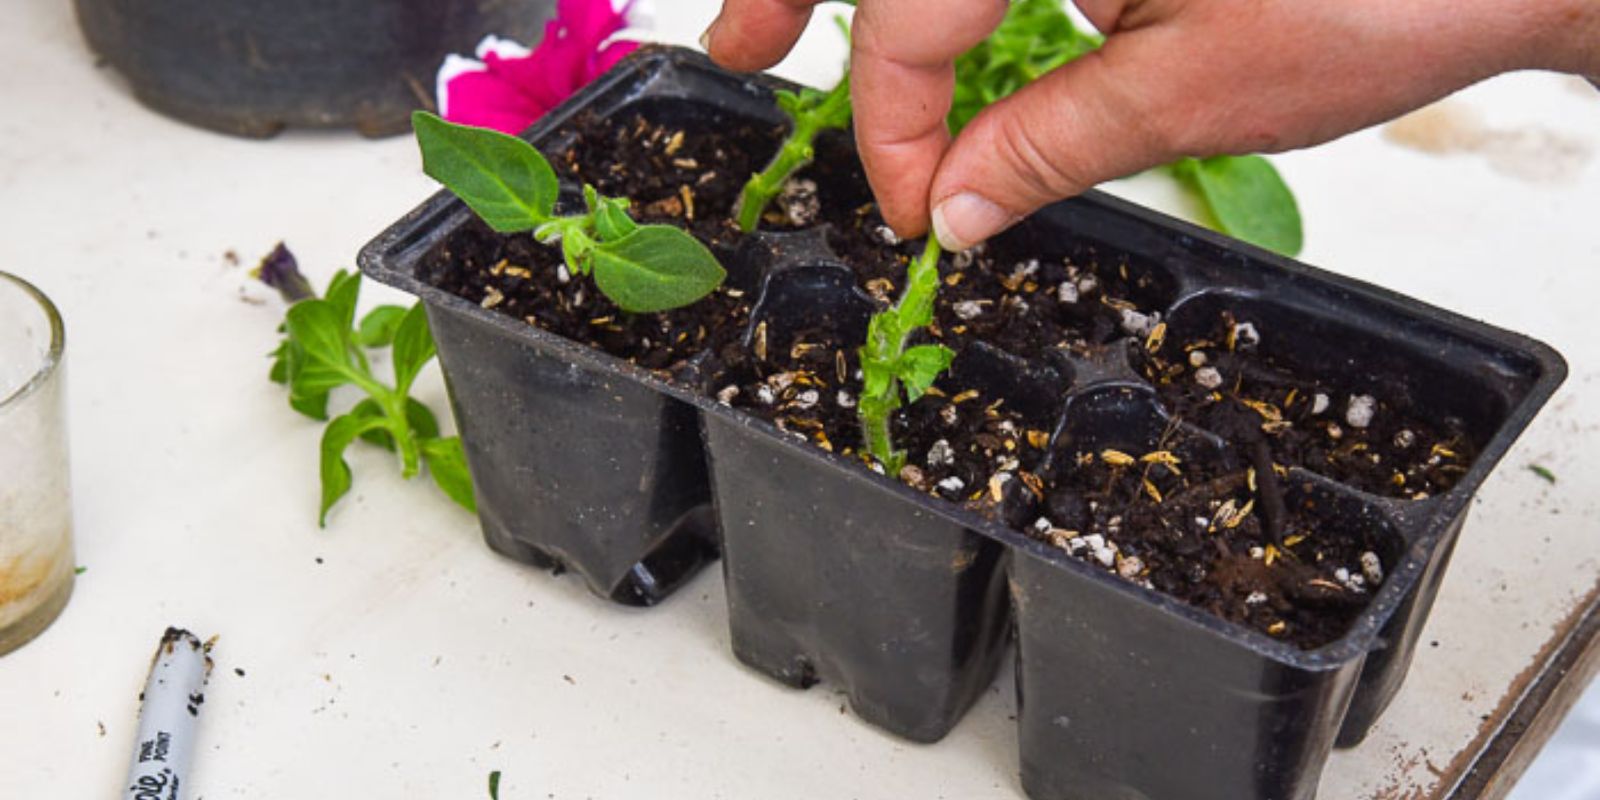
Step 6: Insert the Cutting into the Potting Mix
Make a small hole in the potting mix with a pencil or stick. Insert the cutting into the hole, ensuring that the bottom of the cutting is buried in the soil. Press the soil around the cutting gently to secure it in place. You want the cutting to stay upright and stable.
Step 7: Water the Cutting
Water the cutting lightly to settle the soil around the cutting. Be careful not to overwater, as this can cause the cutting to rot. The soil should be damp but not soggy. Use a watering can or a spray bottle for a gentle misting, ensuring that the leaves aren’t too wet.
Step 8: Create a Humid Environment
Petunias need humidity to encourage rooting, so it’s essential to create a humid microenvironment around your cutting. Cover the pot with a clear plastic bag or plastic dome. This will help keep moisture around the cutting while preventing it from drying out. You can also use a clear plastic bottle with the bottom cut off for a makeshift greenhouse.
Step 9: Provide Bright, Indirect Light
Place the cutting in a spot with bright, indirect light. Petunias need sunlight to grow, but direct sunlight can be too harsh for young cuttings. Keep the pot in a warm area with temperatures around 65-75°F (18-24°C) to promote root growth. Avoid placing the cutting in direct sun or drafty areas.
Step 10: Monitor and Maintain Moisture
Over the next 1-2 weeks, monitor the cutting for signs of new growth and roots. You can check for root development by gently tugging on the cutting. If it resists, it means roots have begun to form. Keep the soil slightly moist during this time, but be careful not to drown the cutting.
Step 11: Transplant the Rooted Cutting
Once the cutting has developed a healthy root system, it’s time to transplant it into a larger pot or directly into your garden. Gently remove the cutting from the pot, being cautious not to damage the roots. If you’re transplanting into the garden, choose a location with well-draining soil and plenty of sunlight. For containers, use a slightly larger pot and continue to care for the young plant as you would a mature petunia.
Tips for Success
- Choose the Right Time: The best time to propagate petunias is in the spring or early summer when the plant is actively growing.
- Be Patient: Rooting may take anywhere from 1 to 3 weeks, depending on environmental conditions.
- Avoid Overcrowding: If you are propagating multiple cuttings, ensure they aren’t crowded in the pot, as this can restrict airflow and cause rot.
- Acclimate to Outdoor Conditions: If you’ve propagated your petunias indoors, be sure to harden them off by gradually introducing them to outdoor conditions before planting them in your garden.
Conclusion
Propagating petunias from cuttings is an easy, rewarding, and cost-effective way to increase your plant collection. With just a few simple steps and the right care, you can grow identical petunia plants that will produce vibrant, colorful flowers. Whether you’re looking to save money, experiment with new colors, or expand your garden, propagating petunias will provide you with a fun and successful gardening project. So, gather your materials, follow the steps outlined above, and get ready to enjoy a blooming garden filled with beautiful petunias!