
Growing an oak tree from an acorn is a rewarding and fascinating process. While oak trees are generally known for their majestic size and long lifespan, starting one from an acorn is not as complicated as it may seem. In fact, the simplest way to start an acorn’s journey toward becoming a mighty tree is by growing it in water. This method is easy, requires minimal supplies, and can be done by anyone, from beginners to seasoned gardeners.
In this article, we’ll guide you through the easiest way to grow an acorn in water, providing you with the necessary steps, tips, and troubleshooting advice to ensure your success.
Why Grow an Acorn in Water?
Growing an acorn in water offers several advantages over directly planting it in soil. Water germination allows you to easily observe the growth process, helping you understand how the seed develops without the challenges of soil drainage or pests. The water method can also speed up the germination process, as it mimics the moist environment acorns need in nature to sprout. Additionally, this method is a fun project for kids, science enthusiasts, or anyone eager to grow a tree from scratch.
What You’ll Need to Grow an Acorn in Water
Before you get started, it’s important to gather a few basic supplies. Don’t worry — these items are easily accessible and affordable.
1. Fresh Acorns
- Choose acorns that are from a healthy oak tree. You can collect them in the fall when they naturally drop from the tree. Look for acorns that are free of cracks, holes, or mold. A healthy acorn will typically float in water, so avoid those that sink, as they may be damaged or infertile.
2. A Glass Container
- You’ll need a clear glass jar, vase, or cup that’s large enough to hold the acorn while allowing water to cover about half of it. A tall container works best, as it can hold the acorn upright while the root develops.
3. Toothpicks
- Toothpicks will help suspend the acorn in the water, ensuring that it is partially submerged while allowing the top half to remain exposed to air. Alternatively, you can use small dowels or sticks to achieve the same effect.
4. Water
- Use clean, room-temperature water for germinating the acorn. You’ll want to change the water regularly (every few days) to prevent the growth of algae and mold.
5. A Warm, Bright Location
- Find a spot that gets indirect sunlight, such as near a window. While direct sunlight can be too harsh for young seedlings, enough light is necessary to encourage growth.
Step-by-Step Instructions for Growing an Acorn in Water
Step 1: Prepare the Acorn
- Start by selecting a healthy, ripe acorn. As mentioned earlier, the best acorns are those that float in water, which means they’re likely healthy and capable of sprouting. If your acorn sinks, it may be a dud.
- If you want to increase your chances of success, you can perform a simple test to determine if the acorn is viable. Soak it in a bowl of water for 24 hours. If it floats, it’s likely to sprout. If it sinks, it may not be worth trying.
Step 2: Set Up Your Glass Container
- Take your glass container and fill it with enough water to submerge about half of the acorn. The goal is to ensure that the acorn is partially submerged while leaving the upper half exposed to air.
- If you’re using a glass jar, make sure it’s large enough to provide ample space for the acorn as it grows. You’ll also want to ensure that the acorn doesn’t touch the bottom of the container.
Step 3: Suspend the Acorn with Toothpicks
- Insert three or four toothpicks evenly around the middle of the acorn. These toothpicks will rest on the rim of the container, preventing the acorn from sinking too deep into the water.
- Make sure that the bottom half of the acorn is submerged in water, while the top half remains exposed to air. This setup mimics the natural conditions of acorn germination in the wild, where they are partially submerged in moist soil.
Step 4: Place the Acorn in a Warm, Bright Spot
- Place the container in a warm location with indirect sunlight. A windowsill with plenty of natural light but not too much direct sunlight is ideal. Avoid placing it in areas with extreme heat or cold, as this may hinder the acorn’s growth.
- Ensure that the temperature remains consistently between 65°F and 75°F (18°C and 24°C). Too much heat can cause the acorn to dry out, while too little warmth may slow down the germination process.
Step 5: Monitor Water Levels and Change the Water Regularly
- Every few days, check the water levels in the container. Add water to ensure that the acorn is always partially submerged, but never let it sit entirely underwater, as this can cause rot.
- Change the water every 2 to 3 days to keep it fresh and clear. Stale water can cause mold or algae to form, which can harm the acorn and prevent it from sprouting.
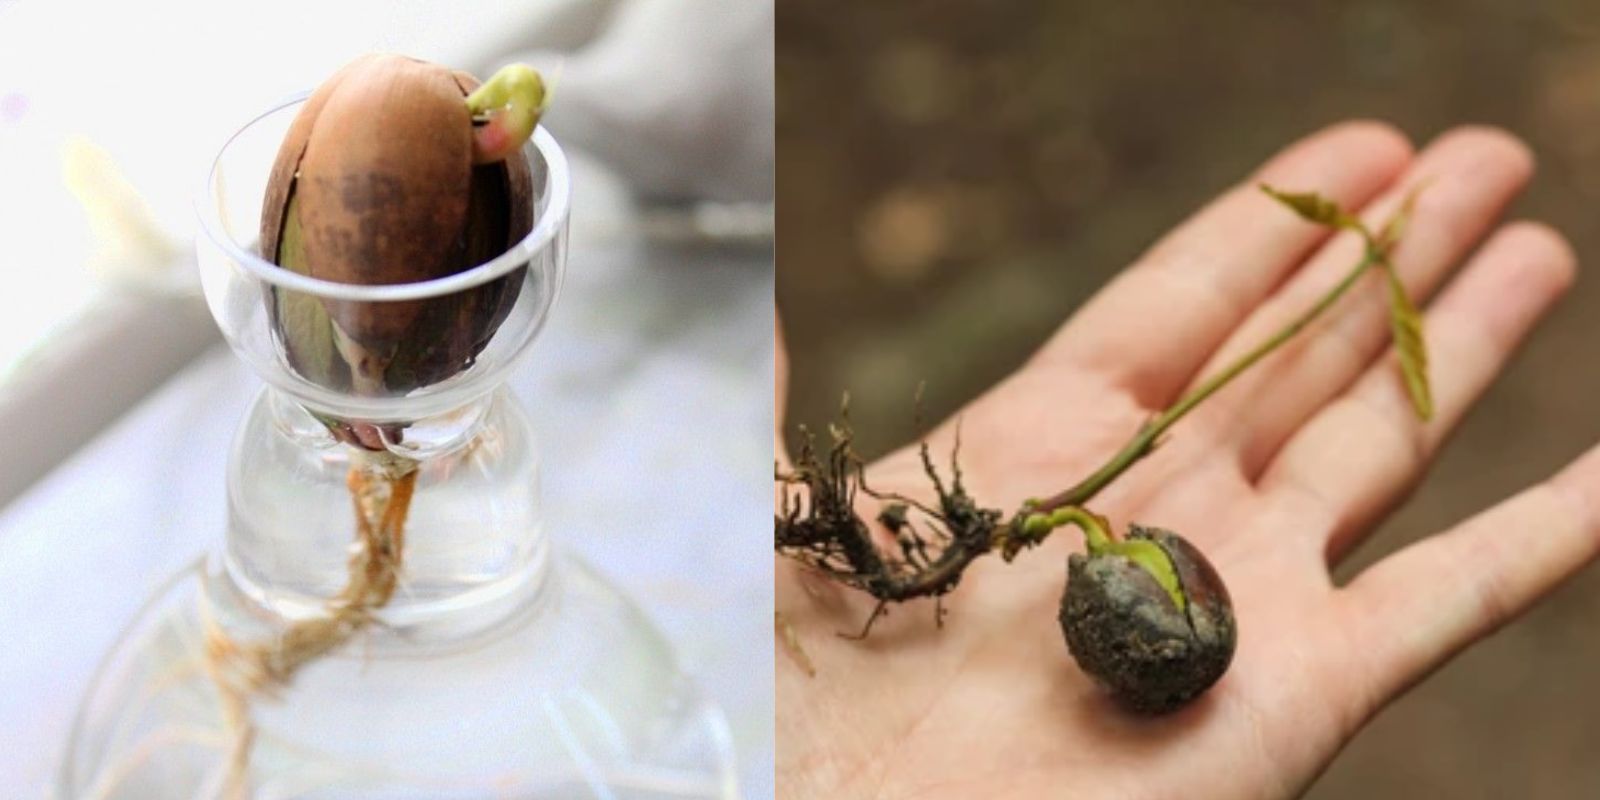
Step 6: Wait for the Acorn to Germinate
- Within 2 to 3 weeks, you should start seeing signs of germination. The acorn will crack open, and a small root (the radicle) will begin to emerge from the bottom. It’s important to let the root grow in the water before moving on to the next step.
- During this time, keep an eye on the acorn and its growth. You should see the root grow longer as the days pass. Eventually, you’ll notice the stem (the shoot) starting to form at the top of the acorn. This is when you’ll know the acorn is ready to be transplanted into soil.
Step 7: Transplant the Germinated Acorn to Soil
- Once the acorn has sprouted and a small root system has formed, it’s time to transplant it to a pot or outdoor garden.
- Prepare a pot with good-quality soil. A small container with a drainage hole is perfect for transplanting the acorn. The pot should be deep enough to accommodate the root system as it continues to grow.
- Gently remove the acorn from the water, being careful not to damage the roots. Place it in the pot, covering it with soil so that only the top of the acorn is exposed.
- Water the newly transplanted acorn regularly and place it in a sunny spot. Continue to care for it as it grows into a young oak tree.
Troubleshooting Tips
While growing an acorn in water is relatively simple, a few challenges may arise. Here are some common issues and how to address them:
- Acorn Won’t Germinate:
- If your acorn hasn’t sprouted after 3 weeks, it could be due to an unhealthy or non-viable acorn. Try testing the acorn’s viability before starting, or try a different one.
- Also, ensure the water is kept clean, and the container is placed in the right temperature range.
- Mold or Algae Growth:
- If mold or algae starts to form, it’s essential to change the water more frequently. Clean the container thoroughly and replace the water every 2 to 3 days to maintain a healthy growing environment.
- Acorn Rotting:
- Acorns can rot if left submerged in water for too long. Always ensure that the acorn is only partially submerged and that the water is refreshed regularly.
Conclusion
Growing an acorn in water is an easy and enjoyable way to start your own oak tree. The process requires minimal effort and can be a fun learning experience for anyone interested in plants or nature. By following these simple steps and tips, you can successfully grow an acorn into a young tree that, with proper care, will eventually grow into a majestic oak.