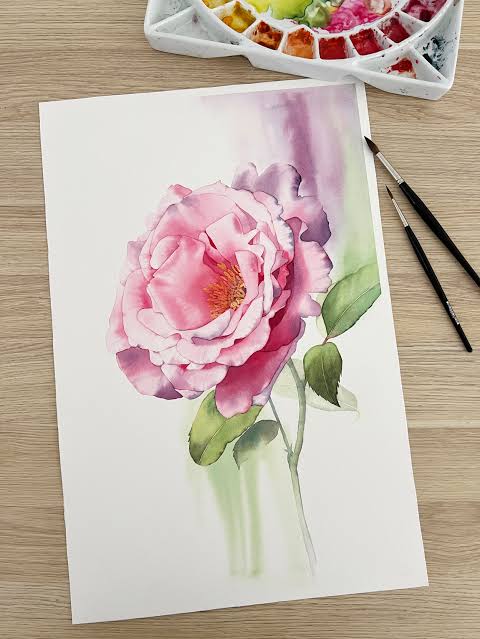
Painting flowers is one of the most enjoyable art subjects—full of color, shape, and flow. Even if you’re a beginner, the right techniques can help you paint stunning blooms quickly and confidently. This guide breaks down simple tricks that make your floral paintings look polished and artistic.🌸 1. Start With Simple Flower ShapesYou don’t need to draw perfectly detailed flowers.Begin with basic shapes:Circles for roses and peoniesTriangles or ovals for tulipsFive simple petals for daisiesLoose irregular shapes for wildflowersSimple sketches give your final painting a natural, effortless look.🎨 2. Use a Light Pencil Sketch or No Sketch At AllIf you’re using watercolor or acrylics, lightly sketch your flower shape.For a looser style, skip the sketch and paint naturally—this creates beautiful, fluid shapes.🌼 3. Block In Colors First (Don’t Start With Details)Great paintings start with big shapes, not tiny details.Block in:Main petal shapesColor gradientsHighlights and shadowsOnce you have the base down, add details on top. This prevents your painting from looking flat.🌺 4. Work From Light to Dark (Watercolor) or Dark to Light (Acrylic/Oil)Watercolor:Start with light washes → build midtones → add shadows.This keeps petals soft and luminous.Acrylic/Oil:Begin with darker base colors → layer lighter highlights → finish with white touches.This gives flowers depth and realism.🌸 5. Use the Right BrushesBrush choice makes painting flowers easier.Best brushes for flowers:Round brush – perfect for petalsFlat brush – crisp edgesLiner brush – delicate stems and detailsFilbert brush – natural curved petal shapesFor loose styles, use bigger brushes to avoid overworking details.🌼 6. Mix Natural, Not Perfect, ColorsFlowers rarely have a single solid color.Try:Adding a tiny bit of complementary colorMixing warm and cool tonesUsing gradients from base to tipEven a simple daisy looks richer with subtle color variation.🌺 7. Use Petal Direction to Add RealismPetals point in different directions—capture that movement.Think about:Where the flower facesHow petals overlapHow shadows fall between layersThis trick makes your flowers look dimensional instead of flat.🌸 8. Add Texture for DepthDepending on the medium:Acrylic/Oil:Use thicker paint for petal edgesPress your brush lightly to create groovesAdd layers for bold texturesWatercolor:Use wet-on-wet for soft petalsAdd dry-brush strokes for crisp edgesSplatter for artistic effects🌼 9. Don’t Overwork Your PaintingToo many strokes can make flowers look muddy or stiff.Stop painting when:Colors start blending too muchEdges lose definitionDetails become clutteredLess is often more with flowers.🌺 10. Add Final Details LastOnce the main flower is done, add the finishing touches:Thin stem linesSmall leaf veinsTiny highlightsDark centers or pollen dotsSoft shadow under the bloomThese simple details elevate the entire artwork.🌸 Extra Quick Tricks✔ Use reference photos for color accuracy✔ Practice individual petals before full flowers✔ Try painting quick 5-minute flowers for warm-ups✔ Experiment with loose, impressionistic styles✔ Mix white with a tiny bit of warm color for realistic highlights🎨 ConclusionWith these simple tricks to painting flowers tutorial successfully, you’ll quickly gain confidence and skill in floral art. Whether you prefer realistic roses or loose watercolor blooms, these techniques help you create beautiful paintings with ease and creativity. Remember—painting flowers is all about flow, color, and expression, not perfection.If you want, I can also create:🌺 a step-by-step tutorial (beginner, intermediate, or advanced)🎨 a complete painting lesson using acrylic, watercolor, or oil🖼️ printable practice sheets for petal shapes