
Orchids, known for their exquisite beauty and delicate nature, require specific care to thrive. However, even with careful attention, orchids can sometimes fall victim to root rot—a condition that can severely weaken the plant if left untreated. Understanding how to identify, treat, and promote recovery after root rot is crucial for orchid enthusiasts. This article explores comprehensive steps and techniques to help your orchid rebound from root rot, ensuring rapid root growth and renewed vigor.
Understanding Root Rot in Orchids
Root rot in orchids typically occurs due to overwatering or poor drainage, leading to fungal infections that attack the roots. Symptoms of root rot include mushy, discolored roots, wilting leaves, and a general decline in plant health. Prompt action is essential to prevent further damage and restore the orchid’s health.
Step-by-Step Guide to Reviving an Orchid After Root Rot
1. Assessing the Damage
The first step in treating an orchid affected by root rot is to assess the extent of the damage:
- Inspect the Roots: Gently remove the orchid from its pot and carefully examine the roots. Healthy roots should be firm and white or green. Diseased roots will appear mushy, brown, or black.
- Trimming Away Diseased Roots: Using sterile scissors or pruning shears, trim away any blackened or mushy roots. Cut until you reach healthy tissue, ensuring each cut is clean to prevent further infection.
2. Treating with Hydrogen Peroxide
Hydrogen peroxide (3%) can effectively treat fungal infections in orchid roots. Here’s how to proceed:
- Prepare a Treatment Solution: Mix one part hydrogen peroxide with four parts water in a container large enough to submerge the orchid roots.
- Soaking the Roots: Submerge the orchid roots in the hydrogen peroxide solution for about 10-15 minutes. This helps kill fungal spores and bacteria that may be causing the root rot.
- Allowing Drying Time: After soaking, allow the orchid roots to air dry for a few hours in a warm, well-ventilated area. This step is crucial to prevent moisture-related issues that can exacerbate root rot.
3. Repotting the Orchid
Proper repotting is essential to provide a healthy environment for your orchid’s recovery:
- Choosing a New Pot: Select a new pot that provides adequate drainage. Orchids prefer pots with drainage holes to prevent water from accumulating around the roots.
- Selecting the Potting Medium: Use a well-draining orchid mix such as bark chips or sphagnum moss. Avoid using regular potting soil, as it retains too much moisture.
- Carefully Repotting: Place the orchid in its new pot, ensuring the roots are spread out evenly. Add fresh orchid mix around the roots, gently pressing down to secure the plant. Avoid burying the orchid’s pseudobulbs or rhizome.
4. Providing Optimal Care Conditions
After repotting, provide the following care conditions to support your orchid’s recovery:
- Light: Place the orchid in a location with bright, indirect light. Avoid direct sunlight, as it can scorch the leaves.
- Humidity: Orchids thrive in humid environments. Maintain humidity levels of around 50-70% by misting the leaves or using a humidity tray.
- Watering: Water your orchid sparingly, allowing the potting medium to partially dry out between waterings. Never let the orchid sit in water, as this can lead to root rot recurrence.
- Temperature: Orchids prefer temperatures between 65-75°F (18-24°C) during the day and slightly cooler at night.
5. Monitoring Growth and Development
Regularly monitor your orchid for signs of new growth and root development:
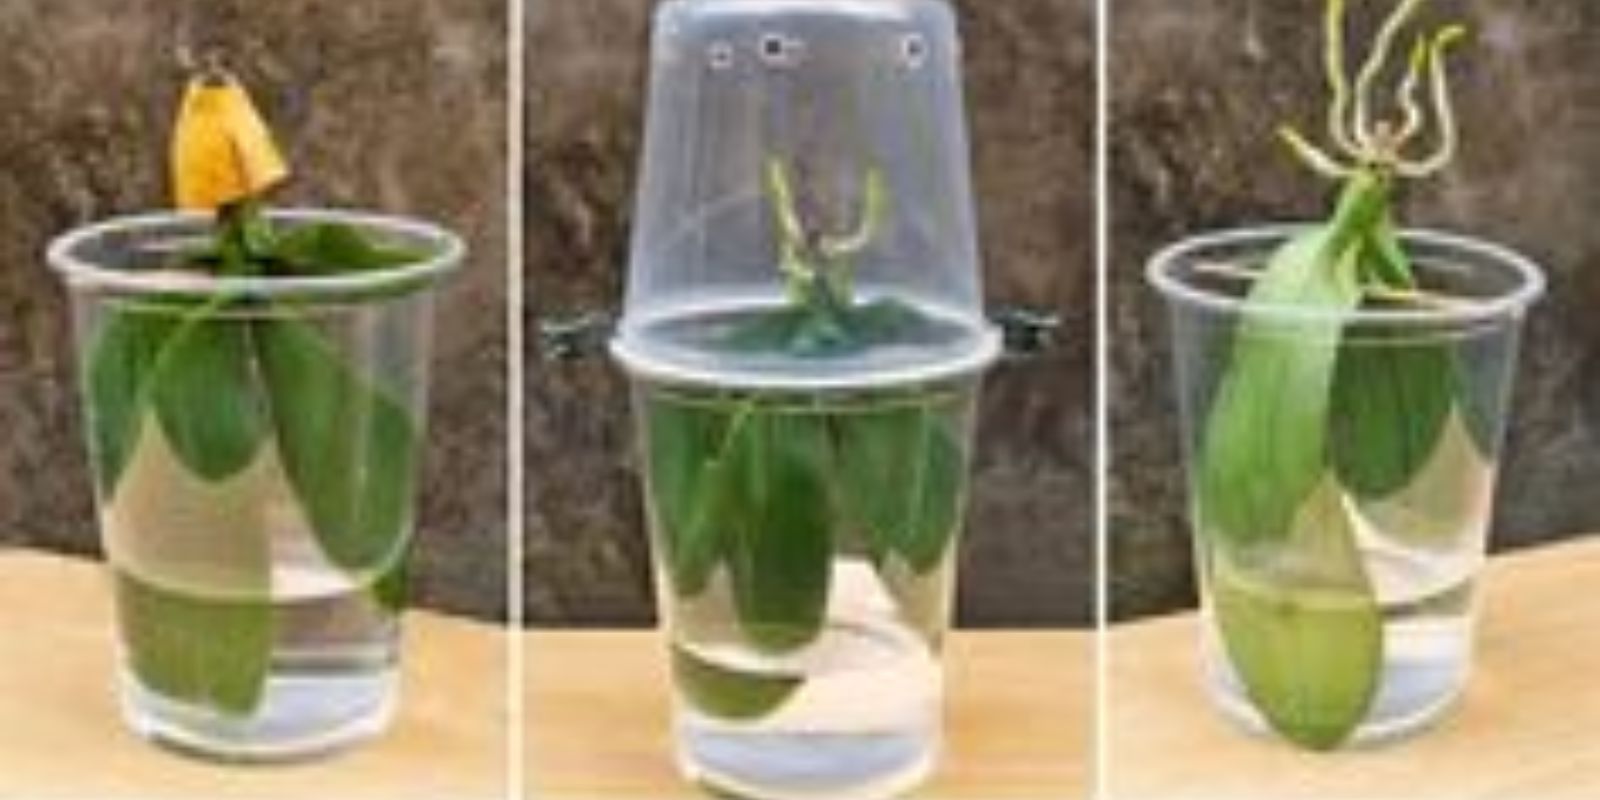
- New Root Growth: Healthy roots will start to grow within a few weeks to months, depending on the orchid species and environmental conditions.
- Fertilization: Once new root growth is established, begin fertilizing your orchid with a balanced orchid fertilizer diluted to half strength. Fertilize every 2-4 weeks during the growing season.
- Leaf Health: Healthy leaves indicate that the orchid is absorbing nutrients properly. Trim any yellow or withered leaves to promote new growth.
6. Encouraging Blooming
As your orchid regains strength, you can encourage blooming by providing optimal care and conditions:
- Cooler Night Temperatures: Many orchid species require a temperature drop at night to stimulate flower spike formation.
- Reduced Watering: Gradually reduce watering to induce a slight period of drought, which can trigger flowering in some orchids.
- Patience: Blooming may not occur immediately after recovery from root rot. Continue providing consistent care, and your orchid will reward you with beautiful blooms when it is ready.
Conclusion
Reviving an orchid after root rot requires patience, diligence, and careful observation. By following these steps—assessing the damage, treating with hydrogen peroxide, repotting, providing optimal care conditions, monitoring growth, and encouraging blooming—you can effectively guide your orchid toward a full recovery. Remember, each orchid species may have unique requirements, so tailor your care approach accordingly. With proper care and attention, your orchid will not only survive but thrive, rewarding you with stunning blooms and lush foliage. Embrace the challenge of orchid care, and enjoy the beauty and satisfaction of nurturing these remarkable plants back to health.