
Orchids are one of the most elegant and fascinating houseplants, but they can be delicate and challenging to care for, especially when they lose their roots. A rootless orchid may seem like it’s on the verge of dying, but don’t throw it away just yet! With the right technique, you can revive it and stimulate new root growth within a matter of days, just like professional nurseries do.
Why Do Orchids Lose Their Roots?
Before we dive into the revival process, it’s important to understand why orchids may lose their roots in the first place. Some common reasons include:
- Overwatering – Excess water causes root rot, leading to decay.
- Underwatering – Dehydrated roots become dry and brittle, making it impossible for the plant to absorb nutrients.
- Poor Drainage – If your orchid sits in waterlogged soil, the roots will suffocate and die.
- Fungal or Bacterial Infections – Pests and diseases can quickly damage the roots.
- Improper Repotting – Damaging roots during repotting or using the wrong soil mix can lead to their loss.
Regardless of the cause, you can still save your orchid using a tried-and-true method used by plant nurseries. Follow these steps carefully, and in a few weeks, your orchid will start showing signs of life again!
Step-by-Step Guide to Reviving a Rootless Orchid
Step 1: Trim Away Dead Tissue
The first step to saving your orchid is assessing its condition. Using sterilized scissors or pruning shears, carefully trim away any dead, rotten, or dried-up roots. If the leaves are also severely damaged or yellowing, trim them as well to help the plant conserve energy.
Step 2: Hydrate the Orchid
Since your orchid has no roots, it struggles to absorb water. To prevent dehydration, soak the base of the orchid (the part where the roots used to be) in lukewarm water for 1–2 hours. This will rehydrate the plant and prepare it for the next step.
Step 3: Choose the Best Root Revival Method
There are two highly effective techniques to encourage root growth: the Sphagnum Moss Method and the Water Culture Method.
Option 1: Sphagnum Moss Method
- Dampen some sphagnum moss with water (avoid soaking it completely).
- Wrap the base of the orchid in the moss, ensuring it stays slightly moist but not wet.
- Place the wrapped orchid in a clear plastic bag or a transparent container to maintain humidity.
- Open the bag for fresh air once a day to prevent mold growth.
- Check every few days to ensure the moss remains moist and watch for root development.
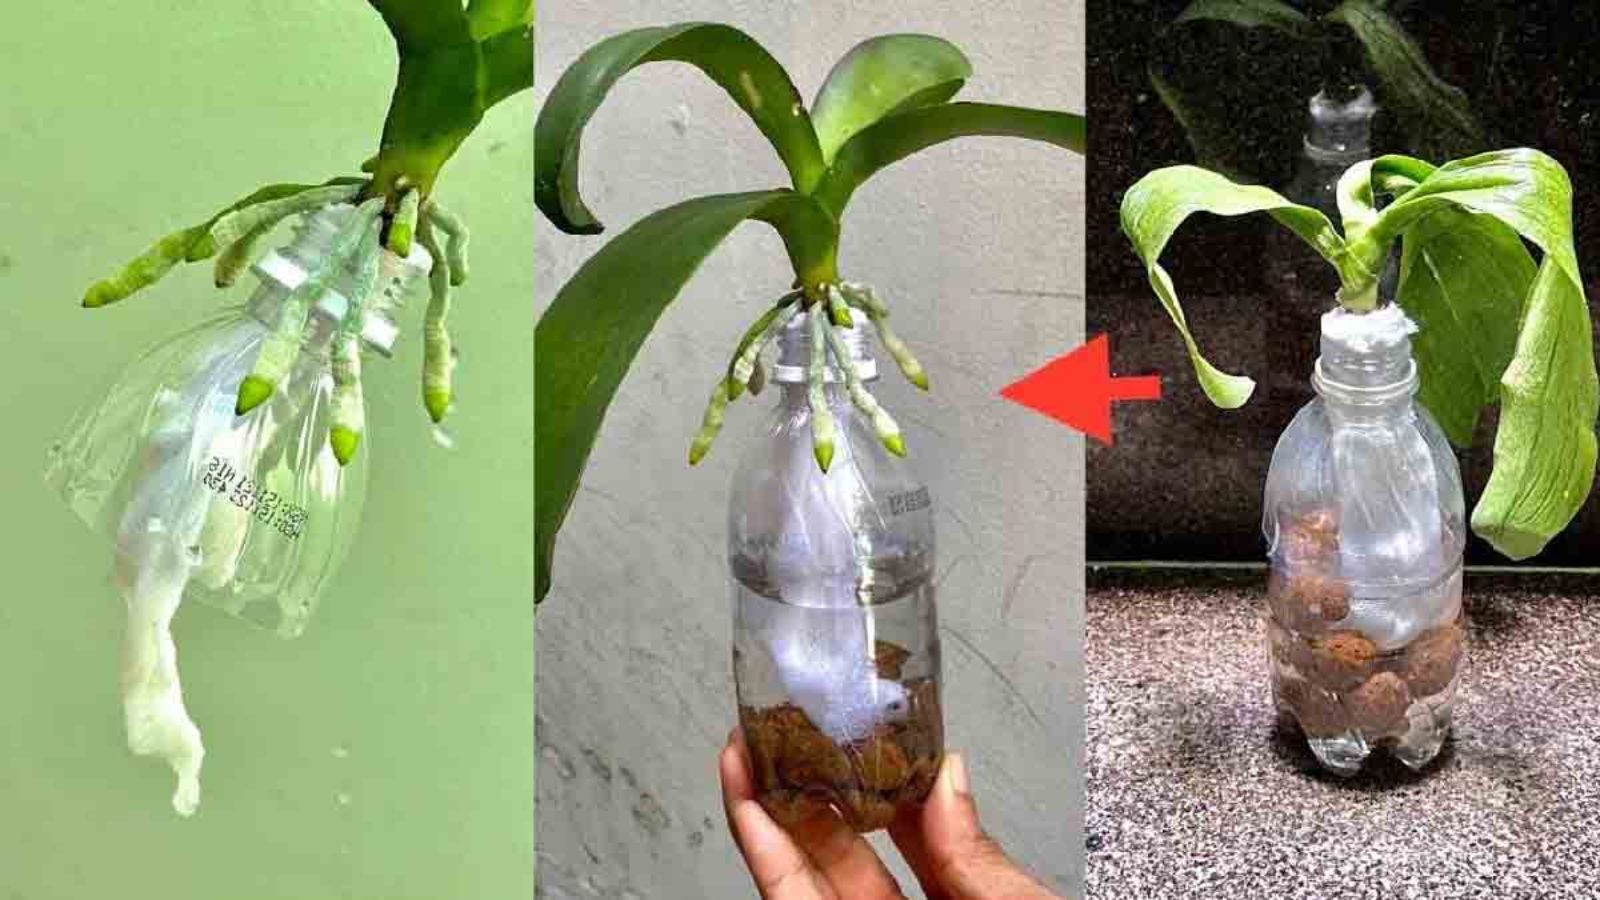
Option 2: Water Culture Method
- Place the orchid’s base just above the water’s surface in a glass jar or vase.
- Do not submerge the plant in water. Instead, let the humidity and evaporation encourage root formation.
- Every few days, dip the base into the water for 15–20 minutes to stimulate hydration.
- Keep the jar in a bright, warm spot but avoid direct sunlight.
- Once new roots develop (usually within 2–4 weeks), transfer the orchid to a well-draining potting mix.
Step 4: Use Rooting Hormones or Natural Stimulants
To speed up the process, you can apply a rooting hormone or a natural growth stimulant, such as:
- Cinnamon Powder – Acts as an antifungal agent while promoting root growth.
- Honey Water – A natural antibacterial that supports root development.
- Aloe Vera Gel – Enhances moisture retention and root regeneration.
Simply apply a small amount to the base of the orchid before placing it in moss or water culture.
Step 5: Maintain High Humidity and Proper Temperature
Orchids thrive in warm and humid conditions, which is why nurseries use greenhouses to help them recover. To mimic this environment:
- Keep the plant in a room with 60–80% humidity.
- Use a humidity tray or mist the air around the orchid (avoid misting directly on the leaves).
- Maintain a temperature of 70–85°F (21–29°C).
Step 6: Provide Indirect Light
Bright, indirect sunlight is essential for photosynthesis and recovery. Place your orchid near a window with filtered light. Avoid direct sun exposure, which can scorch its delicate leaves.
Step 7: Be Patient and Monitor Progress
Root regrowth doesn’t happen overnight, but within 2–6 weeks, you should start seeing new roots emerging. Keep monitoring moisture levels and ensure no mold or rot develops. If using the water culture method, refresh the water every few days.
Step 8: Repot Your Orchid Once Roots Develop
Once your orchid has grown at least 2–3 inches of healthy roots, it’s time to move it into a pot with a well-draining orchid mix. Here’s how:
- Choose a transparent plastic pot with drainage holes to allow root visibility and aeration.
- Use a mix of bark, perlite, and charcoal for optimal drainage.
- Secure the orchid gently in the pot, ensuring roots have space to grow.
- Water sparingly and gradually adjust to regular orchid care routines.
Common Mistakes to Avoid
While reviving a rootless orchid, be mindful of these common mistakes: ❌ Overwatering – Too much water can cause further rot instead of encouraging root growth. ❌ Using Regular Soil – Orchids need a well-draining mix, not typical potting soil. ❌ Direct Sunlight – Excess heat can dehydrate the already weakened plant. ❌ Neglecting Humidity Levels – Dry air slows down root regrowth.
Final Thoughts: Give Your Orchid a Second Chance!
Reviving a rootless orchid may take patience, but the rewards are worth it. With proper care and the right method, you can bring your beloved orchid back to life and watch it thrive once again. Nurseries have mastered this technique, and now you can too!
💬 Have you ever saved an orchid? Share your experience in the comments! 🌸✨
#OrchidCare #GardeningHacks #PlantLovers #OrchidLove #GardeningTips #PlantRescue #IndoorGardening #GreenThumb