
Introduction
Propagation is a fascinating aspect of gardening that allows you to multiply your plants, share them with friends, or create a lush, green space on a budget. While many gardeners are familiar with common methods like seed sowing or stem cuttings, there’s a lesser-known propagation technique that can be incredibly effective and straightforward. This article delves into this unique propagation method, offering a detailed guide on how to use it to successfully grow new plants.
Understanding the Technique
The lesser-known propagation technique we’re exploring involves using leaf or stem cuttings in a propagation medium to produce new plants. This method is particularly useful for certain plant species and can be an excellent way to expand your garden with minimal effort. By utilizing a suitable propagation medium and maintaining the right conditions, you can encourage new growth from even small plant parts.
Steps to Successfully Propagate Plants Using Cuttings
1. Choose a Healthy Plant
The first step in successful propagation is selecting a healthy parent plant. The better the parent plant, the more likely your cuttings will thrive.
- Select the Right Plant: Choose a plant that is vigorous and free from diseases or pests. Avoid using plants that are stressed or unhealthy.
- Timing: The best time to take cuttings is during the plant’s active growing season, which is typically spring or early summer for many species.
2. Prepare the Cutting
Preparing your cutting properly is crucial to ensure successful propagation.
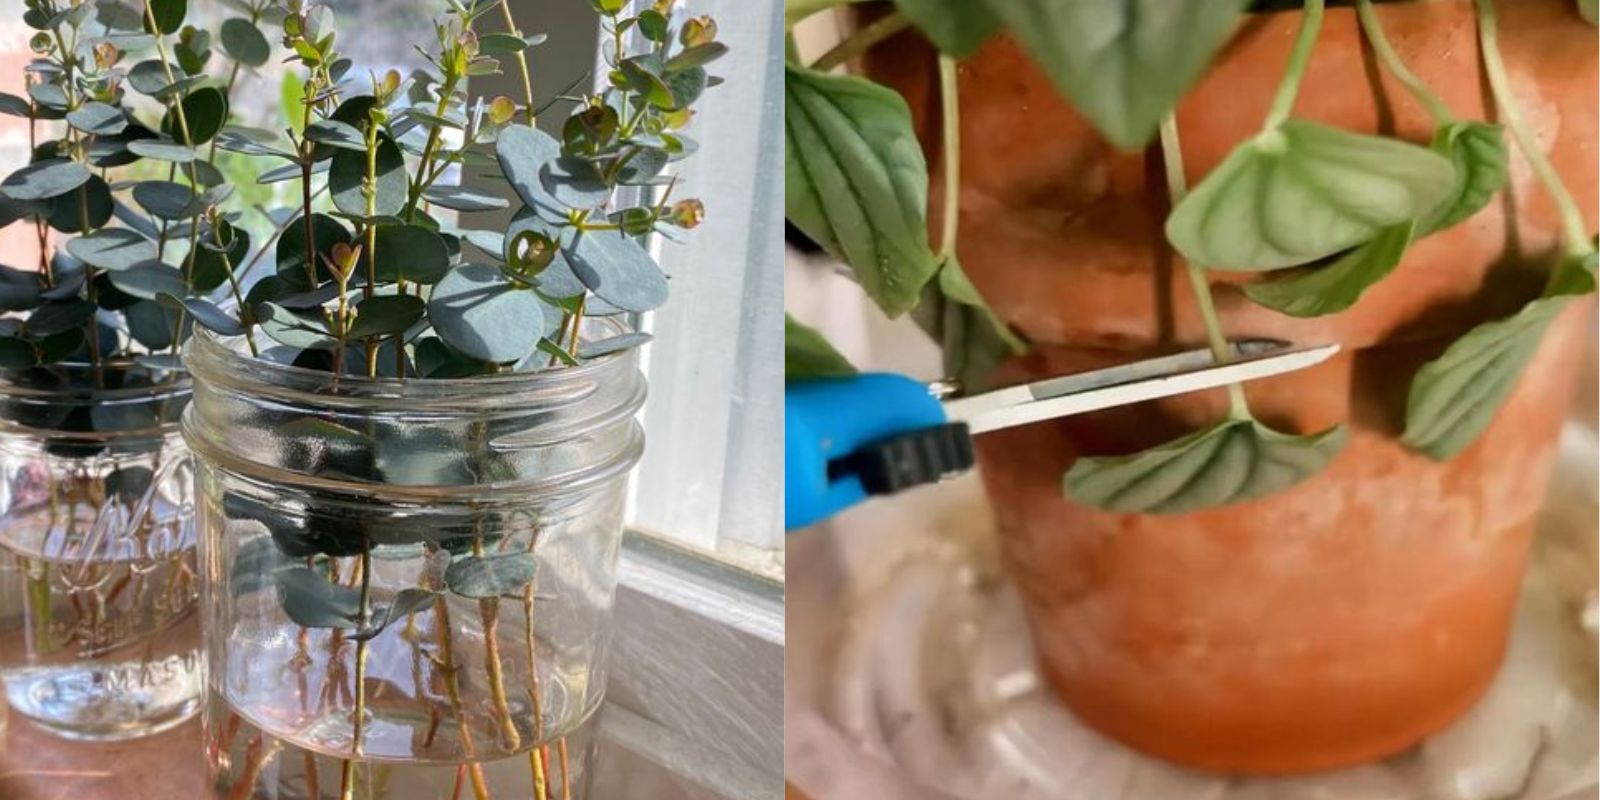
- Tools and Hygiene: Use a clean, sharp knife or scissors to avoid introducing diseases. Sterilize your tools with rubbing alcohol before making cuts.
- Cutting Technique: Take a cutting that is about 4-6 inches long. For stem cuttings, ensure the cut is made just below a node (the point on the stem where leaves attach). For leaf cuttings, remove a healthy, mature leaf from the plant, making sure to include a small portion of the leaf petiole (stem).
3. Use a Propagation Medium
Choosing the right propagation medium can significantly affect the success rate of your cuttings.
- Water Propagation: Place the cutting in a jar or glass of water, ensuring that the node or base of the cutting is submerged. Change the water regularly to keep it fresh.
- Soil Propagation: Plant the cutting in a small pot filled with a well-draining potting mix, such as a mix of perlite and peat moss or sand. Ensure the medium is moist but not waterlogged.
- Perlite or Vermiculite: These mediums are excellent for root development. Place the cutting in a container with perlite or vermiculite, keeping it lightly moist.
4. Maintain Optimal Conditions
Creating the right environment is essential for encouraging root growth.
- Light: Place the container in a bright, indirect light location. Avoid direct sunlight, which can cause the cutting to dry out or become scorched.
- Temperature: Maintain a warm temperature, ideally between 65-75°F (18-24°C). Most cuttings root best in these temperatures.
- Humidity: Keep the environment humid to prevent the cutting from drying out. You can use a plastic bag or a propagation dome to create a mini greenhouse effect, which helps maintain humidity.
5. Monitor and Transplant
Regular monitoring ensures that your cuttings are progressing well and ready for transplantation.
- Root Development: Check the cuttings periodically for root growth. For water propagation, you should see roots forming after a few weeks. In soil or perlite, gently tug on the cutting to check for resistance, indicating root growth.
- Transplanting: Once the roots are well-established (about 1-2 inches long for water propagation), or you see new growth (for soil or perlite), it’s time to transplant the cutting into a larger pot or garden bed.
Troubleshooting Common Issues
While this propagation technique is relatively straightforward, you may encounter some issues. Here’s how to address common problems:
- Rotting Cuttings: If your cuttings are rotting, it’s often due to excessive moisture. Ensure proper drainage and avoid overwatering. For water propagation, change the water frequently.
- Lack of Root Growth: If roots aren’t developing, check the cutting’s environment. Ensure it’s receiving enough light, warmth, and humidity. For soil propagation, make sure the medium isn’t too compacted.
- Wilting: If the cutting is wilting, it might be too dry or exposed to direct sunlight. Increase humidity and move it to a location with indirect light.
Benefits of This Propagation Technique
This propagation method offers several advantages:
- Cost-Effective: Propagating from cuttings is a cost-effective way to expand your garden without purchasing new plants.
- Easy to Learn: The technique is straightforward and requires minimal equipment, making it accessible for beginner gardeners.
- Customizable: You can use this method with a variety of plants, including succulents, herbs, and houseplants.
Additional Tips for Success
- Label Cuttings: If propagating multiple types of plants, label your cuttings to keep track of what you’re growing.
- Experiment: Don’t be afraid to experiment with different propagation mediums and techniques to find what works best for each plant species.
- Patience: Root development can take time, so be patient and continue to provide optimal care for your cuttings.
Conclusion
Propagating plants using cuttings in a propagation medium is a simple yet effective method to expand your garden and share plants with others. By choosing healthy plants, preparing cuttings properly, using suitable propagation mediums, and maintaining the right conditions, you can successfully grow new plants and enjoy a lush, thriving garden.
Motivation
Ready to try this exciting propagation technique and grow your plant collection? Follow these steps and share your propagation success with us—let’s grow beautiful gardens together and celebrate the joys of gardening!