
Weeds—those persistent, fast-growing invaders—are a common problem in gardens everywhere. They compete with your plants for nutrients, water, and sunlight, and left unchecked, they can quickly take over a flowerbed, leaving your flowers struggling. While there are various methods of controlling weeds, one of the most effective and eco-friendly solutions is using cardboard as a weed barrier. In this article, we will explore how to use cardboard to stop weeds in flowerbeds, step by step, ensuring that your garden flourishes without the need for harmful chemicals.
The Benefits of Using Cardboard for Weed Control
Before diving into the steps of how to use cardboard in your flowerbeds, let’s first take a look at why cardboard is such a great option for weed control:
- Eco-Friendly: Cardboard is a recyclable material, and using it in your garden reduces waste. It decomposes naturally over time, enriching the soil.
- Cost-Effective: Cardboard is usually free, often available from local stores or as packaging waste. This makes it an affordable option for gardeners looking to save money.
- Prevents Weed Growth: The cardboard creates a thick barrier that blocks light, preventing weeds from germinating and growing in your flowerbed.
- Conserves Moisture: Cardboard helps retain moisture in the soil beneath, reducing the need for frequent watering. This is especially helpful during dry spells.
- Improves Soil Health: As the cardboard decomposes, it adds organic matter to the soil, improving its texture and fertility.
Now, let’s dive into the step-by-step process of using cardboard to stop weeds in flowerbeds.
Step 1: Prepare Your Flowerbed
Before applying the cardboard, it’s essential to prepare your flowerbed. Start by removing any existing weeds or unwanted plants. This ensures that you’re not just covering them up, but actually eliminating them from the area. You can pull the weeds by hand or use a hoe to loosen the soil and uproot them.
Once the weeds are removed, rake the soil to level it and remove any large clumps or debris. This will provide a smooth, even surface for the cardboard to rest on.
Step 2: Gather Your Cardboard
Now that your flowerbed is ready, it’s time to gather your cardboard. You can use any type of cardboard—boxes, shipping cartons, or even food packaging—as long as it’s free of excessive tape or labels. The cardboard should be sturdy, but not overly thick. Thin cardboard works best as it can break down more easily over time.
Be sure to avoid any boxes with glossy coatings or heavy printing, as these may contain chemicals that could harm the soil or plants. It’s also important to remove any staples or tape, as these can hinder the decomposition process.
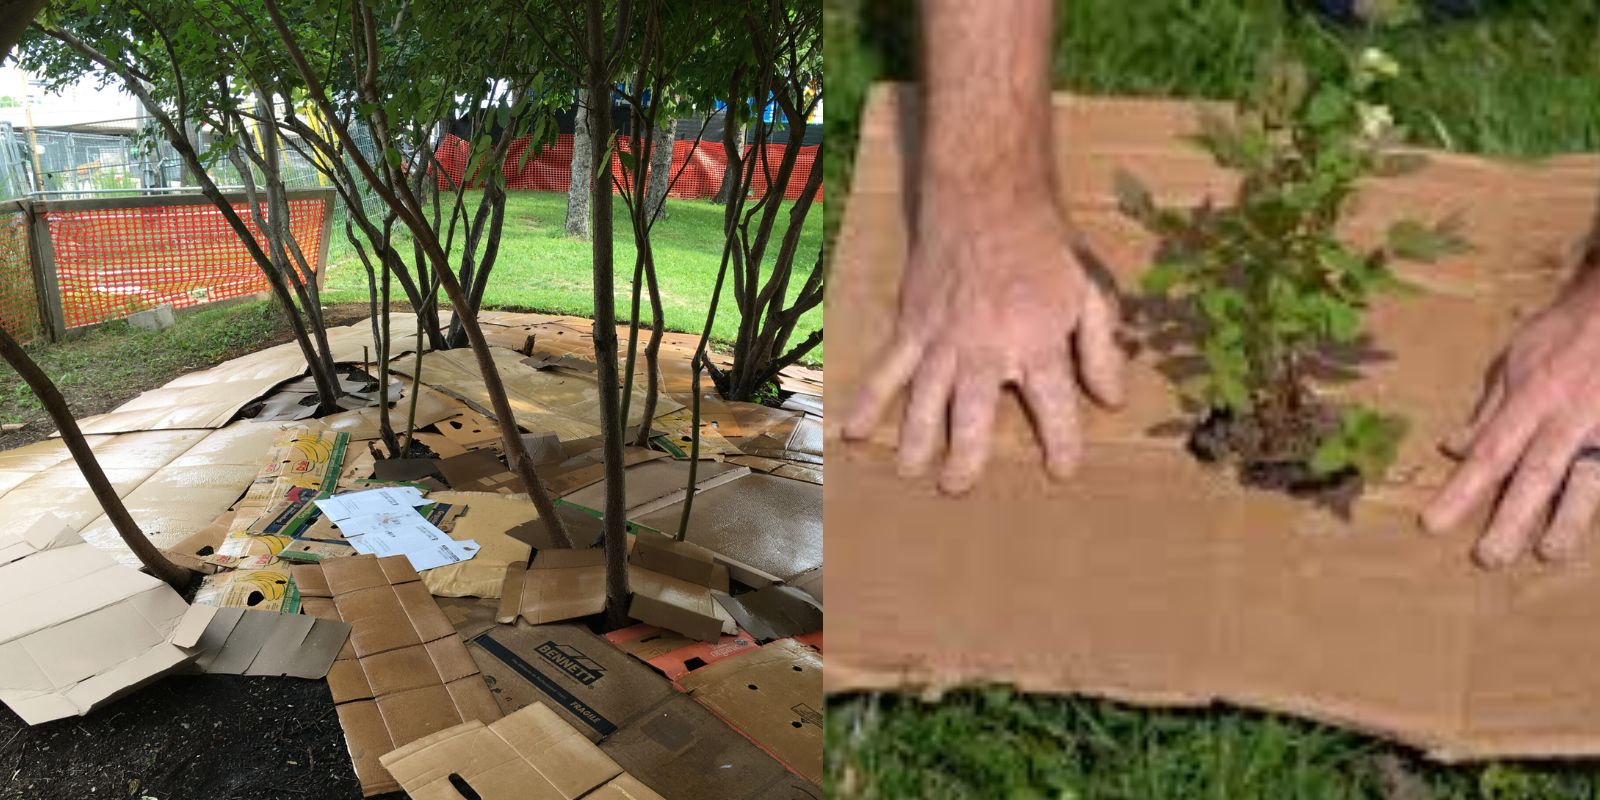
Step 3: Lay the Cardboard Over the Soil
Start laying down the cardboard directly on top of the soil in your flowerbed. The cardboard should cover the entire area, including the spaces between your plants. Be sure to overlap the edges of the cardboard to prevent any gaps where weeds could poke through. Aim for at least two layers of cardboard for maximum effectiveness.
If you’re working in a large area, you may need several pieces of cardboard to cover the entire space. Make sure to fit them together tightly, as any exposed soil may allow weeds to sprout.
Step 4: Moisten the Cardboard
Once the cardboard is laid down, give it a light watering. This will help the cardboard settle into the soil and begin the breakdown process. Moistening the cardboard also makes it easier to manipulate and ensures that it doesn’t blow away in the wind.
Watering the cardboard also helps to create a healthier environment for your plants. The moisture will be retained beneath the cardboard, promoting healthy root growth and reducing the need for frequent irrigation.
Step 5: Cover the Cardboard with Mulch
The next step is to add a layer of mulch on top of the cardboard. Mulch serves several purposes: it helps to keep the cardboard in place, protects it from the elements, and provides an additional layer of protection from weeds.
Organic mulch, such as shredded bark, straw, or compost, works best, as it will break down naturally and enrich the soil over time. Apply a thick layer—about 3 to 4 inches—ensuring that it covers the cardboard completely. This will provide a solid barrier to prevent weeds from pushing through.
In addition to weed prevention, the mulch will keep the soil temperature more consistent, protecting your plants from extreme heat or cold. It also provides a habitat for beneficial insects like earthworms, which improve soil health.
Step 6: Monitor and Maintain Your Flowerbed
After the cardboard and mulch are in place, it’s important to monitor your flowerbed regularly to ensure that the weed barrier is working as intended. Occasionally check to make sure the cardboard is still intact and that no weeds are growing around the edges. If you spot any gaps, simply add more cardboard or mulch to cover them up.
While the cardboard should last for several months to a year, you may need to replace it as it decomposes. Over time, the cardboard will break down, adding organic matter to the soil and improving its texture. As it breaks down, the mulch layer will continue to provide protection and keep the weeds at bay.
Step 7: Reap the Benefits
Using cardboard to stop weeds in flowerbeds is a simple, low-maintenance method that allows your plants to thrive without constant competition from weeds. As the cardboard decomposes, your soil will become richer, your plants will have better access to nutrients and moisture, and your garden will look more beautiful with less effort.
This technique is perfect for gardeners looking to maintain a healthier, more sustainable flowerbed while also reducing their reliance on chemical herbicides.
Tips for Success
- Use Compostable Materials: If you don’t have cardboard on hand, you can also use other compostable materials like newspaper or shredded paper as a substitute.
- Ensure Proper Ventilation: While cardboard is effective at blocking weeds, it also needs to breathe. Make sure that your flowerbed doesn’t become too compacted by the cardboard. If necessary, leave small gaps for air circulation.
- Replenish Mulch: Over time, mulch can break down and thin out. Be sure to replenish the mulch layer every few months to maintain its effectiveness.
- Consider Your Plants: Make sure the cardboard and mulch layers do not smother any plants in your flowerbed. Avoid covering low-growing plants that need direct sunlight.
Conclusion
Cardboard is a fantastic and sustainable option for controlling weeds in your flowerbeds. By following the simple steps outlined above, you can create a beautiful, healthy garden without the need for chemical weed killers. This method not only helps you fight weeds, but it also improves soil health, conserves moisture, and creates a thriving environment for your plants.
Start using cardboard today to reduce the amount of weeding and maintenance your flowerbed needs. Your plants—and the planet—will thank you!
Give it a try and see the difference it makes in your garden! 🌿