
Snake plants, also known as Sansevieria, are among the most popular houseplants due to their easy care and stunning architectural appearance. They are known for their upright, sword-like leaves and can thrive in various indoor environments. If you want to grow more of these hardy plants, propagating them from leaf cuttings is a rewarding and straightforward process. In this article, we will guide you through the step-by-step process of propagating snake plants by leaf cuttings, and share tips for success!
Why Propagate Snake Plant by Leaf?
Before diving into the how-to, it’s essential to understand why propagation is a great option. Snake plants are known for their resilience, but they do not produce seeds readily, making propagation by cutting an ideal method for growing new plants. One of the most popular and easiest methods is leaf propagation. Unlike other methods such as division or offsets, propagating from leaves allows you to use a single leaf to grow a new plant.
By propagating snake plants by leaf, you’re not only expanding your plant collection but also giving friends and family the opportunity to enjoy this beautiful houseplant as well. Additionally, propagating from leaf cuttings allows you to experiment and expand your indoor garden, all without spending a fortune.
Benefits of Propagating Snake Plants
- Cost-Effective: Propagating your plants from leaves helps you save money compared to buying new plants.
- More Plants: If you already own a healthy snake plant, propagating from leaves lets you grow additional plants to add to your collection or share with others.
- Simplicity: Snake plant propagation is one of the easiest and most forgiving methods of plant propagation, making it perfect for beginners.
Materials Needed for Propagating Snake Plant by Leaf
To get started, gather the following supplies:
- Healthy snake plant
- Sharp, clean scissors or pruning shears
- Small pots (for the new plants)
- Well-draining potting soil (preferably a cactus or succulent mix)
- Optional: Rooting hormone (although not necessary, this can sometimes speed up root growth)
- Water
- A clear container or plastic bag for humidity (optional)
Step-by-Step Guide to Propagate Snake Plant by Leaf
Step 1: Select and Prepare the Leaf
The first step in propagating a snake plant by leaf is selecting the right leaf. Look for a healthy, mature leaf that is free from disease or damage. The leaf should be thick, firm, and sturdy, as this indicates the best chance for success when propagating.
Once you have selected a suitable leaf, use a sharp pair of scissors or pruning shears to cut it at the base. Make sure you are cutting the leaf as close to the soil line as possible.
Step 2: Cut the Leaf Into Sections
After cutting the leaf from the plant, it’s time to divide it into sections. Take the whole leaf and cut it into smaller sections, each about 4-6 inches long. Make sure each cutting has a clear top and bottom, as it is crucial that the bottom end of the cutting is placed in the soil. To help prevent confusion, you can label the cuttings with their “top” and “bottom” directions.
At this stage, it’s important to remember that the cuttings should be placed in the soil with the bottom (the part of the leaf closest to the base of the plant) facing down. This will encourage proper rooting. Additionally, some people choose to apply a rooting hormone to the bottom of each cutting, but this is optional and not strictly necessary.
Step 3: Allow the Cuttings to Callus
Before you plant your leaf cuttings, it’s crucial to allow the cut ends to dry out and form a callus. This is an essential step because it helps prevent the cuttings from rotting when placed in the soil. Lay the cuttings flat on a clean surface in a dry, shaded spot for about 2-3 days. This drying period will allow the cut edges to callus over and form a protective layer.
This step is essential for ensuring the survival of the cuttings, as it helps prevent bacteria or fungi from entering the leaf cuttings and causing rot.
Step 4: Prepare the Pot and Soil
Next, prepare a small pot with well-draining soil. Snake plants thrive in soil that doesn’t retain too much moisture, so it’s best to use a cactus, succulent, or a mix with added perlite for improved drainage. Fill the pot with the prepared soil, ensuring the soil is level but not compacted.
If you are propagating multiple cuttings, make sure you have a separate pot for each cutting. This will give each plant enough space to grow roots and develop properly.
Step 5: Plant the Cuttings
Once the leaf cuttings have dried and callused, it’s time to plant them in the soil. Insert the bottom of the leaf cutting (the end that was closest to the base of the plant) into the prepared potting mix. Be sure to plant the cutting upright with the bottom end facing down. Gently press the soil around the cutting to ensure it stays in place.
If you are propagating multiple cuttings, space them out by a few inches to give each one enough room to grow.
Step 6: Water Lightly
After planting the leaf cuttings, water the soil lightly. Snake plants prefer to dry out between waterings, so avoid soaking the soil. You want to keep the soil slightly moist, not wet, to avoid root rot. Water the plant only when the soil feels dry to the touch, and always ensure that the pot has proper drainage.
Step 7: Create the Right Growing Conditions
Once the cuttings are planted, it’s time to provide the right environment for them to root and grow. Snake plants prefer indirect light, so place the pot in a spot that receives bright, but filtered sunlight. Avoid placing the pot in direct sunlight, as this can cause the cuttings to dry out too quickly.
If you want to increase humidity around the cuttings to encourage root growth, you can cover the pot with a plastic bag or place it in a clear container. This will help keep the cuttings in a more humid environment, but be sure to remove the cover once a day for some fresh air to prevent mold growth.
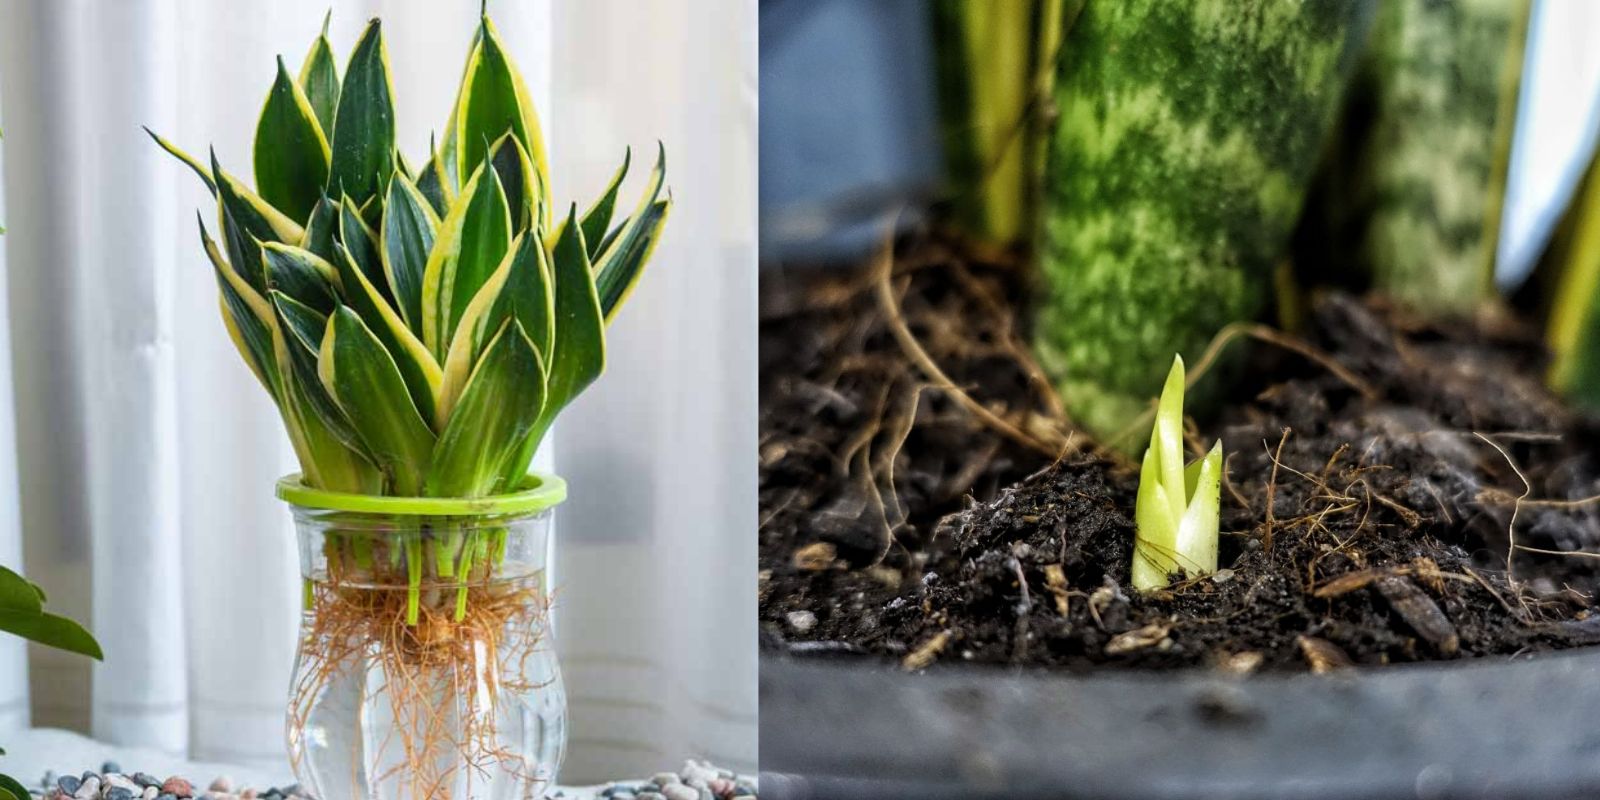
Step 8: Wait for Rooting
Patience is essential during the propagation process. It can take anywhere from a few weeks to a few months for snake plant cuttings to root, depending on the conditions and the age of the leaf. You’ll know your cuttings are ready to be transplanted into larger pots once you notice new growth, such as small shoots emerging from the soil.
While you wait, be sure to check on the cuttings regularly. If you notice any signs of rot or mold, remove the affected cuttings immediately to prevent it from spreading to the healthy ones.
Step 9: Transplant to Larger Pots
Once the cuttings have rooted and new growth is visible, it’s time to move them into larger pots where they can continue growing. Use the same well-draining soil mix as before, and continue to care for the new plants as you would any mature snake plant.
Tips for Success
- Use clean tools: Make sure your scissors or shears are sanitized before cutting the leaf to prevent any infection or contamination.
- Avoid overwatering: Snake plants are very susceptible to root rot, so it’s crucial to avoid watering too frequently.
- Be patient: Rooting can take time, and not all cuttings will root successfully, so don’t get discouraged if some cuttings don’t make it.
- Maintain indirect light: Too much direct sunlight can burn the cuttings, while too little light can slow down growth.
- Temperature: Keep the cuttings in a warm environment. Snake plants thrive in temperatures between 60-85°F (15-29°C).
Conclusion
Propagating snake plants by leaf cuttings is an easy and rewarding process. By following these simple steps, you can grow a whole new collection of snake plants from a single leaf, giving you more plants to enjoy or share with others. As long as you are patient and provide the right care, you’ll soon have a thriving collection of these beautiful houseplants to brighten up your home. Happy propagating!