
Hydrangeas are one of the most popular flowering shrubs in gardens worldwide, prized for their large, colorful blooms that bring beauty to any landscape. Whether you are a seasoned gardener or a beginner, propagating hydrangeas from cuttings is a simple and rewarding way to expand your garden. By following a few easy steps, you can grow new plants from a single hydrangea, creating more of these stunning flowers at no extra cost.
This article will guide you through the process of propagating hydrangeas from cuttings. We’ll cover everything from selecting the best stems to creating an ideal rooting environment, ensuring that your new hydrangeas take root and thrive.
Why Propagate Hydrangeas from Cuttings?
Propagating hydrangeas through cuttings has several advantages. First and foremost, it is a cost-effective way to multiply your plants. Instead of purchasing new plants each season, you can use your existing hydrangeas to grow new ones. Additionally, propagation allows you to create clones of your favorite hydrangeas, ensuring that the new plants have the same characteristics, such as color and size, as the parent plant.
When to Take Hydrangea Cuttings
The best time to take hydrangea cuttings is during the late spring or early summer when the plant is actively growing. At this time, the stems are soft and flexible, making them easier to root. However, some hydrangea species can also be propagated in late summer or early fall, depending on the climate in your region.
Choosing the Right Hydrangea Stems
Not all hydrangea stems are suitable for propagation. Here’s how to choose the best cuttings:
- Look for Non-Flowering Stems: It’s important to select stems that have not flowered. Flowering stems are generally too soft and won’t root as easily as non-flowering stems. Look for stems with healthy leaves but no signs of flowers.
- Choose Semi-Hardwood Stems: The best cuttings are taken from semi-hardwood stems, which are neither too soft (as in spring growth) nor too hard (as in older wood). The stems should bend but not snap when you gently flex them. These semi-hardwood stems have the perfect balance of flexibility and firmness to encourage rooting.
- Healthy, Pest-Free Stems: Make sure the stems are free of pests and diseases. Choose stems that are vibrant green, with no signs of wilting, yellowing, or spots.
Step-by-Step Guide to Propagate Hydrangea Cuttings
Follow these detailed steps to successfully propagate hydrangeas from cuttings.
Step 1: Prepare the Materials
Before you begin, gather the following materials:
- A sharp, clean pair of pruning shears or scissors
- Rooting hormone (optional but recommended)
- Small pots or containers with drainage holes
- Well-draining potting mix (a mixture of peat and perlite works well)
- A plastic bag or clear plastic dome for humidity
- A watering can or spray bottle
Step 2: Take the Cuttings
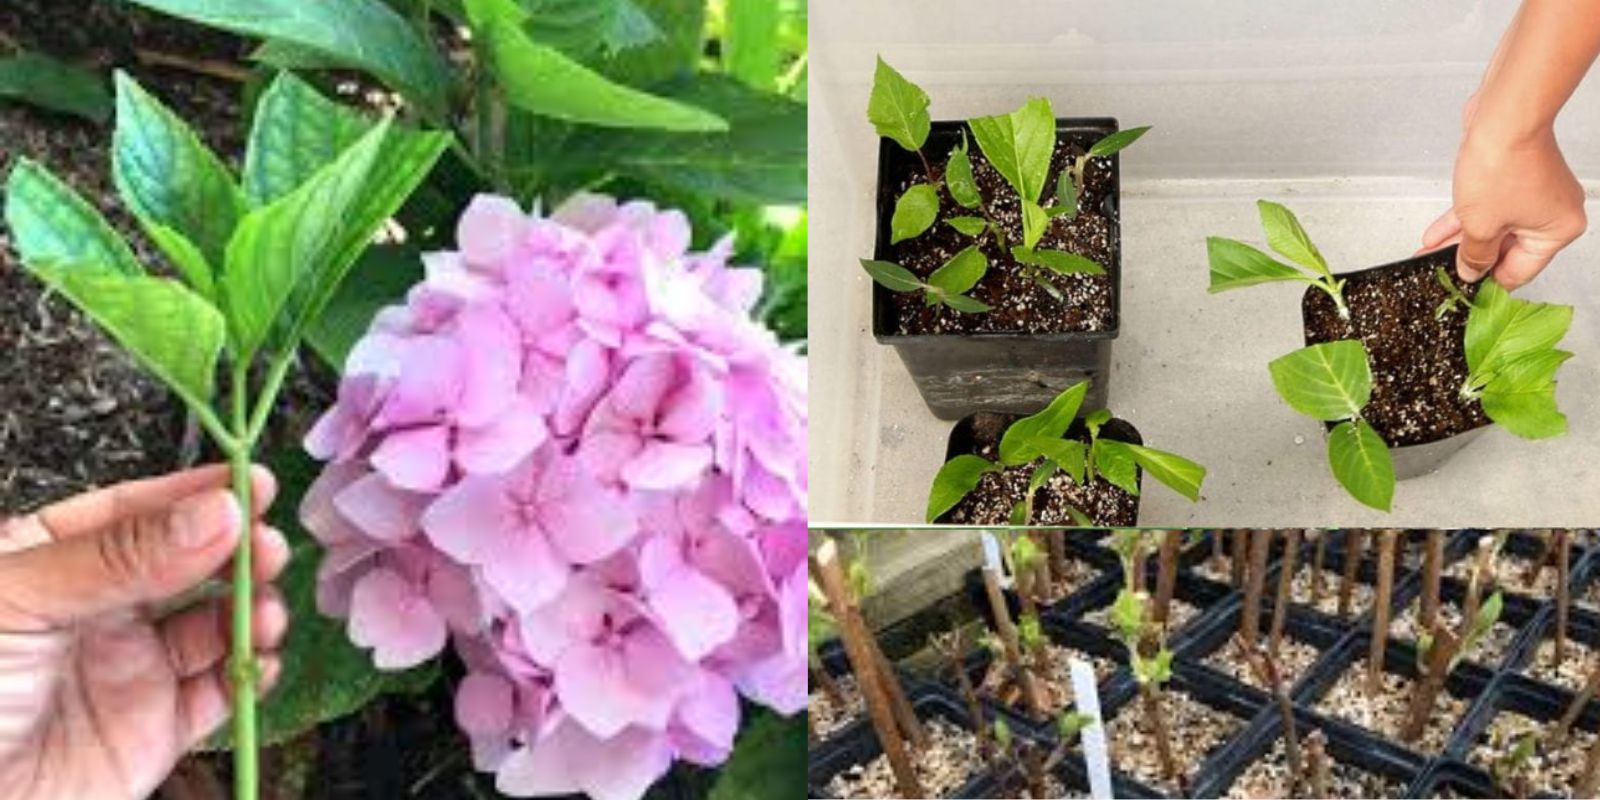
Using your pruning shears or scissors, cut a healthy hydrangea stem that is approximately 4-6 inches long. Make the cut just below a leaf node (the point where a leaf meets the stem), as this is where roots are most likely to form. Aim for several cuttings to increase your chances of success.
Step 3: Remove the Lower Leaves
Strip off the lower leaves from each cutting, leaving only a couple of leaves at the top. The exposed stem should be free of leaves for at least 2 inches to prevent the leaves from rotting in the soil. Be careful not to damage the top leaves, as they help the cutting stay healthy and hydrated.
Step 4: Optional – Apply Rooting Hormone
Although not strictly necessary, applying rooting hormone can speed up the rooting process and improve your success rate. Dip the cut end of each hydrangea cutting into the rooting hormone, then tap off any excess powder. The hormone will help stimulate root growth, making it easier for the cutting to establish itself in the soil.
Step 5: Plant the Cuttings
Prepare small pots or containers filled with well-draining potting mix. Gently make a hole in the soil using a pencil or your finger, and insert the cutting about 2 inches deep into the soil. Be sure the cutting is upright and that no leaves are touching the soil. Gently firm the soil around the cutting to hold it in place.
Step 6: Water the Cuttings
After planting the cuttings, water them thoroughly. The soil should be moist but not soggy. Use a watering can or spray bottle to moisten the soil gently. This will help settle the soil around the cutting and provide moisture to encourage root growth.
Step 7: Create a Humid Environment
Hydrangea cuttings need a high-humidity environment to encourage root development. To achieve this, cover the cutting with a plastic bag or a clear plastic dome. This will help trap moisture and keep the air around the cutting humid. If you’re using a plastic bag, make sure to leave some space for airflow to prevent mold growth. You can also use a misting bottle to regularly spray the cuttings if you don’t have a plastic covering.
Step 8: Place the Cuttings in a Bright Spot
Place the pots with the cuttings in a bright location, but avoid direct sunlight. Direct sunlight can be too harsh and may cause the cuttings to dry out. A spot with indirect light or filtered sunlight works best. Aim for a temperature range of 65-75°F (18-24°C), which is ideal for root development.
Step 9: Wait for Roots to Develop
Over the next 3-4 weeks, the hydrangea cuttings will begin to develop roots. You can check for root growth by gently tugging on the cuttings. If you feel resistance, this means roots have started to form. At this point, you can begin to remove the plastic covering, but continue to keep the soil moist.
Step 10: Transplant the Cuttings
Once the cuttings have established a healthy root system, they can be transplanted into larger pots or directly into the garden. If you’re planting them in pots, choose containers that are about 6-8 inches in diameter. Gradually acclimate the young plants to outdoor conditions by placing them in a shaded spot for a few hours a day before transplanting them fully into the garden.
Caring for Newly Propagated Hydrangeas
After transplanting your new hydrangea plants, it’s important to continue providing the proper care to ensure they grow strong and healthy:
- Watering: Keep the soil consistently moist but not soggy. Hydrangeas need plenty of water, especially during the growing season, but make sure the soil has good drainage to prevent root rot.
- Fertilizing: Feed your hydrangeas with a balanced fertilizer every 4-6 weeks during the growing season to encourage strong growth and vibrant blooms.
- Pruning: Prune your hydrangea plants in the early spring or after the blooms have faded. Regular pruning helps to shape the plant, remove dead or damaged stems, and encourage more blooms.
- Protection from Pests: Keep an eye out for common pests like aphids, slugs, and spider mites. If you notice signs of pests, treat the plant with an organic insecticide or natural methods like neem oil.
Conclusion
Propagating hydrangeas from cuttings is an easy, cost-effective way to multiply your plants and enjoy more of these stunning blooms in your garden. By following these simple steps—selecting the right stems, preparing the cuttings, and creating a humid environment—you can successfully propagate hydrangeas and watch them grow into beautiful new plants.
Whether you’re looking to expand your own collection or share hydrangeas with friends, propagating these plants is a rewarding experience that every gardener should try.
#HydrangeaPropagation #GardenTips #PlantPropagation #Hydrangeas #DIYGardening #GardeningCommunity #GrowMorePlants #GardeningAtHome #GreenThumb #BeautifulBlooms