
Creating a DIY compost bin is one of the most rewarding and sustainable practices you can incorporate into your gardening routine. Not only does it help reduce household waste, but it also provides you with nutrient-rich compost that can enhance soil health and promote plant growth. Whether you have a small urban garden or a spacious backyard, making your own compost bin is a project that offers long-term benefits for both your garden and the environment. In this comprehensive guide, we’ll walk you through the steps to create your own DIY compost bin, covering everything from materials and construction to maintenance and harvesting.
Why Composting Matters
Composting is the natural process of recycling organic matter, such as kitchen scraps and yard waste, into valuable compost that can be used to enrich soil. This process not only reduces the amount of waste sent to landfills but also provides a sustainable way to improve soil structure, moisture retention, and nutrient content. Composting helps close the loop in the waste cycle and fosters healthier, more productive gardens.
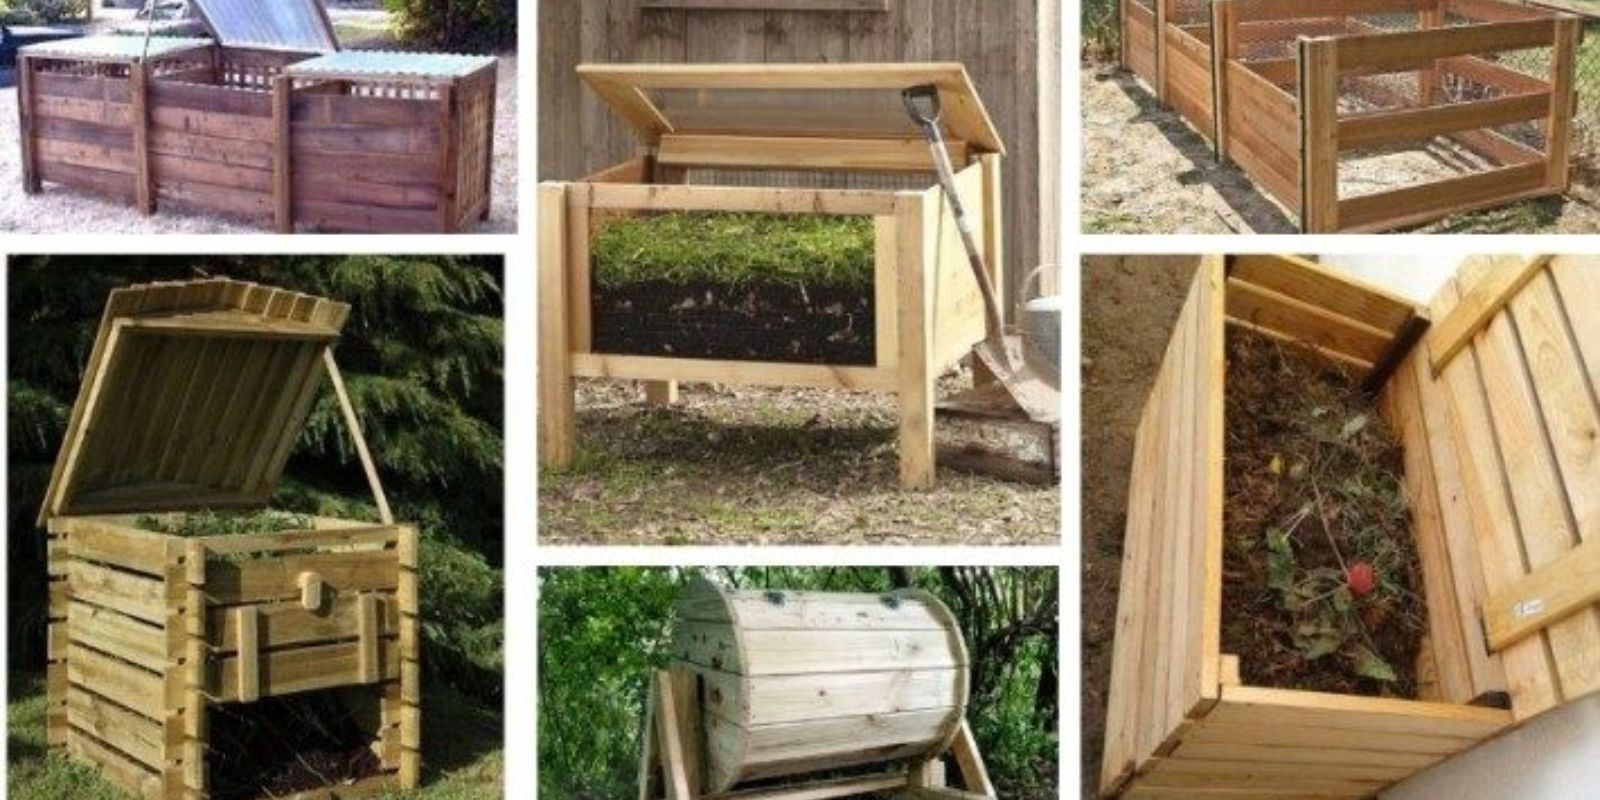
Choosing Your Compost Bin Design
The first step in creating your DIY compost bin is to choose the design that best fits your needs and available space. There are several options to consider:
- Plastic Bin:
- Description: A large, sturdy plastic bin with a lid, often featuring ventilation holes.
- Advantages: Easy to clean, retains heat and moisture well, and is readily available.
- Wooden Bin:
- Description: A bin constructed from wooden pallets or planks, typically with open sides for ventilation.
- Advantages: Aesthetic appeal, customizable size, and good airflow.
- Wire Mesh Bin:
- Description: A bin made from wire mesh or chicken wire, forming a cylindrical shape.
- Advantages: Cost-effective, easy to construct, and provides excellent airflow.
- DIY Design:
- Description: Create a custom compost bin using materials like pallets, crates, or repurposed containers.
- Advantages: Fully customizable to your space and material availability.
Materials and Tools Needed
To build your DIY compost bin, gather the following materials and tools:
- Materials: Plastic bin, wooden pallets or planks, wire mesh or chicken wire, screws, nails, or zip ties.
- Tools: Drill, saw (if cutting wood or wire), hammer, screwdriver, measuring tape, and gloves.
Step-by-Step Instructions
1. Select and Prepare the Location:
- Choose a well-drained, shady spot in your yard or garden. Ideally, the location should be easily accessible and close to where you’ll generate compostable materials.
2. Construct the Bin:
- Plastic Bin:
- Drill several holes in the sides and bottom of the bin to ensure proper aeration and drainage.
- Place the bin on a flat surface or elevate it slightly for better airflow.
- Wooden Bin:
- Assemble the wooden planks into a rectangular or square shape, securing the corners with screws or nails.
- Leave gaps between the planks for ventilation and ensure the bin is sturdy and level.
- Wire Mesh Bin:
- Form a cylindrical shape with the wire mesh and secure the ends together with zip ties or wire.
- Place the mesh bin in your chosen location and anchor it if needed.
- DIY Design:
- Use your chosen materials to create a custom compost bin that suits your space and needs. Ensure that the bin has adequate ventilation and is easy to access.
3. Layer Your Materials:
- Bottom Layer: Start with a layer of coarse materials, such as small branches or straw, at the bottom of the bin. This promotes good airflow and drainage.
- Green Materials: Add kitchen scraps (fruit and vegetable peels, coffee grounds) and green yard waste (grass clippings, green leaves) as the next layer.
- Brown Materials: Follow with brown materials, such as dry leaves, cardboard, or paper, which provide carbon and balance the compost.
4. Maintain the Compost:
- Turning: Regularly turn the compost with a pitchfork or shovel to aerate it and accelerate decomposition. Aim to turn the compost every 2-3 weeks.
- Moisture: Keep the compost moist, similar to a damp sponge. Add water if the compost becomes too dry or add dry materials if it’s too wet.
- Temperature: Compost should reach a temperature of 130-160°F (54-71°C) for efficient decomposition. You can use a compost thermometer to monitor the temperature.
5. Harvest the Compost:
- Ready Compost: Compost is ready when it is dark, crumbly, and has an earthy smell. This process typically takes 3-6 months, depending on factors like temperature, moisture, and material type.
- Removal: Use a shovel to remove the finished compost from the bin. Sift out any large, undecomposed pieces and return them to the bin for further composting.
Tips for Successful Composting
- Balance: Maintain a good balance of green and brown materials for optimal composting. Aim for roughly 1/3 green materials and 2/3 brown materials.
- Shredding: Shred or chop larger materials to speed up decomposition and improve the composting process.
- Avoid: Do not compost meat, dairy, or oily foods, as these can attract pests and create unpleasant odors.
- Pest Control: If you encounter pests, such as rodents or insects, adjust the composting conditions or use traps to manage the issue.
Conclusion
Building your own DIY compost bin is a simple and rewarding project that can significantly benefit your garden and the environment. By recycling organic waste into valuable compost, you contribute to a more sustainable lifestyle while improving the health and productivity of your garden. With a variety of designs and materials to choose from, creating a compost bin is an accessible and practical way to make a positive impact.
Start your composting journey today and transform your kitchen scraps and yard waste into garden gold! Share your composting experiences and inspire others to embrace eco-friendly practices. 🌱♻️ #DIYCompostBin #SustainableGardening #EcoFriendly #CompostingTips #GardenHacks #WasteReduction #OrganicGardening #GreenLiving