
Turmeric, with its vibrant orange rhizomes and myriad health benefits, is a sought-after spice in kitchens around the world. Growing turmeric in containers is a great way to enjoy this spice, regardless of your climate or gardening space. Whether you’re a seasoned gardener or a beginner, this comprehensive guide will walk you through every step of cultivating turmeric in containers, ensuring you get the best results no matter where you live.
Understanding Turmeric
Turmeric (Curcuma longa) is a tropical plant renowned for its bright yellow-orange rhizomes, which are used in cooking and for medicinal purposes. It thrives in warm, humid climates but can be successfully grown in containers, making it accessible to gardeners in diverse environments. Growing turmeric in containers allows you to manage the plant’s needs more precisely, giving you control over its environment.
Why Grow Turmeric in Containers?
- Versatility: Containers can be placed anywhere, from patios to balconies to indoor spaces.
- Climate Control: Growing turmeric in containers allows you to regulate temperature and humidity, making it suitable for cooler climates.
- Space Efficiency: Ideal for those with limited space or urban environments.
Step-by-Step Guide to Growing Turmeric in Containers
1. Selecting the Right Container
Choosing the right container is crucial for the healthy growth of turmeric. Here’s what to consider:
- Size: Turmeric requires space for its roots to develop. Opt for a container that is at least 12 inches deep and 12-18 inches in diameter.
- Drainage: Ensure the container has drainage holes to prevent waterlogging, which can lead to root rot.
- Material: Plastic, clay, or ceramic containers work well, but ensure they are not too heavy if you plan to move them frequently.
2. Preparing the Soil
Turmeric thrives in well-draining, fertile soil. Follow these steps to prepare the ideal growing medium:
- Soil Mix: Use a mix of potting soil, compost, and perlite or sand. This combination provides the necessary nutrients and ensures good drainage.
- Soil pH: Aim for a slightly acidic to neutral pH (6.0 to 7.0). Test the soil pH and amend as needed with lime or sulfur.
3. Planting Turmeric Rhizomes
Planting turmeric properly is key to a successful harvest. Here’s how to do it:
- Source Rhizomes: Purchase fresh turmeric rhizomes from a nursery or online. Avoid dried rhizomes as they may not sprout.
- Preparation: Soak the rhizomes in water for a few hours before planting to encourage sprouting.
- Planting: Plant the rhizomes about 2 inches deep in the soil, with the buds or shoots facing up. Space them 8-12 inches apart to allow for growth.
4. Providing Optimal Conditions
Turmeric needs specific conditions to grow well. Here’s how to create the perfect environment:
- Light: Place the container in a warm, sunny spot where it can receive indirect sunlight. Turmeric prefers bright, filtered light. If growing indoors, use grow lights to supplement natural light.
- Temperature: Turmeric thrives in temperatures between 65-85°F (18-29°C). Avoid placing it in cold drafts or near air conditioners.
- Humidity: High humidity is crucial. Consider using a humidifier or placing a tray of water near the plant to increase moisture levels.
5. Watering and Fertilizing
Proper watering and fertilizing are essential for healthy turmeric plants:
- Watering: Keep the soil consistently moist but not waterlogged. Water the plant when the top inch of soil feels dry. Ensure good drainage to prevent root rot.
- Fertilizing: Feed your turmeric plant with a balanced, water-soluble fertilizer every 4-6 weeks during the growing season. Organic options like compost tea or fish emulsion work well.
6. Managing Pests and Diseases
Turmeric is relatively pest-resistant but can occasionally suffer from issues:
- Pests: Watch for aphids, spider mites, and scale insects. Treat infestations with insecticidal soap or neem oil.
- Diseases: Root rot and fungal infections can occur in overly moist conditions. Ensure proper drainage and avoid overwatering.
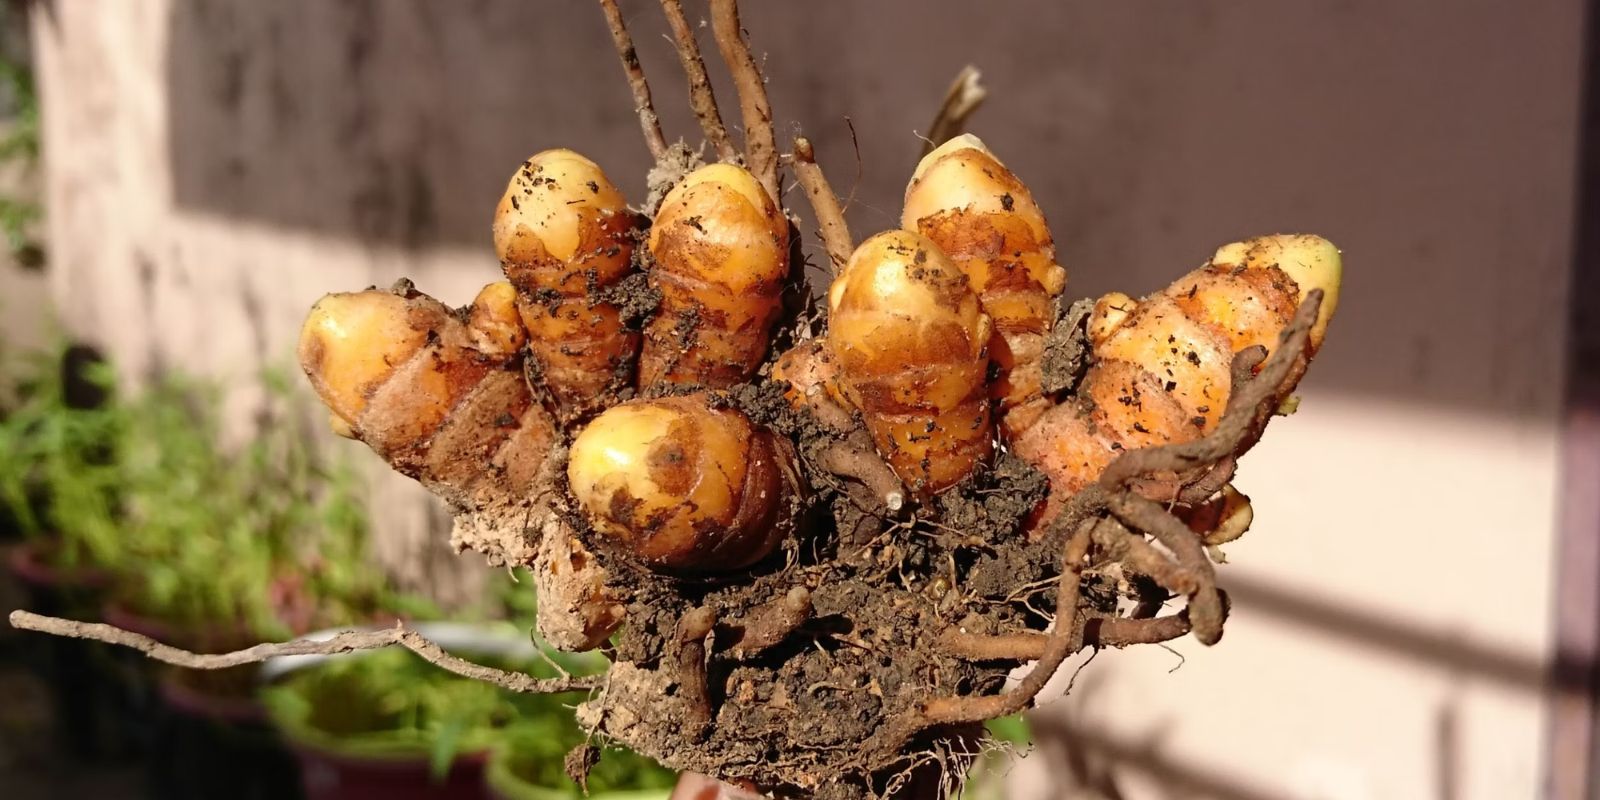
7. Harvesting Turmeric
Knowing when and how to harvest your turmeric is key to enjoying its full flavor and benefits:
- Timing: Turmeric is ready to harvest when the leaves start to yellow and die back, typically after 8-10 months of growth.
- Harvesting: Gently dig up the rhizomes using a hand fork or trowel. Be careful not to damage them. Rinse the rhizomes thoroughly and allow them to dry in a cool, airy place.
8. Storing and Using Turmeric
Proper storage ensures your turmeric remains fresh and flavorful:
- Storage: Store dried rhizomes in a cool, dark place in an airtight container. Fresh turmeric can be refrigerated for a few weeks.
- Usage: Turmeric can be used fresh, grated into dishes, or ground into powder for cooking and medicinal purposes.
Conclusion
Growing turmeric in containers offers flexibility and control, allowing you to enjoy this versatile spice regardless of your climate. By following these steps—selecting the right container, preparing the soil, planting properly, and providing the ideal conditions—you can cultivate healthy turmeric plants and enjoy a bountiful harvest.
Ready to spice up your gardening routine? Start growing turmeric today and experience the satisfaction of harvesting your own fresh rhizomes! 🌿✨ #GrowTurmeric #ContainerGardening #UrbanFarming #HomeGarden #SpiceUpYourLife #GardeningTips #PlantCare