
Sweet potatoes are a delicious, nutrient-rich, and easy-to-grow crop that thrives in warm climates. Unlike regular potatoes, which are grown from tubers, sweet potatoes are propagated from slips—small sprouts that grow from a mature sweet potato. With proper care, you can grow a bountiful harvest in your backyard, raised beds, or even containers.
In this detailed guide, we’ll walk you through the entire process of growing sweet potatoes—from sprouting slips to harvesting and curing them for the best flavor.
Why Grow Sweet Potatoes?
Growing sweet potatoes offers numerous benefits, making them a great addition to any home garden:
✔️ Nutrient-Rich – Packed with fiber, vitamins A and C, and antioxidants.
✔️ Drought-Tolerant – Requires less water than many other crops.
✔️ High Yield – A single plant can produce multiple tubers.
✔️ Versatile Use – Great for baking, frying, and mashing.
If you love homegrown, chemical-free produce, sweet potatoes are a fantastic choice for your garden.
Step 1: Choosing the Right Sweet Potato Variety
Not all sweet potatoes are the same! Different varieties vary in flavor, texture, and growing time. Here are some popular types:
🍠 Beauregard – One of the most common, fast-growing, and high-yielding varieties.
🍠 Jewel – Deep orange flesh with a mildly sweet flavor.
🍠 Georgia Jet – A fast-growing variety known for its early harvest.
🍠 Purple Sweet Potato – Rich in antioxidants, with a mildly sweet taste.
Choose a variety based on your climate and taste preference.
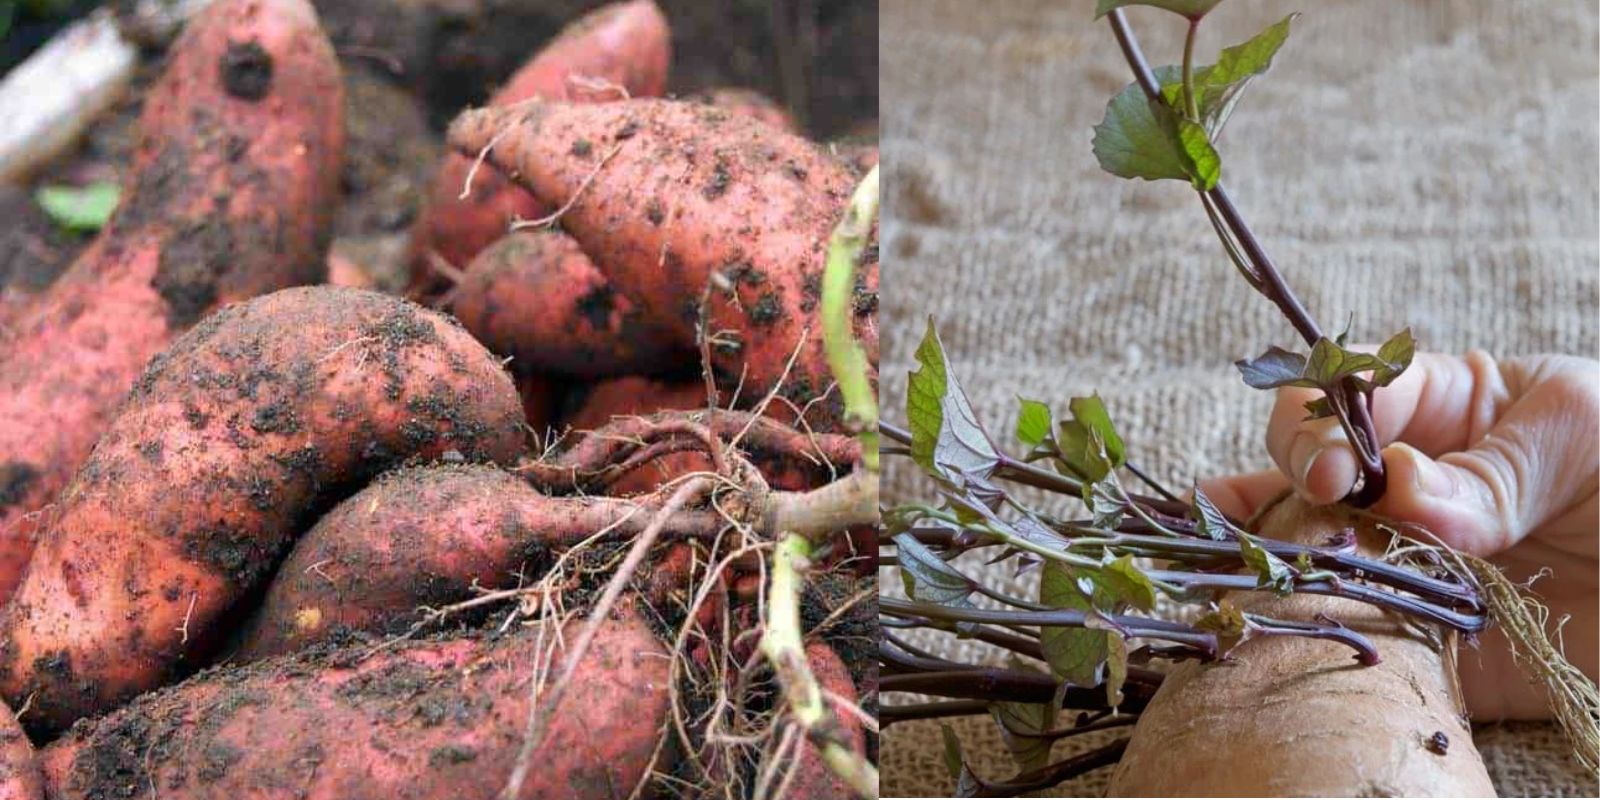
Step 2: Sprouting Sweet Potato Slips
Sweet potatoes don’t grow from seeds; they grow from slips—small sprouts that emerge from a mature sweet potato. Here’s how to start them:
Method 1: Water Method
1️⃣ Select a healthy, organic sweet potato (avoid those treated with sprout inhibitors).
2️⃣ Cut it in half and suspend it in a jar of water using toothpicks.
3️⃣ Place the jar in a warm, sunny spot (65-75°F).
4️⃣ In 2-4 weeks, small shoots (slips) will start to grow from the potato.
5️⃣ Once the slips are 4-6 inches long, gently twist them off.
Method 2: Soil Method
1️⃣ Bury a whole sweet potato in a container filled with loose, well-draining soil.
2️⃣ Keep the soil moist and warm.
3️⃣ Slips will sprout in 2-4 weeks.
4️⃣ Harvest the slips by cutting or gently pulling them off.
Both methods work well, but the soil method tends to produce stronger slips.
Step 3: Rooting the Slips
After harvesting the slips, they need to develop roots before planting.
🌱 Place the slips in a glass of water, ensuring only the bottom part is submerged.
🌱 Change the water every 2 days to prevent rot.
🌱 Within 5-7 days, roots will start to form.
🌱 Once the roots are 1-2 inches long, they’re ready to plant.
This step helps establish strong, healthy plants for better growth.
Step 4: Preparing the Planting Area
Sweet potatoes thrive in loose, well-draining soil with plenty of sunlight.
✔️ Soil Type: Sandy or loamy soil is best. Avoid heavy clay.
✔️ pH Level: Slightly acidic to neutral (5.5-7.0).
✔️ Spacing: Space plants 12-18 inches apart in rows 3 feet apart.
✔️ Sunlight: Needs at least 6-8 hours of full sun daily.
✔️ Mulching: Apply straw or leaves to retain moisture and suppress weeds.
Step 5: Planting the Sweet Potato Slips
Once the soil is ready, it’s time to transplant the slips.
1️⃣ Dig small holes about 4-6 inches deep.
2️⃣ Insert the slip with at least two leaves above the soil surface.
3️⃣ Gently press the soil around the slip to secure it.
4️⃣ Water thoroughly to help the roots establish.
It’s best to plant sweet potatoes when the soil temperature is consistently above 60°F.
Step 6: Caring for Your Sweet Potato Plants
Growing sweet potatoes is relatively easy, but proper care ensures a healthy harvest.
Watering
💧 Water regularly but avoid overwatering. Sweet potatoes need about 1 inch of water per week but are drought-tolerant once established.
Fertilizing
🌿 Avoid too much nitrogen, which encourages leaves instead of tubers. Instead, use a balanced organic fertilizer or compost tea every few weeks.
Weeding & Mulching
🚜 Keep the area weed-free by mulching with straw, grass clippings, or leaves. This also helps retain soil moisture.
Pest Control
🐜 Watch out for pests like:
✔️ Sweet Potato Weevils – Use floating row covers for protection.
✔️ Wireworms – Rotate crops to prevent infestations.
✔️ Aphids – Spray neem oil or insecticidal soap if needed.
Step 7: Harvesting Sweet Potatoes
Sweet potatoes take 90-120 days to mature. The best way to know they’re ready is when the vines start to yellow and die back.
How to Harvest
1️⃣ Use a garden fork or spade to gently dig around the plant.
2️⃣ Lift the tubers carefully to avoid bruising or cutting them.
3️⃣ Shake off excess soil but do not wash them right away.
4️⃣ Allow them to dry in the sun for a few hours.
Step 8: Curing for Maximum Sweetness
Freshly harvested sweet potatoes need to be cured to develop their full sweetness and shelf life.
🌡️ Store them in a warm, humid place (80-85°F) for 7-14 days.
💦 Maintain humidity by covering them with a cloth or storing them in a box with a damp towel.
📦 Once cured, store them in a cool, dark place (55-60°F) for long-term storage.
After curing, your sweet potatoes will be sweeter and last for months!
Common Problems & Solutions
🚨 Yellow Leaves? – Could be overwatering or a nutrient deficiency. Adjust watering and fertilization.
🐛 Pests? – Use organic methods like neem oil or row covers.
🛑 No tubers? – Too much nitrogen fertilizer can lead to leafy growth but no potatoes.
Final Thoughts
Growing sweet potatoes is a fun, rewarding process that yields delicious, homegrown tubers perfect for cooking. Whether you’re growing them in a garden bed, raised bed, or containers, following these steps will help you achieve a thriving harvest.
Have you tried growing sweet potatoes? Share your experience and tips in the comments! 🍠🌱
#GrowSweetPotatoes #HomeGardening #OrganicFarming #GrowYourOwnFood #GardeningTips #SelfSufficiency #UrbanGardening