
Growing peanuts at home can be an incredibly rewarding endeavor. Not only do they provide a delicious snack, but they also serve as a nutritious addition to your diet. Plus, peanuts are legumes, meaning they can improve soil health by fixing nitrogen. If you’re ready to dive into the world of peanut cultivation, this guide will walk you through everything you need to know, from selecting the right variety to harvesting your crop. Let’s get started!
Understanding Peanuts
Before you begin, it’s essential to understand that peanuts are not true nuts; they are legumes, which means they belong to the same family as beans and lentils. Peanuts grow underground, and their unique growth habit requires a bit of special attention. They thrive in warm, well-draining soil and are sensitive to frost, making them ideal for warm climates.
Choosing the Right Peanut Variety
Peanuts come in several varieties, and selecting the right one for your climate is crucial for successful growth. Here are some common varieties:
- Virginia Peanuts: Known for their large kernels, these are often used for roasting and are popular in the snack food industry. They grow best in warmer climates.
- Runner Peanuts: This type produces medium-sized nuts and is commonly used for peanut butter. They are well-suited for Southern U.S. climates.
- Spanish Peanuts: These have smaller kernels with a higher oil content, making them excellent for oil production and snacks. They can tolerate poorer soils better than other varieties.
- Valencia Peanuts: Known for their sweet flavor, Valencia peanuts typically have three or more kernels per pod. They are often used for boiling.
Choose a variety that best suits your climate and intended use.
Timing is Everything
Planting Season
Peanuts thrive in warm weather, so it’s essential to plant them at the right time. Aim to sow your seeds after the last frost date in your area, typically in late spring or early summer when soil temperatures reach at least 65°F (18°C).
In most regions, this timing falls between April and June. Monitor local weather conditions to ensure optimal planting times.
Preparing the Soil
Healthy soil is the foundation for successful peanut cultivation. Peanuts prefer sandy loam soil that drains well, as they are susceptible to root rot in overly moist conditions. Here’s how to prepare your soil:
- Choose a Location: Select a sunny spot in your garden that receives at least 6-8 hours of sunlight each day.
- Soil Testing: Consider conducting a soil test to determine pH levels and nutrient content. Peanuts prefer a slightly acidic to neutral pH (6.0-7.0).
- Amend the Soil: Work in plenty of organic matter, such as compost, to improve soil structure and fertility. This will also help retain moisture and provide nutrients for your plants.
- Tilling: Till the soil to a depth of about 12 inches to loosen it and create an ideal environment for root development.
Sowing the Seeds
Seed Preparation
Before planting, choose healthy, disease-free seeds. You can purchase seeds from a nursery or garden center, or save seeds from a previous harvest. If using saved seeds, ensure they are from a reputable source and properly cured.
Planting Depth and Spacing
- Planting Depth: Sow peanut seeds 1-2 inches deep in the soil.
- Spacing: Space seeds 6-8 inches apart in rows that are 2-3 feet apart. This spacing allows ample room for plants to grow and develop.
Watering Immediately After Planting
Water the seeds thoroughly right after planting to ensure good soil-to-seed contact. This initial watering helps with germination and encourages seedling establishment. Keep the soil consistently moist but not waterlogged.
Care and Maintenance
Watering
Peanuts require consistent moisture, especially during their flowering and pod formation stages. Here’s how to manage watering effectively:
- Frequency: Water once a week, providing about 1 inch of water per week. Adjust based on rainfall and temperature.
- Method: Water at the base of the plants to avoid wetting the foliage, which can lead to disease.
Fertilizing
While peanuts can fix their own nitrogen, a balanced fertilizer can help promote healthy growth, especially if your soil lacks nutrients. Here are some tips for fertilizing:
- Pre-Planting: Incorporate a balanced fertilizer (10-10-10) into the soil before planting.
- Side Dressing: Apply additional fertilizer when plants are about 6 inches tall and again when they begin to flower.
Weeding and Mulching
Weeds can compete with your peanuts for nutrients and water, so regular maintenance is crucial.
- Weeding: Hand-pull weeds as needed, taking care not to disturb the peanut plants’ roots.
- Mulching: Apply a layer of organic mulch (straw, grass clippings, or wood chips) around the plants to suppress weeds, retain moisture, and regulate soil temperature.
Pest and Disease Management
Peanuts can be susceptible to various pests and diseases. Here are some common issues and how to manage them:
- Pests: Watch for aphids, thrips, and root-knot nematodes. Introduce beneficial insects like ladybugs to control aphid populations, and use crop rotation to minimize nematode issues.
- Diseases: Fungal diseases like leaf spot can be mitigated through proper spacing, watering at the base of plants, and avoiding overhead watering. Consider using fungicides if necessary.
Flowering and Pod Development
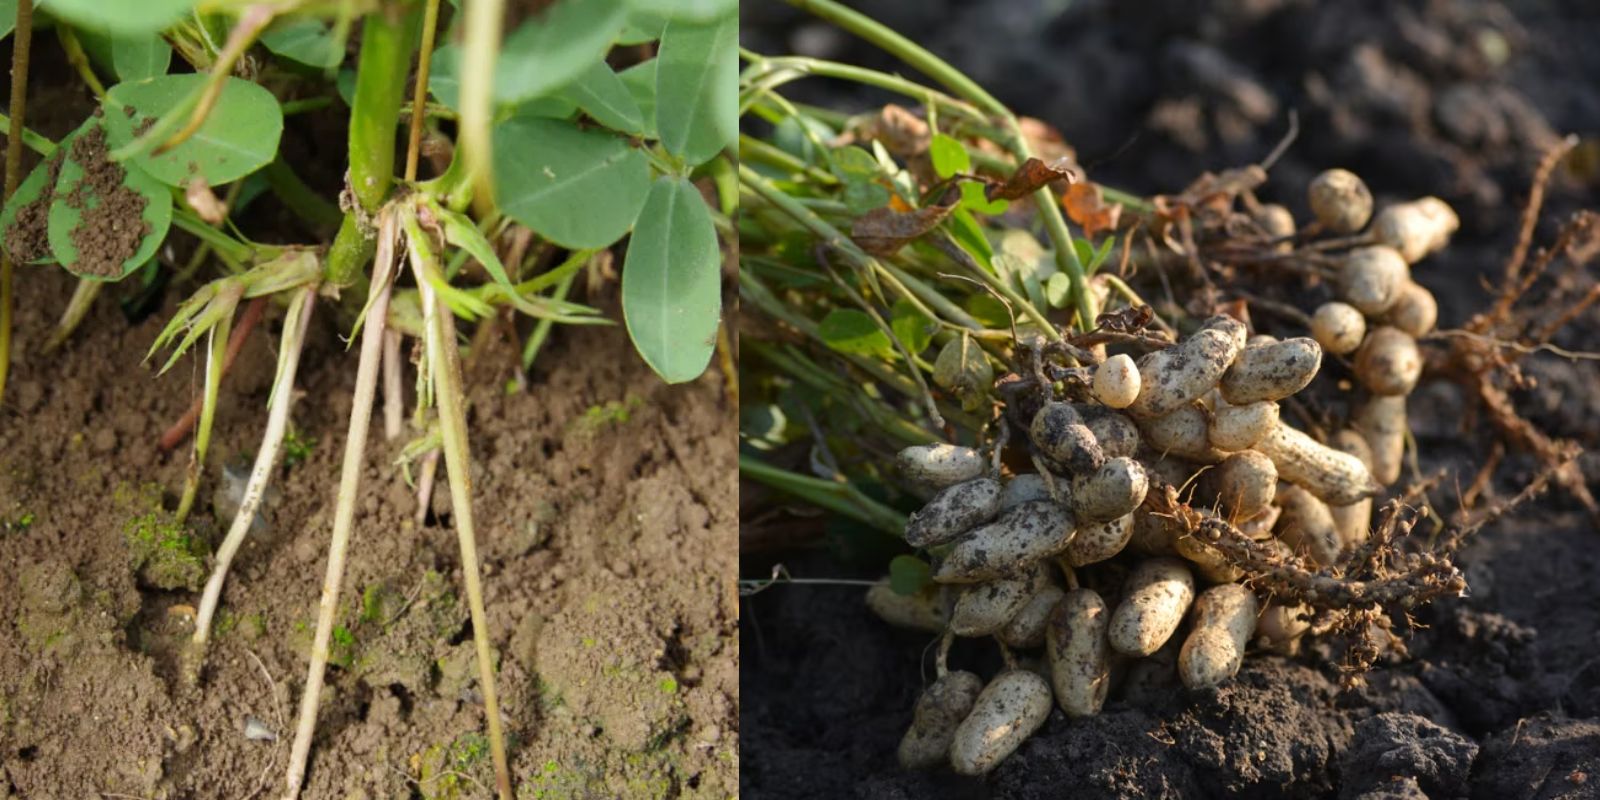
As your peanut plants mature, they will produce yellow flowers that eventually develop into pods. This unique growth habit requires special attention:
- Flowering: Peanut flowers typically appear 30-40 days after planting. Once pollinated, the flowers produce “peg” structures that grow down into the soil, forming pods.
- Soil Coverage: Ensure that the soil remains well-aerated and moist during this stage to encourage healthy pod formation.
Harvesting Peanuts
When to Harvest
Peanuts are typically ready for harvest about 120-150 days after planting, depending on the variety. Look for the following signs:
- Foliage Color: The leaves will start to yellow, indicating that the plant is nearing the end of its life cycle.
- Pods: You can gently dig around the base of a few plants to check for pod development. If the pods are plump and full, it’s time to harvest.
Harvesting Process
- Digging: Use a garden fork or spade to carefully dig around the plants, loosening the soil without damaging the roots or pods.
- Uprooting: Gently lift the entire plant from the ground, making sure to keep the pods attached.
- Drying: Shake off excess soil and hang the plants upside down in a warm, dry place. Allow them to dry for 1-2 weeks, ensuring good air circulation.
Storing Your Harvest
Once the peanuts are fully dried, you can store them for later use. Here’s how:
- Removing the Pods: Gently remove the peanuts from the pods, discarding any damaged or rotten ones.
- Storage: Store the dried peanuts in a cool, dry place in an airtight container. They can also be frozen for extended shelf life.
Enjoying Your Homegrown Peanuts
Now that you have successfully grown and harvested your peanuts, it’s time to enjoy them! Here are some delicious ways to use your homegrown crop:
- Roasted Peanuts: Roast them in the oven with a bit of salt for a tasty snack.
- Peanut Butter: Blend roasted peanuts with a little oil and salt to make your own creamy peanut butter.
- In Recipes: Use peanuts in salads, stir-fries, or as a topping for various dishes.
Conclusion
Growing peanuts at home is not only an enjoyable gardening project, but it also provides a sustainable source of nutrition. With proper care, you can enjoy a bountiful harvest of these delicious legumes. Whether you eat them roasted, as peanut butter, or incorporated into your favorite recipes, homegrown peanuts are a delightful treat. So gather your supplies, follow the steps outlined in this guide, and start your journey to becoming a peanut gardener today!
Happy Gardening!
#PeanutGardening #HomegrownPeanuts #GrowYourOwnFood #GardeningTips #SustainableLiving