
Hydrangeas are one of the most beloved garden plants, known for their large, vibrant flower clusters that add elegance to any outdoor space. While purchasing new plants can be pricey, propagating hydrangeas from cuttings is an easy and cost-effective way to multiply your collection. Whether you’re an experienced gardener or a beginner, this method is straightforward and rewarding. In this guide, we’ll walk you through everything you need to know about growing hydrangeas from cuttings, ensuring success from the start.
Why Grow Hydrangeas from Cuttings?
Propagating hydrangeas has numerous advantages:
- Cost-effective: Grow more plants without buying new ones.
- Genetic consistency: Propagated hydrangeas will be identical to the parent plant, ensuring you replicate the colors and traits you love.
- Sustainability: It’s an eco-friendly way to enhance your garden while reusing existing plants.
- Satisfaction: Watching a small cutting turn into a thriving plant is incredibly rewarding!
When to Take Hydrangea Cuttings
The best time to take hydrangea cuttings is during the growing season, typically in late spring to early summer. This period ensures that the cuttings have enough time to develop roots before colder temperatures arrive.
Avoid taking cuttings when the plant is dormant, as this could reduce the success rate of rooting.
Materials You’ll Need
- Sharp pruning shears or scissors
- Rooting hormone (optional but recommended)
- Small pots or containers with drainage holes
- Potting mix (a blend of soil and perlite works well)
- Clear plastic bags or a propagation dome
- Spray bottle for misting
- Healthy hydrangea plant
Step-by-Step Guide to Growing Hydrangeas from Cuttings
1. Select a Healthy Cutting
- Choose a non-flowering stem from your hydrangea. Flowering stems divert energy to blooms rather than root development.
- Ensure the cutting is about 4-6 inches long and has at least two leaf nodes (the bumps where leaves emerge).
2. Prepare the Cutting
- Using sharp shears, make a clean cut just below a leaf node.
- Remove the lower leaves from the stem to prevent rotting. Keep a few leaves at the top for photosynthesis.
- If the remaining leaves are large, trim them by half to reduce water loss.
3. Apply Rooting Hormone
- Dip the cut end of the stem in rooting hormone to encourage faster and stronger root growth. This step is optional but highly effective.
4. Prepare the Potting Medium
- Fill a small pot or container with a mixture of potting soil and perlite or sand. This ensures good drainage and aeration.
- Moisten the soil lightly before planting.
5. Plant the Cutting
- Make a small hole in the soil and insert the cutting about 2 inches deep.
- Gently firm the soil around the stem to hold it in place.
6. Create a Humid Environment
- Cover the pot with a clear plastic bag or place it under a propagation dome. This helps retain moisture and creates a greenhouse effect.
- Ensure the plastic doesn’t touch the leaves by using stakes or a frame.
7. Place in Indirect Light
- Position the pot in a location with bright, indirect sunlight. Direct sunlight can scorch the delicate cutting.
- Maintain a temperature of around 65-75°F (18-24°C) for optimal rooting.
8. Water and Mist Regularly
- Keep the soil consistently moist but not waterlogged.
- Use a spray bottle to mist the cutting daily, maintaining high humidity levels.
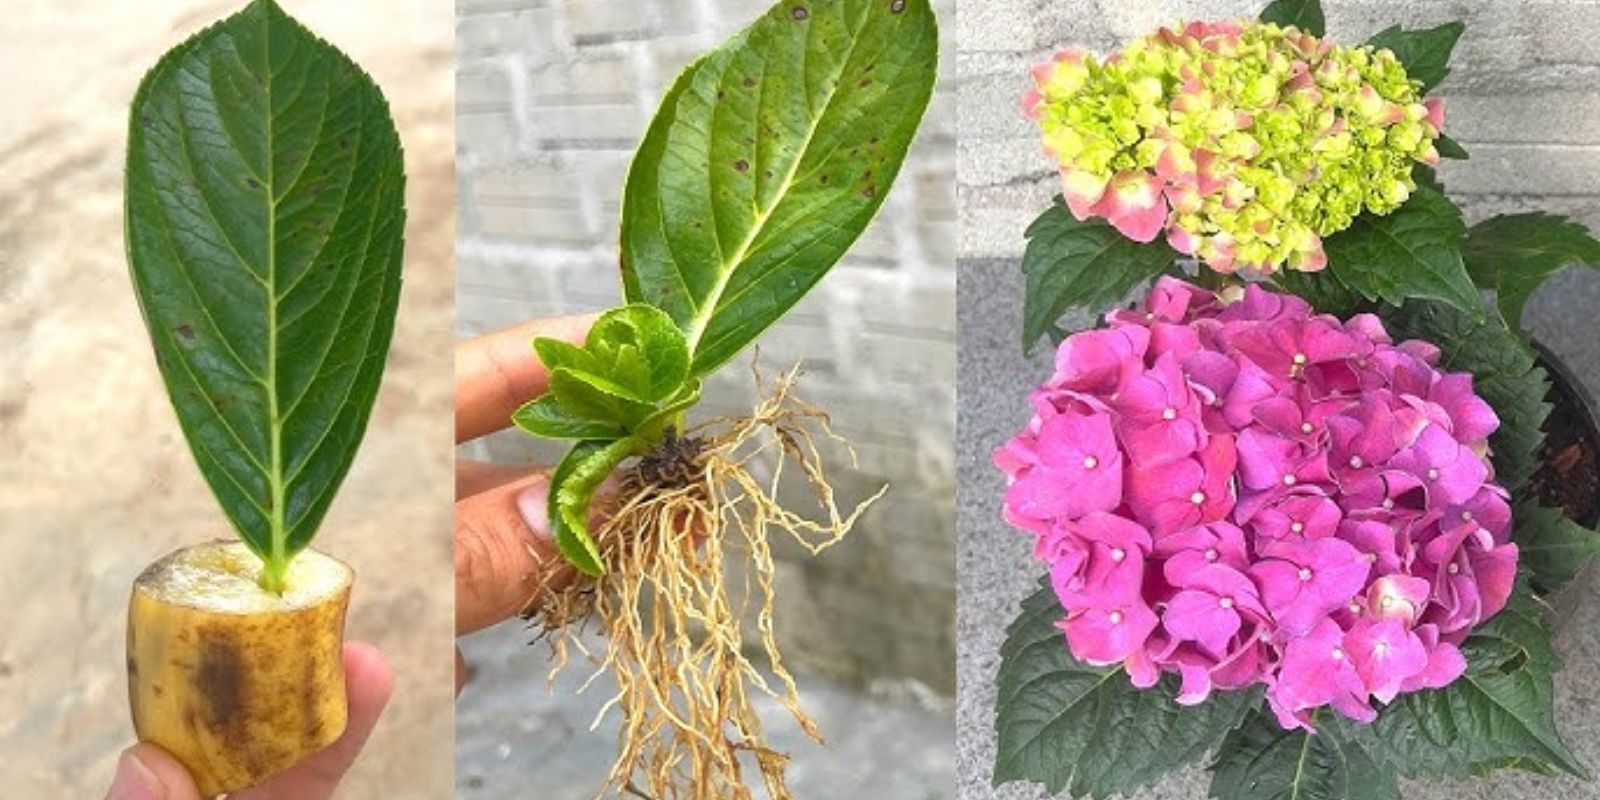
9. Monitor Root Development
- Check for root growth after 4-6 weeks by gently tugging on the cutting. Resistance indicates that roots have formed.
10. Transplant the Cutting
- Once the cutting has established roots, it’s ready to be transplanted.
- Choose a larger pot or a spot in your garden with well-draining soil and partial shade.
Caring for Your New Hydrangea Plant
After successfully propagating your hydrangea cutting, proper care is essential to ensure its growth and blooming potential.
1. Watering
- Hydrangeas prefer consistently moist soil. Water regularly, especially during dry spells, but avoid overwatering.
2. Fertilizing
- Apply a balanced fertilizer during the growing season to support healthy growth and vibrant blooms.
3. Mulching
- Add a layer of mulch around the base of the plant to retain moisture and regulate soil temperature.
4. Pruning
- Prune your hydrangea annually to maintain its shape and encourage new growth. Remove dead or damaged branches as needed.
5. Pest and Disease Management
- Watch for common pests like aphids or spider mites. Treat infestations with insecticidal soap or neem oil.
- Ensure good air circulation around the plant to prevent fungal diseases.
Tips for Success
- Patience is Key: Rooting can take several weeks. Avoid disturbing the cutting during this time.
- Start Multiple Cuttings: Propagate several cuttings at once to increase your chances of success.
- Use Healthy Plants: Always choose disease-free stems for propagation.
- Experiment with Rooting Techniques: Try water propagation by placing cuttings in a jar of water until roots develop, then transplant to soil.
Why You’ll Love Growing Hydrangeas from Cuttings
By propagating hydrangeas, you’re not just expanding your garden; you’re also engaging in a sustainable and rewarding gardening practice. Imagine your garden brimming with lush hydrangeas, all from a single plant you propagated yourself!
Start Growing Today!
Hydrangeas are forgiving plants that thrive with a little care and attention. With this guide, you have all the tools you need to grow these beautiful blooms right from cuttings. Share your journey and photos of your propagated hydrangeas below! 🌸🌿
#HydrangeaPropagation #GrowYourOwn #GardenGoals #DIYGardening #PlantLovers #HydrangeaMagic #GardeningMadeEasy