
Growing melons in your own garden can bring a satisfying harvest of sweet, juicy fruits right to your table. Although melons are known for needing warm weather and plenty of sunshine, the process is not as complicated as you might think. With proper planning, soil preparation, and a little bit of TLC, you can enjoy homegrown melons from your backyard or garden bed.
In this guide, we’ll go over the key steps to successfully growing melons, including choosing the best variety for your region, preparing your soil, supporting healthy growth, and harvesting at the perfect time. Whether you’re planting watermelon, cantaloupe, or honeydew, these steps will ensure your plants have everything they need to thrive.
Step 1: Choose the Right Melon Variety
The first step to successful melon growing is selecting a variety that will thrive in your climate. Melons come in many shapes and sizes, each with different growing requirements.
- Watermelons: These are generally heat-loving and do well in hot summers. Look for varieties like Sugar Baby (great for small spaces) or Crimson Sweet if you have ample space.
- Cantaloupes: Known for their sweet, orange flesh, cantaloupes can thrive in moderate to warm climates. Varieties like Hale’s Best and Ambrosia are popular choices.
- Honeydew Melons: Honeydews need a long growing season and do best in warmer zones. Jade Star and Honey Brew are excellent choices if you have ample sun.
If you’re in a cooler region, opt for fast-maturing varieties or consider starting seeds indoors.
Step 2: Start Seeds Indoors in Cooler Climates
For gardeners in cooler zones or those with short growing seasons, starting melon seeds indoors can give your plants a head start. Begin the process about 3-4 weeks before your last expected frost.
- Prepare Seedling Pots: Use biodegradable pots filled with seed-starting soil, as this allows you to transplant without disturbing the roots.
- Plant and Water: Place one seed per pot, about an inch deep, and water gently. Keep the soil consistently moist.
- Provide Warmth and Light: Melon seeds need warmth (70-80°F) and ample sunlight or grow lights to germinate and grow sturdy.
- Harden Off Before Transplanting: About a week before moving outdoors, gradually expose seedlings to outdoor conditions to toughen them up.
Step 3: Prepare Your Soil for Optimal Growth
Melons thrive in nutrient-rich, well-drained soil with a pH between 6.0 and 6.8. Preparing your soil ensures your plants get the nutrition they need to support fruit growth.
- Add Organic Matter: Mix in compost or well-rotted manure to boost the soil’s organic content and provide a steady supply of nutrients.
- Improve Drainage: If you have clay-heavy soil, consider adding sand or perlite for better drainage. Raised beds are also great for melons if you have poor soil.
- Consider a Soil Test: Testing your soil will tell you if any additional nutrients are needed, especially phosphorus and potassium, which help in fruit development.
Step 4: Transplant Seedlings Outdoors or Direct Sow
Once the soil temperature reaches at least 70°F, it’s time to transplant your seedlings outdoors or direct sow melon seeds in the garden.
- Transplant Carefully: Space plants about 3 feet apart, as melons need room to sprawl. Plant them in a sunny location with good air circulation.
- Water After Planting: Water the seedlings well after planting to help establish roots in their new location.
- Mulch Around Plants: Applying mulch conserves soil moisture, suppresses weeds, and helps regulate soil temperature.
Step 5: Support Plants and Control Weeds
Melons are vining plants that spread widely. Training them to grow on a trellis can save space and improve airflow, reducing disease risk.
- Use a Sturdy Trellis: A-frame or vertical trellises can hold the weight of smaller melons like cantaloupe. For larger melons, consider a strong support structure.
- Mulch to Control Weeds: A layer of straw or bark mulch around plants can prevent weed growth and keep the area around melons clear of competing plants.
Step 6: Water Consistently and Deeply
Melons are made up mostly of water, so providing consistent moisture is essential, especially when fruits are developing.
- Water at the Base: Avoid wetting the leaves, as this can encourage fungal issues. Instead, water deeply at the base of each plant.
- Water in the Morning: Watering in the morning gives plants a chance to dry off during the day, helping prevent diseases.
- Adjust During Fruit Development: Once fruits are about to ripen, slightly reduce watering. This will concentrate the sugars, resulting in a sweeter melon.
Step 7: Fertilize for Fruit Production
Melons are heavy feeders, so applying fertilizer throughout the season can make a big difference in yield.
- Apply Balanced Fertilizer: Every 2-3 weeks, apply a balanced fertilizer rich in phosphorus and potassium. Organic options like compost tea or fish emulsion work well.
- Avoid Overdoing Nitrogen: Too much nitrogen promotes leaf growth at the expense of fruit production. Stick to balanced nutrients.
Step 8: Pollinate by Hand if Necessary
If your plants aren’t producing as much fruit, it may be due to poor pollination. Hand pollination can increase your chances of a successful crop.
- Identify Male and Female Flowers: Male flowers appear first, followed by females (distinguished by a small fruit at the base).
- Transfer Pollen: Use a small brush to gently transfer pollen from male to female flowers.
Step 9: Prune Excess Growth
Pruning your melon vines can help direct the plant’s energy toward producing larger, higher-quality fruit.
- Prune Side Shoots: Remove any small side shoots that aren’t contributing to the main fruit-bearing vine.
- Limit Fruit Per Vine: Melons produce better when you limit the number of fruits per vine. Aim for 1-2 fruits per main stem for optimal quality.
Step 10: Keep an Eye on Pests and Diseases
Melons can be susceptible to pests and diseases, so regular checks are essential for catching issues early.
- Watch for Common Pests: Aphids, cucumber beetles, and squash bugs are common threats. Hand-pick pests or use organic insecticidal soap if necessary.
- Monitor for Disease: Powdery mildew and fusarium wilt are frequent problems. Ensuring good airflow and avoiding overhead watering helps prevent these diseases.
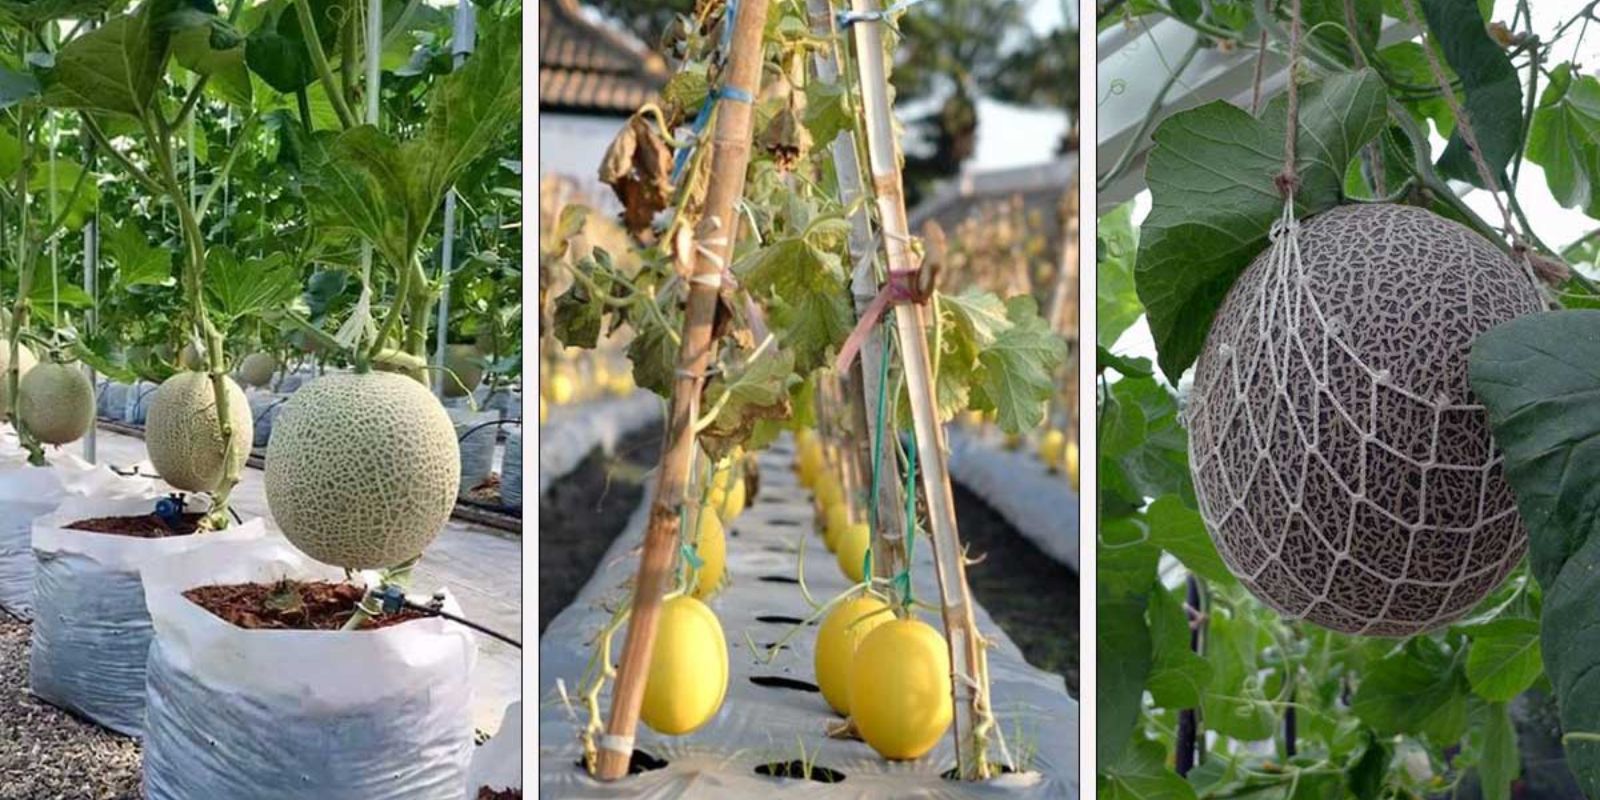
Step 11: Support Fruits if Growing Vertically
If you’re using a trellis, make sure to support the melons to prevent them from falling.
- Create Slings: Use soft fabric or mesh to create slings that support the melons as they grow on the vine.
- Check Regularly: As the melons grow heavier, adjust the slings to ensure they don’t slip.
Step 12: Harvest at the Perfect Time
Knowing when to pick melons is crucial for enjoying their maximum sweetness.
- Check for Sweet Smell: Ripe melons emit a sweet aroma, especially near the stem.
- Look for Color Change: The rind color often changes slightly, and the skin develops a dull, less shiny appearance.
- Watch the Stem: Ripe melons typically begin to detach from the stem naturally. A slight tug should release them easily.
Step 13: Store and Enjoy
After picking, store melons in a cool place or refrigerate them if you won’t eat them immediately.
- Store at Room Temperature: If they’re not fully ripe, leave melons on the counter to continue ripening.
- Refrigerate When Ripe: Once fully ripe, store melons in the fridge for up to a week.
Step 14: Save Seeds for Next Season
If you enjoyed your melon crop, consider saving seeds for next year!
- Remove and Clean Seeds: Scoop seeds from a mature melon, rinse, and remove any pulp.
- Dry Thoroughly: Spread the seeds on a paper towel and allow them to dry completely.
- Store in a Cool, Dark Place: Place dried seeds in an envelope or jar and store in a cool, dark location until next planting season.
Conclusion: Growing Melons with Ease
With patience and a little know-how, you’ll soon have a crop of delicious melons ready for your table. Growing your own melons is a rewarding experience, allowing you to enjoy the freshest, most flavorful fruit possible.
Ready to start your melon-growing adventure? Let’s see those gardens thrive! 🍈🌞 #HomegrownMelons #GardenHarvest #GrowYourOwnFood #OrganicGardening #MelonSeason