
Croton plants (Codiaeum variegatum) are tropical wonders, loved for their vibrant foliage that comes in shades of red, orange, yellow, and green. These stunning houseplants bring life and color to any indoor or outdoor space. While they can be purchased as mature plants, propagating crotons from stem cuttings is a simple and rewarding way to multiply your collection or share plants with friends. This guide will take you through everything you need to know about growing croton plants from stem cuttings successfully.
Why Grow Croton Plants From Cuttings?
Propagating crotons from stem cuttings is not only a cost-effective way to expand your garden, but it also gives you the satisfaction of nurturing a plant from its very beginning. Crotons are resilient and relatively easy to propagate, making them an excellent choice for both beginner and experienced gardeners. Plus, who wouldn’t want more of these beautiful, eye-catching plants?
What You Will Need:
- A healthy, mature croton plant
- Pruning shears or a sharp knife
- Rooting hormone (optional but helpful)
- A small pot or container with drainage holes
- Well-draining potting soil or water for rooting
- Plastic bag or humidity dome
- Spray bottle for misting
- Clean water
Step-by-Step Guide to Growing Croton Plants From Stem Cuttings
1. Choose a Healthy Stem
Begin by selecting a healthy, mature croton plant as your source for cuttings. Look for a stem that is 4-6 inches long and has vibrant leaves. Ensure that the stem is disease-free and free of pests. Avoid using stems that are too young or too woody, as they may not root effectively.
2. Make the Cut
Using a clean, sharp knife or pruning shears, make a diagonal cut just below a leaf node (the area where leaves or stems grow from the main stem). Cutting at an angle increases the surface area for rooting, which helps encourage faster root development. Aim to make the cut smooth and avoid crushing the stem.
3. Remove Lower Leaves
Once you’ve taken your cutting, remove the leaves from the lower half of the stem. This step is essential because it prevents the leaves from sitting in water or soil, which could lead to rot. Keep 2-3 leaves at the top of the cutting intact to allow for photosynthesis.
4. Apply Rooting Hormone (Optional)
While crotons can root without any assistance, applying a rooting hormone can significantly improve your success rate. Dip the cut end of the stem into rooting powder or gel, ensuring that the exposed nodes are well-coated. Rooting hormone contains plant hormones that stimulate root growth, giving your cutting a head start.
5. Choose Your Rooting Medium
Croton cuttings can be rooted in either soil or water. Each method has its advantages:
- Rooting in Soil: Fill a small pot or container with well-draining potting soil. Make a small hole in the soil and gently insert the cutting, ensuring the nodes are buried. Firm the soil around the cutting to hold it in place.
- Rooting in Water: Place the cutting in a jar of clean water, ensuring that the bottom nodes are submerged but the leaves stay above water. Change the water every few days to keep it fresh and oxygen-rich.
6. Create a Humid Environment
Crotons thrive in humid conditions, so it’s important to replicate this environment for your cuttings. If you’re rooting in soil, cover the cutting with a plastic bag or place it under a humidity dome to trap moisture. For water propagation, mist the cutting regularly with a spray bottle to maintain high humidity levels.
7. Place in Bright, Indirect Light
Position your cutting in a spot with bright, indirect sunlight. Avoid placing it in direct sunlight, as this can scorch the leaves and dry out the cutting. Crotons need consistent warmth to root, so keep the temperature between 70-80°F (21-27°C).
8. Water and Wait
If rooting in soil, keep the medium consistently moist but not soggy. Overwatering can lead to root rot, so check the soil regularly. For water propagation, monitor the water level and ensure the nodes remain submerged.
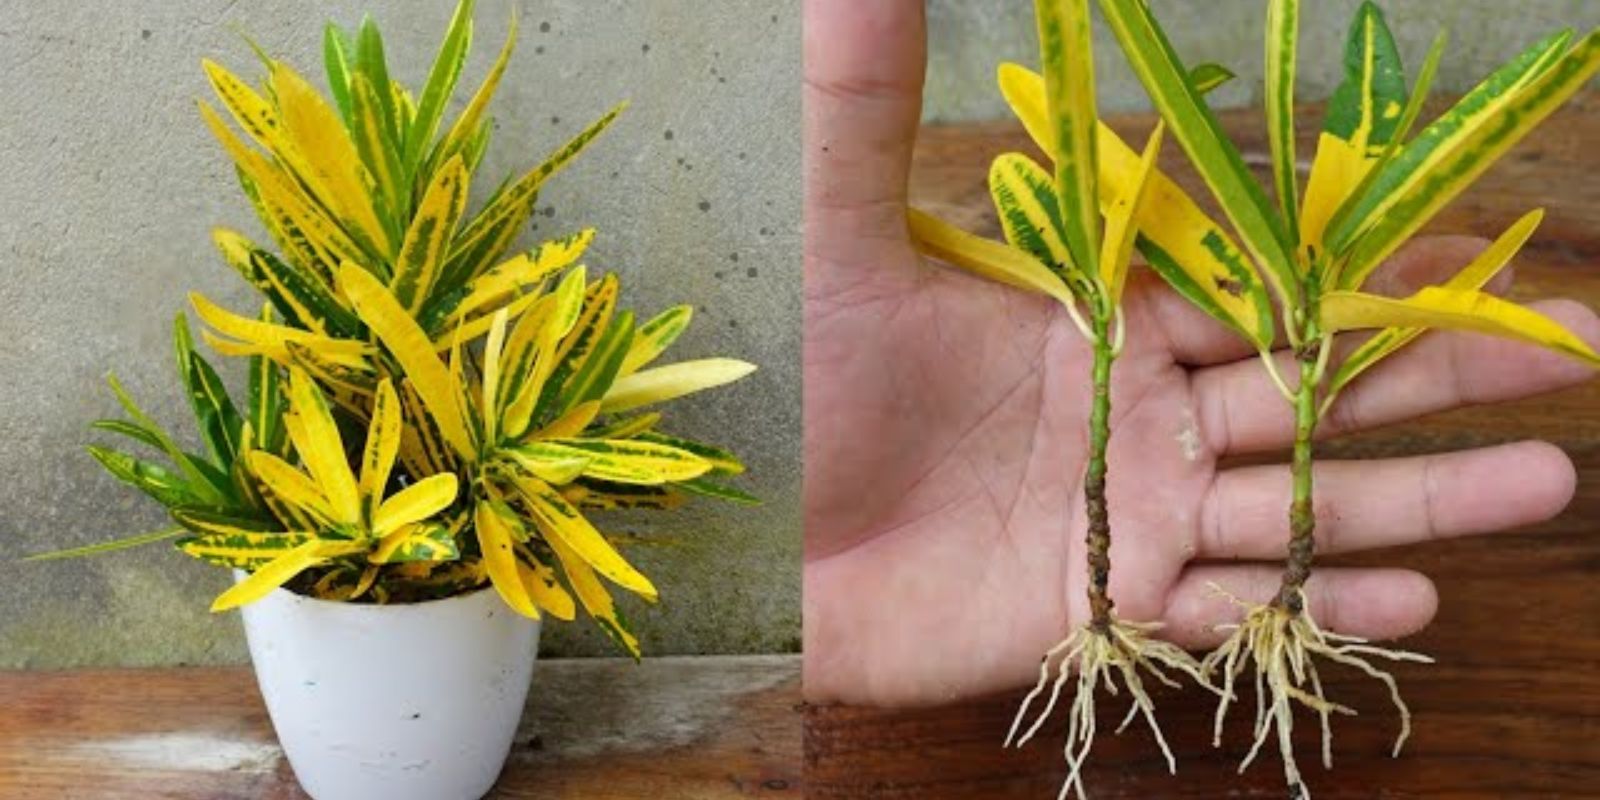
9. Watch for Root Growth
Roots typically begin to develop within 4-6 weeks. In water, you’ll be able to see the roots as they grow. In soil, gently tug on the cutting to check for resistance, which indicates root formation. Be patient—rooting can sometimes take a little longer, depending on environmental conditions.
10. Transplant the Cutting
Once the roots are at least 1-2 inches long, it’s time to transplant your cutting. If it was rooted in water, carefully move it to a small pot filled with well-draining potting soil. Water the soil lightly to help the cutting settle in its new home. Keep the plant in a warm, humid environment as it acclimates.
Tips for Success
- Consistency is Key: Keep the environment warm, humid, and consistent for best results.
- Use Sterile Tools: Always use clean, sharp tools to prevent the spread of diseases.
- Avoid Overwatering: Soggy soil can quickly lead to root rot, so make sure your pot has proper drainage.
- Be Patient: Propagation takes time. Resist the urge to check for roots too often, as this can disrupt the process.
- Acclimate Slowly: Once the cutting is established, gradually expose it to more light and less humidity to help it adapt to normal conditions.
Common Problems and Solutions
Problem: Cutting is wilting
- Cause: Low humidity or lack of water.
- Solution: Increase humidity by misting regularly or using a plastic bag cover. Ensure the soil or water is not drying out.
Problem: No roots after several weeks
- Cause: Low temperatures or insufficient light.
- Solution: Move the cutting to a warmer location with bright, indirect light.
Problem: Yellowing leaves
- Cause: Overwatering or poor drainage.
- Solution: Check the soil’s moisture level and adjust watering. Ensure the pot has drainage holes.
Why You’ll Love Propagating Crotons
Growing croton plants from stem cuttings is a fun and rewarding project that allows you to create new plants from your existing ones. These vibrant plants make fantastic gifts and add a touch of the tropics to any space. Plus, propagating plants is a sustainable way to garden, saving both money and resources.
Final Thoughts
Crotons are more than just houseplants; they’re living pieces of art that brighten any room or garden. By following these simple steps, you can successfully propagate croton plants from stem cuttings and enjoy their dazzling beauty for years to come. So, why not give it a try? Grab your pruning shears and start growing your croton collection today!
🌱 Have you tried propagating crotons? Share your experience or tips in the comments below! 🌿
#CrotonPlants #PropagationTips #TropicalGardening #IndoorPlants #HouseplantPropagation #GardeningHacks #PlantLovers #GardeningMadeEasy #DIYPropagation