
Growing a walnut tree from seed is a rewarding and sustainable way to cultivate your own nut-producing tree. While it takes patience, the process is simple if you follow the right steps. Whether you’re interested in growing black walnuts (Juglans nigra) or English walnuts (Juglans regia), this guide will take you through everything you need to know to successfully plant and nurture a walnut tree from seed.
Why Grow a Walnut Tree from Seed?
Growing a walnut tree from seed is an economical and environmentally friendly way to establish a tree in your backyard or orchard. Instead of buying a sapling, you can harvest seeds from existing walnut trees and germinate them yourself. Here are some reasons to start growing walnuts from seed:
✅ Cost-effective – No need to buy expensive saplings.
✅ Eco-friendly – Helps restore green spaces and improve air quality.
✅ Nut production – Enjoy fresh, organic walnuts at home.
✅ Aesthetic value – A beautiful shade tree for your garden.
Now, let’s explore how you can grow your own walnut tree from seed.
Step 1: Collect Fresh Walnuts
To start, you need to gather fresh, mature walnuts from a tree. You can find them in late summer to early fall when they naturally drop from the tree.
- Look for plump, fully matured walnuts that have fallen to the ground.
- The outer husk may still be green; avoid nuts that look damaged or moldy.
- If you don’t have access to a tree, you can buy fresh, unprocessed walnuts (not roasted or salted) from local farms.
Once collected, you’ll need to remove the outer husk before proceeding to the next step.
Step 2: Remove the Outer Husk
The outer husk of a walnut contains tannins, which can inhibit germination if not removed properly.
1️⃣ Let the walnuts dry for a few days to soften the husk.
2️⃣ Peel or scrape off the husk using gloves (walnut husks stain hands).
3️⃣ Rinse the seeds in water to remove remaining debris.
💡 Pro Tip: To check if a walnut seed is viable, drop it in a bucket of water. Healthy seeds sink, while bad seeds float. Discard any floating seeds.
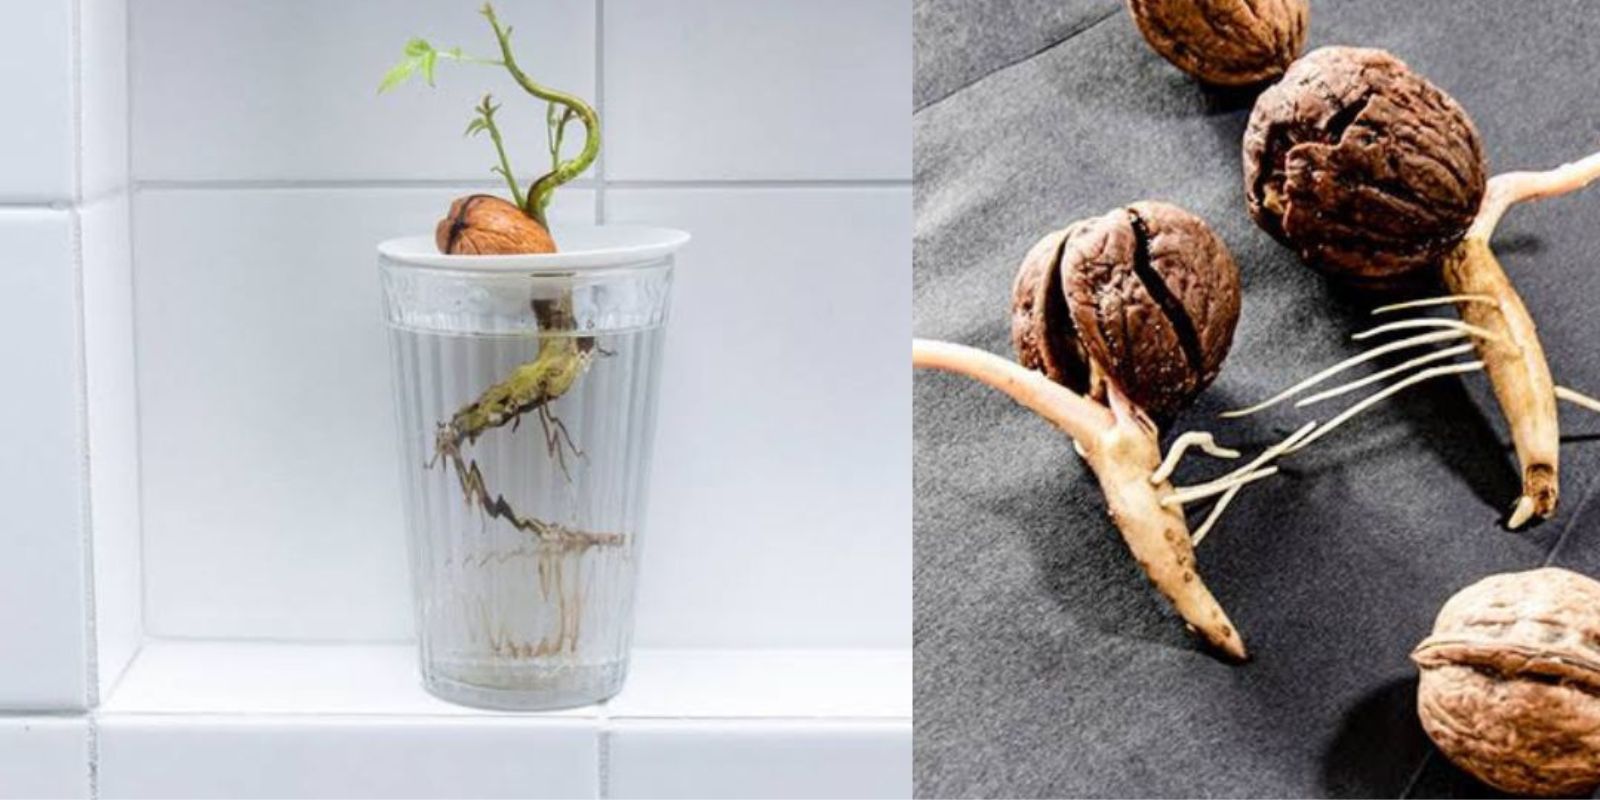
Step 3: Cold Stratification for Germination
Walnut seeds need a cold period (stratification) to break dormancy and start sprouting. This mimics natural winter conditions.
Method 1: Refrigeration Stratification (Recommended for controlled germination)
- Dampen a paper towel or peat moss and wrap the walnut seeds.
- Place the wrapped seeds in a plastic bag or airtight container.
- Store in the refrigerator at 34–40°F (1–4°C) for 90–120 days.
- Check every few weeks to keep the medium moist and remove any moldy seeds.
Method 2: Outdoor Natural Stratification
If you prefer a natural approach, plant the walnuts directly into the soil in fall. The cold winter will naturally stratify the seeds, and they will germinate in spring.
Step 4: Planting the Germinated Seeds
After stratification, it’s time to plant the seeds.
1️⃣ Choose a planting location – Walnut trees need full sun and well-draining soil.
2️⃣ Dig a hole – Plant the seeds 2 inches deep, spacing them 10–15 feet apart for healthy root development.
3️⃣ Water thoroughly – Keep the soil moist but not soggy.
4️⃣ Protect from animals – Squirrels love walnuts! Cover with a wire mesh if needed.
🌱 If you’re planting in a pot first, choose a deep container to accommodate the taproot.
Step 5: Caring for Your Young Walnut Tree
Once your seedling emerges, provide proper care to ensure it grows into a healthy tree.
Watering & Mulching
✅ Water deeply once a week, especially in the first two years.
✅ Apply a layer of mulch around the base to retain moisture and suppress weeds.
Sunlight & Soil
✅ Walnuts thrive in full sun (at least 6–8 hours daily).
✅ Use well-draining, slightly acidic to neutral soil (pH 6–7.5).
Fertilizing
✅ Apply a balanced fertilizer (10-10-10) in early spring.
✅ Avoid excessive nitrogen, as it promotes leaf growth over nut production.
Pruning
✅ Prune in late winter to remove weak or crossing branches.
✅ Train the tree to develop a strong central leader for structural integrity.
Step 6: Waiting for Nut Production
Growing a walnut tree requires patience. Here’s what to expect:
- Seedlings take 1–2 years to establish.
- Walnut trees start producing nuts in 5–7 years (sometimes longer for black walnuts).
- Full production happens after 10–15 years.
Once mature, your tree will yield delicious, organic walnuts every year!
Common Problems & Solutions
🚨 Pests (Squirrels, Aphids, Walnut Husk Flies)
✔ Use protective netting or deterrents to keep squirrels away.
✔ Spray neem oil for aphid control.
🚨 Diseases (Walnut Blight, Root Rot)
✔ Avoid overhead watering to prevent fungal infections.
✔ Ensure good air circulation and remove infected leaves.
🚨 Slow Growth
✔ Ensure proper sunlight and fertilization.
✔ Avoid overwatering, which can stunt root development.
Final Thoughts
Growing a walnut tree from seed is an exciting and fulfilling gardening project. With patience and the right care, you can enjoy the beauty and benefits of homegrown walnuts for decades.
🌱 Would you try growing a walnut tree from seed? Let us know in the comments! 💬👀