
Introduction
Potatoes are a staple in many kitchens, known for their versatility and deliciousness. The good news for those with limited garden space is that you can still achieve a plentiful harvest of these tubers. Growing potatoes in a small space is entirely feasible with a few smart techniques and some creative thinking. Whether you have a balcony, a small yard, or even just a few square feet indoors, you can cultivate a bumper crop of potatoes. This article will guide you through the steps to maximize your potato yield in compact areas, ensuring you enjoy a thriving harvest without needing a large garden plot.
1. Choose the Right Variety
Selecting Potato Varieties
Choosing the right type of potato is crucial when growing in limited space. Some varieties are better suited to container growing or small gardens. Look for:
- New Potatoes: These are smaller, tender varieties that are well-suited to containers. They mature quickly and are perfect for small spaces.
- Fingerling Potatoes: Known for their unique shapes and rich flavors, fingerling potatoes are ideal for compact growing areas. They produce high yields even in confined spaces.
- Dwarf Varieties: Varieties specifically bred for container gardening or small spaces can also be a good choice. They typically have a shorter growth cycle and require less space.
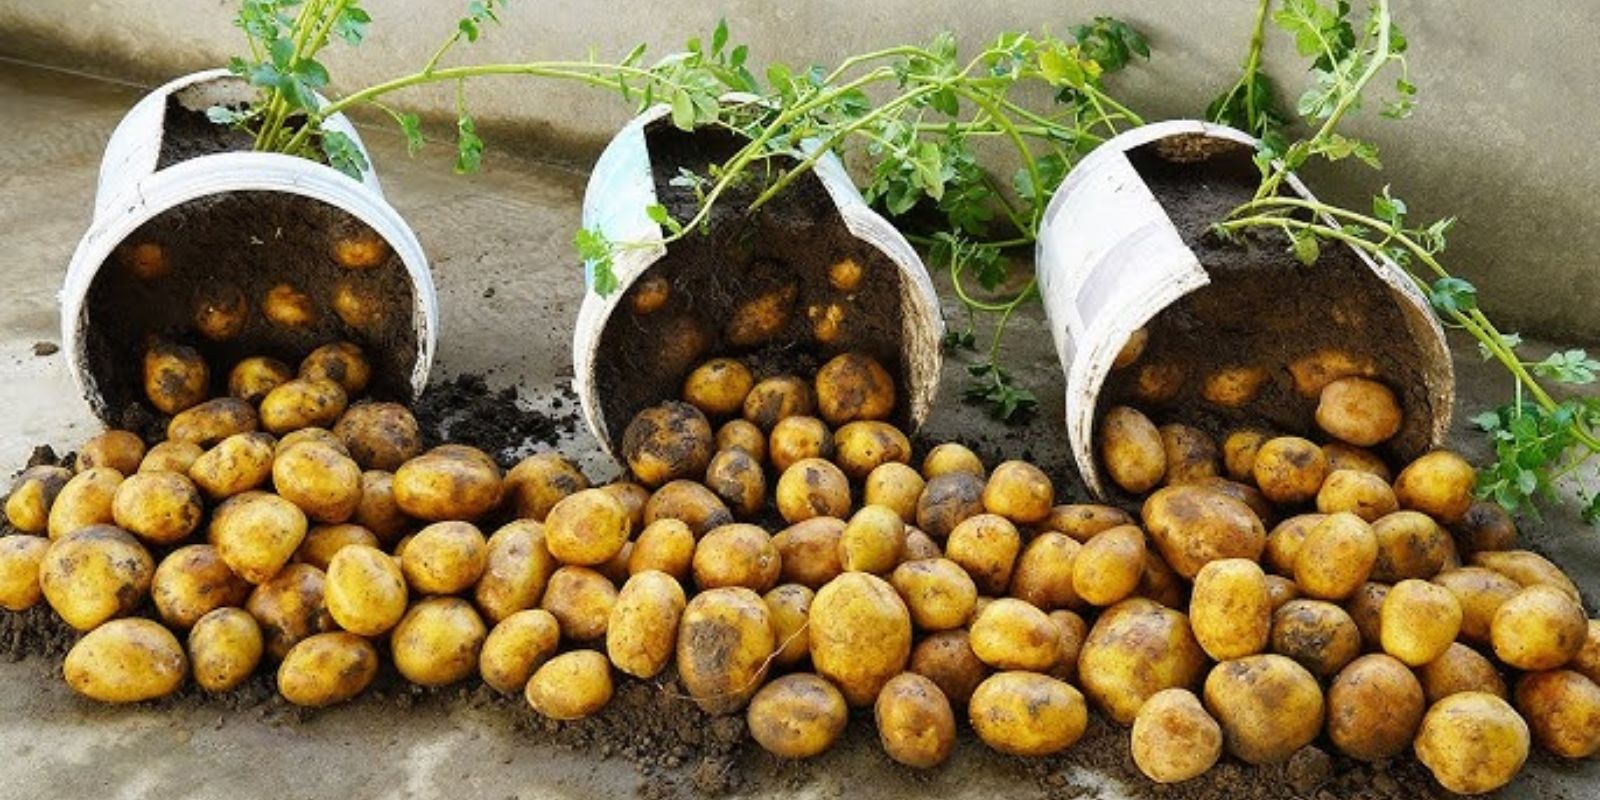
2. Select Your Container
Container Options
The container you choose will significantly impact your potato harvest. Consider these options:
- Large Pots: A pot with a diameter of at least 12 inches and a depth of 12-18 inches is ideal. Ensure it has drainage holes to prevent waterlogging.
- Buckets: Recycled buckets, preferably with drainage holes drilled in the bottom, work well. They’re inexpensive and readily available.
- Potato Towers: These are specially designed containers that allow for vertical growing. They can be made of stacked rings or collapsible fabric, providing a way to maximize space vertically.
- Grow Bags: Fabric grow bags are another great option. They’re breathable, easy to move, and come in various sizes.
3. Prepare the Soil
Soil Mix
Potatoes thrive in well-draining, nutrient-rich soil. Prepare your soil mix with the following ingredients:
- Potting Soil: Use high-quality potting soil as the base. It provides a lightweight and well-draining medium.
- Compost: Mix in compost to enrich the soil with nutrients. Compost helps improve soil fertility and moisture retention.
- Sand or Perlite: For better drainage, especially in containers, add a handful of sand or perlite to the mix.
Combine these ingredients in a ratio of 2 parts potting soil, 1 part compost, and a handful of sand or perlite. This mix ensures your potatoes have the right environment to grow healthy and strong.
4. Plant Your Seed Potatoes
Planting Techniques
Seed potatoes are small tubers specifically grown for planting. Follow these steps to plant them effectively:
- Prepare Seed Potatoes: If your seed potatoes are larger than a golf ball, cut them into pieces, making sure each piece has at least one eye (the small buds on the potato). Allow the cut pieces to dry for 24 hours to prevent rot.
- Planting Depth: In your chosen container, plant the seed potatoes about 4-6 inches deep, with the eyes facing up. Space them about 8-12 inches apart if planting more than one per container.
- Cover and Water: Cover the potatoes with the soil mix and water gently. Ensure the soil remains moist but not waterlogged.
5. Maintain Proper Care
Ongoing Care
Proper care is essential to achieving a bountiful potato crop. Follow these maintenance tips:
- Watering: Potatoes need consistent moisture. Water the plants regularly, especially during dry periods, but avoid overwatering. The soil should be kept evenly moist.
- Fertilizing: Use a balanced fertilizer to provide essential nutrients. Apply according to the manufacturer’s instructions. You may need to fertilize every 4-6 weeks during the growing season.
- Hilling: As the plants grow, add more soil or mulch around the base of the plants to cover the tubers. This process, known as hilling, encourages the development of additional tubers and prevents them from becoming exposed to light, which can cause them to turn green and become toxic.
6. Provide Support
Supporting Your Plants
For vertical growing systems like potato towers or grow bags:
- Add Soil: As the plants grow, add more soil or compost to the container, covering the lower leaves. This practice helps to maximize the space and encourages more tuber growth.
- Ensure Stability: Make sure the container or tower remains stable and upright. Secure it if necessary to prevent tipping over as the plants grow taller.
7. Harvesting
When and How to Harvest
Knowing when to harvest your potatoes is key to enjoying a successful crop:
- Timing: Potatoes are typically ready to harvest when the plants have flowered and the foliage begins to yellow. This usually occurs about 10-12 weeks after planting, depending on the variety.
- Harvesting Techniques: Gently dig into the soil with a hand fork or spade, taking care not to damage the tubers. Remove the potatoes and allow them to dry in a cool, dark place for a few hours before storing.
- Early Harvesting: For new potatoes, you can harvest a bit earlier while the tubers are still small and tender. For full-sized potatoes, wait until the plants have completely died back.
Conclusion
Growing a bumper crop of potatoes in a small space is not only possible but can also be incredibly rewarding. By selecting the right variety, using suitable containers, and providing the proper care, you can achieve a plentiful harvest even with limited room. This method of gardening not only maximizes your space but also allows you to enjoy fresh, homegrown potatoes throughout the season.
Motivation
Transform your small space into a productive potato paradise and enjoy a bountiful harvest! Share your success and inspire others with #SmallSpaceGardening and #PotatoHarvest. 🌱🥔
Hashtags