
Hostas are among the most beloved perennial plants in many gardens, known for their lush green leaves, variety of textures, and adaptability to shady spots. However, like all plants, hostas can become overgrown, crowded, or simply too large for their space over time. Dividing overgrown hostas not only rejuvenates the plant but also helps maintain its health, prevents diseases, and gives you the opportunity to propagate new plants. In this comprehensive guide, we will walk you through everything you need to know to divide your hostas successfully in the summer, keeping them beautiful and healthy for years to come.
Why Divide Hostas?
Before we dive into the step-by-step process of dividing hostas, it’s important to understand why it’s necessary to do so. Hostas can grow quite large and become overcrowded in a garden bed, competing for nutrients, water, and space. If left unchecked, the plants may produce fewer leaves and flowers, or even become susceptible to disease. Dividing your hostas will:
- Promote healthier plants by improving air circulation and light penetration.
- Prevent overcrowding and maintain their vigor.
- Give you extra plants to replant in other areas of your garden or share with friends.
- Keep the center of the plant from becoming dead or hollow.
By dividing your hostas regularly, you will ensure that they remain vibrant and continue to thrive year after year.
When is the Best Time to Divide Hostas?
The ideal time to divide hostas is in late spring or early summer, after the plant has started actively growing but before it reaches its full size. This is typically when the leaves are about half-grown. Dividing hostas in early summer allows the plant to establish new roots before the heat of the summer sets in.
However, it is essential to avoid dividing hostas during the hottest months, as this can cause unnecessary stress on the plant and delay the rooting process. Late summer is generally too late to divide hostas since the plants are already in their peak growing season, and transplanting them could stunt their growth.
Key Timing Tips:
- Late spring to early summer (April to June) is the best time for division.
- Avoid dividing during the hottest summer months or when the plant is dormant.
What You Will Need to Divide Hostas
Before you start the division process, make sure you have the following tools and materials on hand:
- Shovel or Spade: To dig up the hosta from the ground.
- Garden Gloves: To protect your hands from sharp edges and soil.
- Watering Can or Hose: To water the plants after division.
- Pruning Shears or Knife: To cut apart the plant if needed.
- Compost or Fertilizer: To enrich the new planting holes and ensure strong growth.
- New Planting Locations: Prepare spots in your garden where the divisions can thrive. Hostas prefer partial to full shade and well-drained, slightly acidic soil.
Step-by-Step Process for Dividing Overgrown Hostas
Now that you have your tools ready, it’s time to start dividing your hostas. Follow these simple steps for a successful division process.
Step 1: Choose the Right Location for Your Hostas
Hostas thrive in shaded areas, so when selecting new spots for your divided plants, choose areas that receive partial to full shade throughout the day. Hostas are adaptable to various soil types but prefer well-drained soil rich in organic matter. Consider enriching the soil with compost or well-rotted manure to provide the best growing conditions for your new plants.
Step 2: Prepare the New Planting Holes
Before digging up the hosta, prepare the new planting holes by digging a hole that is twice as wide as the root ball of the division. Add some compost or organic matter to the hole to improve soil fertility and ensure good drainage. This will give the newly divided hosta roots the best chance to establish themselves quickly.
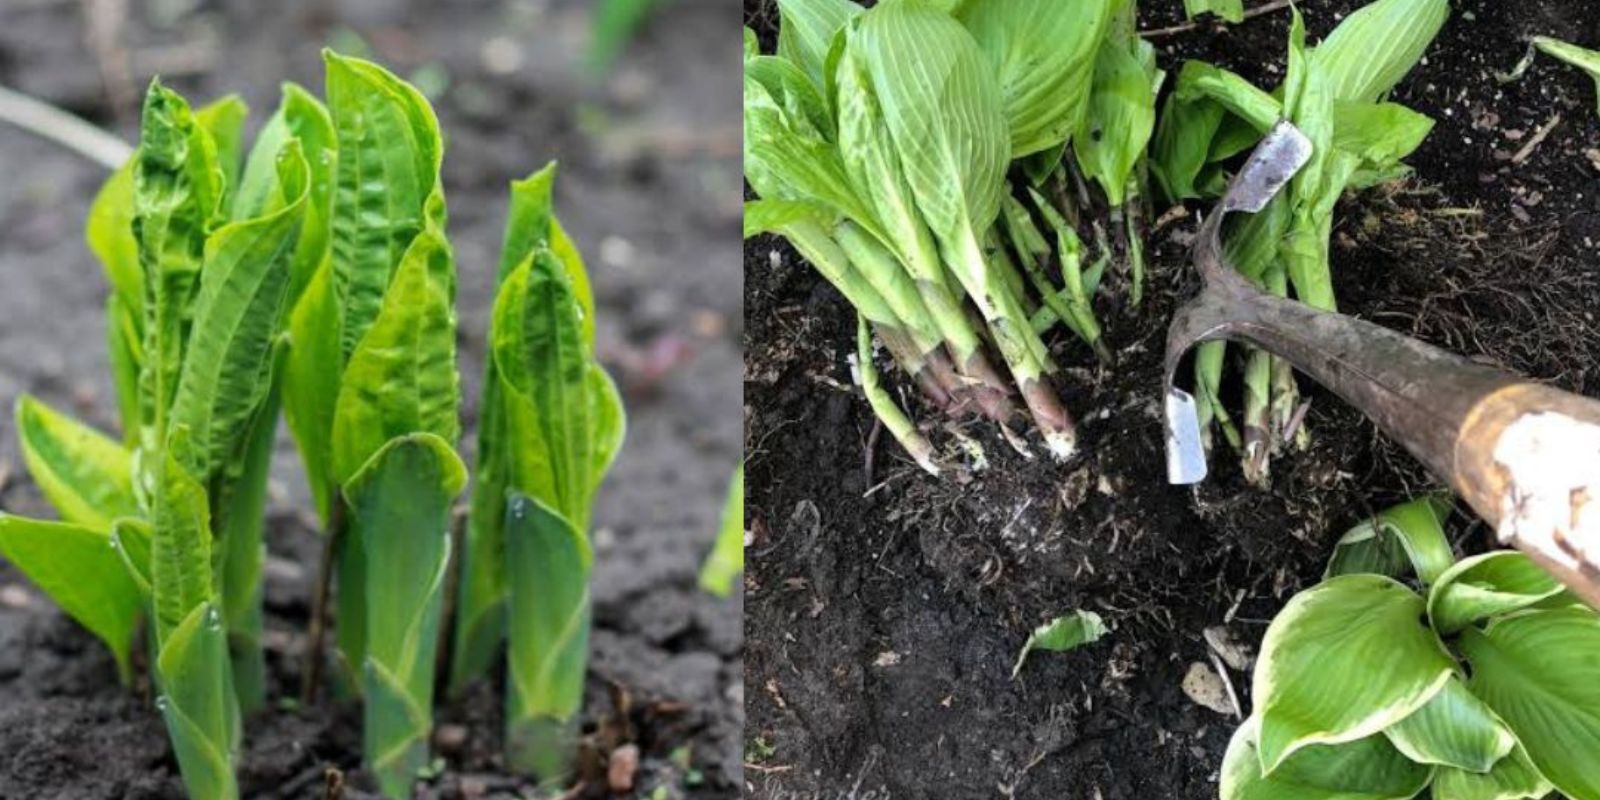
Step 3: Dig Up the Hosta
Using your shovel or spade, carefully dig around the base of the hosta. Begin by loosening the soil several inches from the plant’s root zone to avoid damaging the roots. Once the soil is loosened, gently lift the hosta from the ground, making sure to keep as much of the root system intact as possible.
Step 4: Separate the Clumps
Hostas grow in clumps, and the next step is to divide those clumps into smaller sections. Depending on the size of the original plant, you can divide it into two or more sections. To do this, gently pull the plant apart with your hands or use a sharp knife or pruning shears to cut the clumps into smaller, manageable pieces. Each division should have several healthy shoots and a portion of the root system. Make sure each section is large enough to thrive on its own.
Pro Tip: If the clump is particularly large or difficult to separate by hand, use a serrated knife or a garden fork to divide it more easily.
Step 5: Trim the Leaves and Roots
Once the divisions are separated, trim any damaged or dead roots to encourage healthy regrowth. You can also trim the leaves back by about a third to reduce stress on the plant. Be sure not to cut the roots too much—hostas rely on their roots to provide nutrients, so you want to leave enough for the plant to establish itself in its new location.
Step 6: Replant the Divisions
Now that you have your divisions ready, it’s time to replant them. Place each division into the prepared hole, making sure the crown (the area where the leaves meet the roots) is level with the surrounding soil. Fill in the hole with soil, pressing gently to eliminate air pockets and provide stability for the plant. Water the newly planted divisions thoroughly to help settle the soil and encourage root growth.
Step 7: Water and Mulch
After planting, give your hostas a deep watering to help them establish roots. Mulch around the base of the plant to conserve moisture and keep the soil cool. Organic mulch, such as shredded bark or leaves, is ideal for hostas. Mulching also helps to suppress weeds and maintain soil structure.
Step 8: Ongoing Care for Divided Hostas
After dividing and replanting your hostas, continue to care for them by providing regular watering, especially during dry spells. Hostas are known for their ability to thrive in shady, moist conditions, so maintaining adequate moisture is essential for their success.
In addition, consider applying a balanced fertilizer in the early spring to promote healthy growth and foliage development. Deadhead any spent flowers to keep the plant looking tidy and encourage new growth.
Pro Tip: Divided hostas may take a season or two to become fully established and reach their optimal size. Be patient and continue providing proper care during this time.
Benefits of Dividing Hostas Regularly
Dividing hostas offers numerous benefits to both the plants and your garden:
- Healthier Plants: Dividing prevents overcrowding, reduces the risk of disease, and helps maintain a strong root system.
- More Plants: Every division can be replanted, allowing you to expand your garden or share with friends and family.
- Aesthetic Appeal: Dividing ensures that the hostas maintain their beautiful foliage and vibrant color, making your garden more attractive.
- Better Growth: Divided plants tend to grow faster and more vigorously than crowded ones, resulting in lush foliage and improved flowering.
Conclusion
Dividing overgrown hostas in the summer is an essential gardening practice that helps keep your plants healthy, ensures their continued growth, and provides you with more plants to beautify your garden. By following these simple steps and tips, you can successfully divide your hostas and enjoy the beauty of lush, vibrant foliage for years to come.
Hostas are incredibly versatile plants that can thrive in many different conditions. By giving them the care and attention they need, including regular divisions, you can ensure that your garden remains full of healthy, flourishing plants for many seasons. Happy gardening!