
When it comes to gardening, the journey begins with tiny seeds full of potential. To unlock that potential, a nurturing environment is essential, and the foundation of it all lies in the soil. Commercial seed-starting mixes can be costly and may not always meet your garden’s specific needs. Making your own seed-starting soil at home is not only economical but also ensures you know exactly what’s going into your plants from the very start.
This article will guide you step-by-step to create a homemade seed-starting soil mix that promotes healthy germination, strong roots, and vibrant growth.
Why Make Your Own Seed Starting Soil?
Seed starting soil differs from regular garden soil in its structure, nutrients, and drainage capabilities. The purpose of seed starting soil is to provide a light, well-aerated medium that allows seeds to sprout without resistance while maintaining sufficient moisture for germination.
By making your own mix, you can:
- Control the quality and ingredients of the soil.
- Save money in the long run.
- Avoid synthetic chemicals often present in commercial mixes.
- Customize the mix for specific seeds or plant needs.
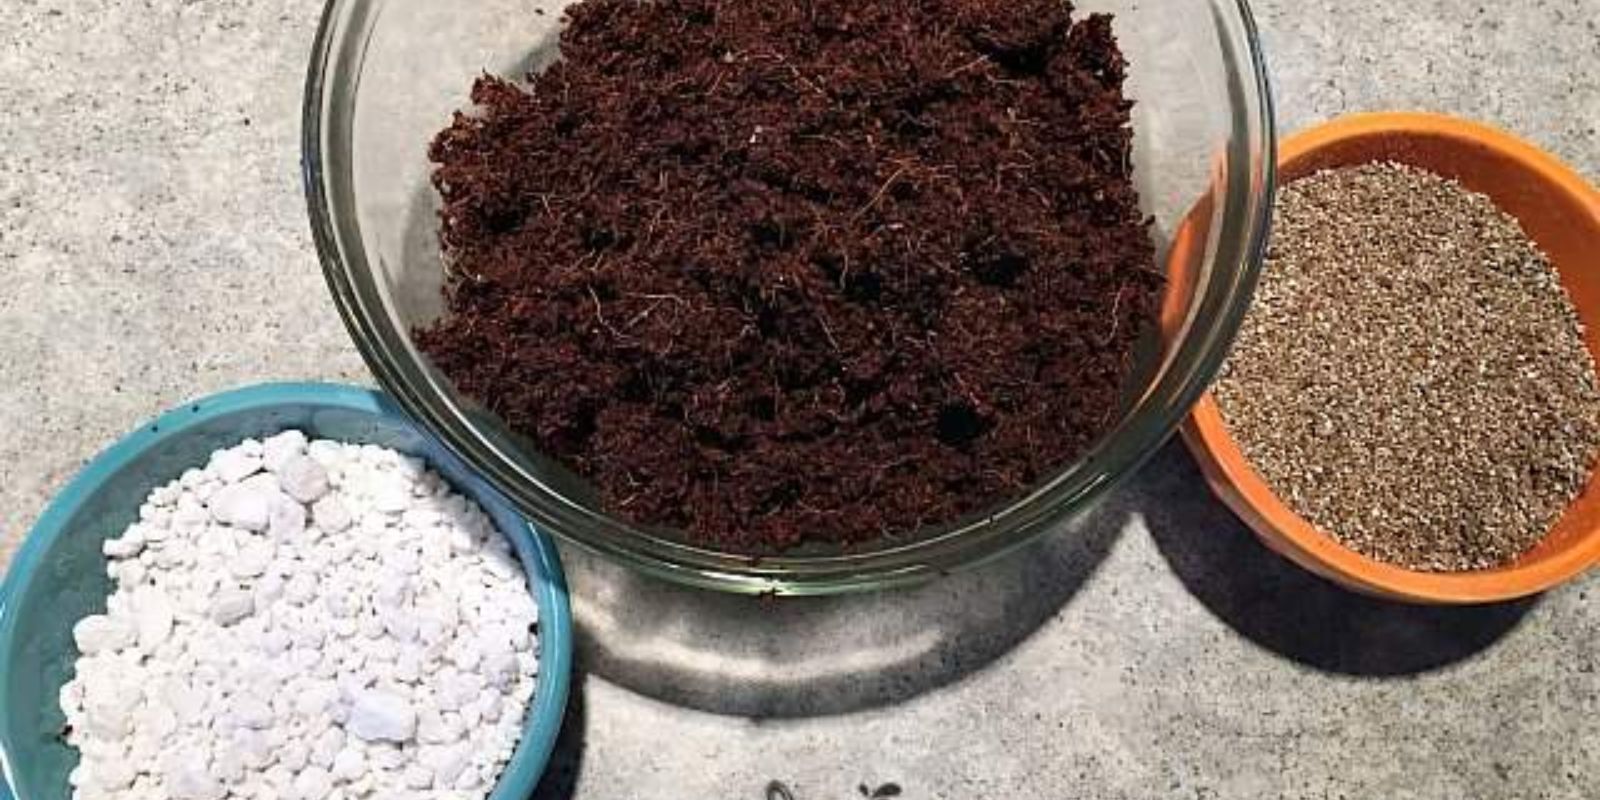
Essential Ingredients for Seed Starting Soil
Creating the perfect seed-starting soil requires a balance of key components:
- Coconut Coir or Peat Moss: Retains moisture without becoming waterlogged. Coconut coir is a sustainable alternative to peat moss.
- Perlite or Vermiculite: Ensures aeration and improves drainage.
- Compost or Worm Castings: Provides organic nutrients essential for seedlings.
- Optional Additives: Sterilized garden soil or sand can be included for additional texture, but ensure they are free from pests or diseases.
Step-by-Step Guide to Making Homemade Seed Starting Soil
1. Gather Your Materials
To create the ideal mix, you’ll need:
- 4 parts coconut coir or peat moss
- 2 parts compost or worm castings
- 1 part perlite or vermiculite
You’ll also need a large container or tub for mixing, a trowel, and water to moisten the mixture.
2. Measure the Ingredients
Accurate measurements are essential to get the right balance of moisture retention, aeration, and nutrients. Use a measuring cup or any consistent container for proportions.
3. Mix Thoroughly
In a large container, combine the coconut coir (or peat moss), compost, and perlite. Use a trowel or your hands (with gloves) to mix everything until evenly distributed. The goal is to create a uniform blend without clumps.
4. Optional: Sterilize the Soil
If you’re concerned about pathogens, pests, or weed seeds, sterilize the mix.
- Spread the soil mixture on a baking tray.
- Bake at 180°F (82°C) for 30 minutes.
- Allow it to cool completely before use.
5. Add Moisture
Lightly moisten the soil mix. It should be damp enough to hold together when squeezed but not so wet that water drips out. Proper moisture ensures the seeds will germinate effectively without drowning.
6. Test the Mix
Before planting, fill a small tray or container with the soil and test its drainage and texture. Pour water over it to ensure it doesn’t compact or stay overly wet. Adjust ingredients if needed by adding more perlite for drainage or coconut coir for moisture retention.
7. Use the Soil Mix
Fill seed trays, small pots, or any container of your choice with the prepared soil mix. Plant your seeds according to the packet instructions, lightly cover them with soil, and water gently. Place the trays in a warm, well-lit area for germination.
Tips for Successful Seed Starting
- Label Your Trays: Use markers to identify the seeds in each tray.
- Monitor Moisture: Keep the soil consistently damp but avoid overwatering.
- Provide Light: Once seeds germinate, place them under grow lights or in a sunny location.
- Transplant Carefully: When seedlings are large enough, gently transplant them into larger pots or garden beds.
Customizing Your Seed Starting Soil
Every gardener has unique preferences, and certain plants may thrive better with slight adjustments.
- For plants that prefer acidic soil, such as tomatoes, you can add a small amount of organic sulfur.
- If your compost is nutrient-rich, you may not need additional fertilizers during the early growth stages.
- For heavy feeders like peppers, consider adding a teaspoon of balanced organic fertilizer to the mix.
Benefits of Homemade Seed Starting Soil
Homemade seed-starting soil allows you to:
- Ensure the use of organic, chemical-free ingredients.
- Experiment with ingredients to find what works best for your plants.
- Promote healthy, disease-free growth from the start.
FAQs About Seed Starting Soil
1. Can I use garden soil instead of a seed starting mix?
Garden soil is typically too dense and may contain pests or pathogens, which can hinder seed germination. It’s best to use a specially designed mix.
2. How long can I store homemade seed-starting soil?
Store your mix in an airtight container or bag in a cool, dry place. It can last for several months if kept away from moisture.
3. Do I need to fertilize seedlings in this soil?
If you’ve included compost or worm castings, your seedlings will have enough nutrients for the first few weeks. Fertilize only if necessary after they develop their first true leaves.
Conclusion: A Growing Start
Homemade seed-starting soil is a game-changer for gardeners who want to take control of their planting process. It’s simple to make, budget-friendly, and ensures your seeds sprout in the best possible environment.
Start your gardening season on the right foot with this easy DIY mix and share your progress with fellow gardeners! 🌱
#DIYSeedStarting #GardeningLove #GrowYourOwnFood #SustainableGardening #HomemadeSoilMix #SeedlingSuccess #GardeningHacks #HealthyPlants #HomeGardeners