
Marigolds are beloved garden flowers known for their vibrant colors, resilience, and ability to repel pests naturally. While many gardeners grow marigolds from seeds, propagating them from cuttings is a quicker and equally effective way to expand your flower collection. This method is especially handy for gardeners who want to clone their favorite marigold plants with consistent results. In this comprehensive guide, we’ll walk you through everything you need to know about growing marigolds from cuttings.
Why Grow Marigolds from Cuttings?
Marigolds are popular not just for their aesthetic appeal but also for their utility in companion planting. They attract pollinators, deter harmful insects, and can thrive in various conditions. Propagating marigolds from cuttings offers several advantages:
- Faster Results: Unlike seeds, cuttings grow faster as they already have the genetic maturity of the parent plant.
- Cloning Your Best Plants: By taking cuttings, you ensure the new plant retains the characteristics of the parent plant, including flower size, color, and disease resistance.
- Cost-Effective: A single marigold plant can give you multiple cuttings, significantly reducing your gardening expenses.
Materials You’ll Need
Before you start, gather the following materials to make the process smooth:
- A healthy marigold plant for cuttings.
- Clean pruning shears or scissors.
- A small container or pot with well-draining soil.
- Rooting hormone powder (optional but recommended for faster rooting).
- Spray bottle or watering can.
- Plastic wrap or a clear plastic bag to create a mini greenhouse effect (optional).
Step-by-Step Guide to Growing Marigolds from Cuttings
Step 1: Choose the Right Plant
Select a healthy, mature marigold plant free of diseases and pests. Look for non-flowering stems as they have more energy to devote to root development compared to flowering stems.
Step 2: Take the Cuttings
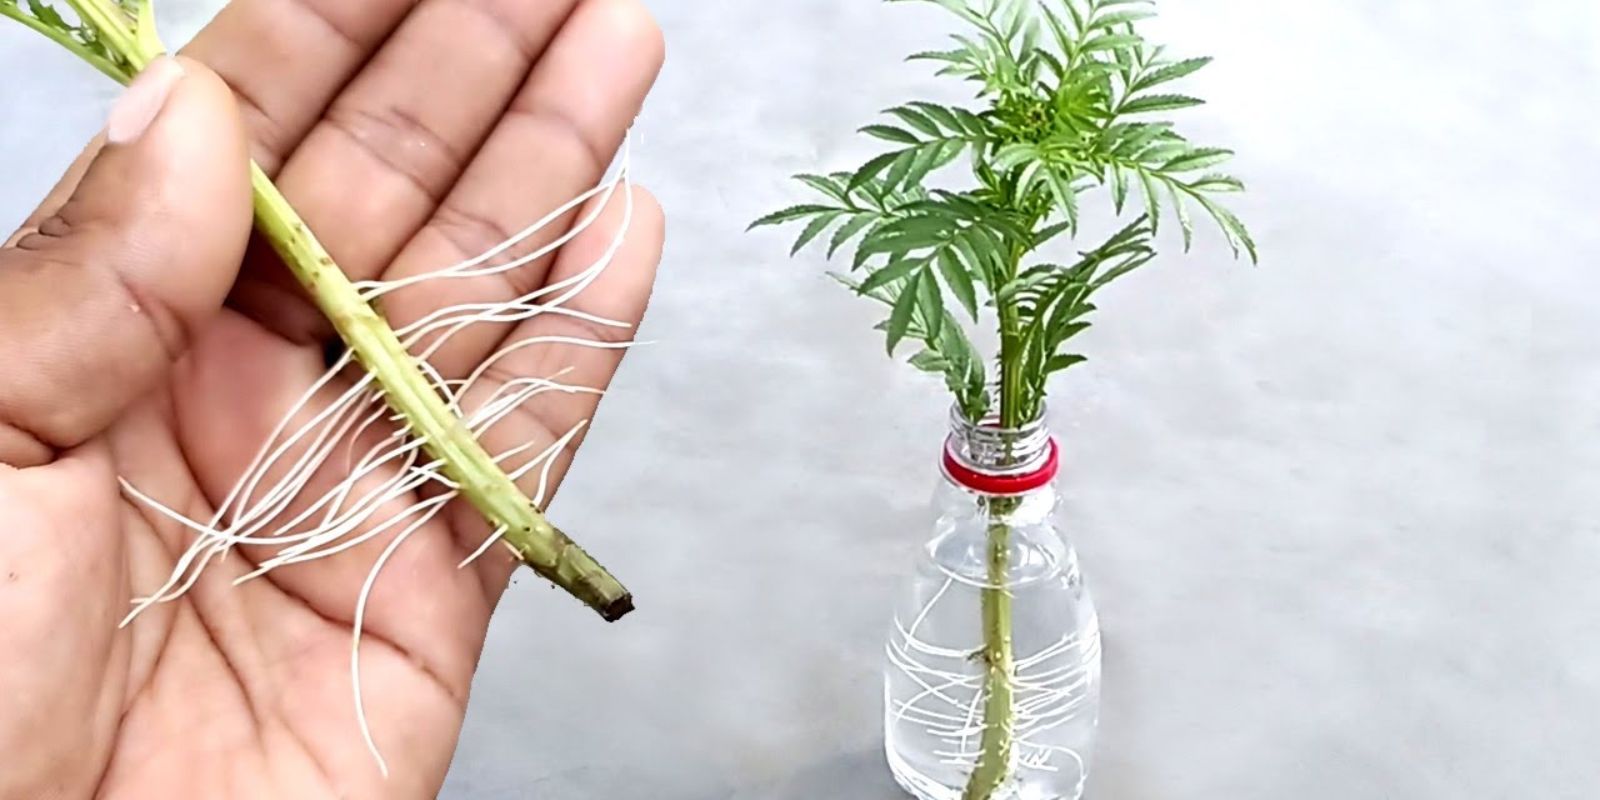
Using clean, sharp scissors or pruning shears, cut a 4-6 inch stem just below a leaf node. The node is where the leaves grow, and it’s the point from which roots will emerge. Make sure your cutting is fresh and not wilted.
Step 3: Prepare the Cutting
Strip the lower leaves from the stem, leaving only 2-3 leaves at the top. This prevents the cutting from losing too much moisture while it focuses on growing roots.
Step 4: Dip in Rooting Hormone (Optional)
If you have rooting hormone, dip the cut end of the stem into the powder. This step is optional but highly recommended as it accelerates root growth and increases the success rate.
Step 5: Prepare the Potting Mix
Fill a small pot or container with a well-draining mix of soil. A combination of garden soil, coco peat, and sand works well. Lightly moisten the soil before planting the cutting.
Step 6: Plant the Cutting
Make a hole in the soil with your finger or a stick and gently insert the cut end of the stem about 2 inches deep. Firmly press the soil around the cutting to ensure it stands upright.
Step 7: Water the Cutting
Water the cutting lightly but thoroughly to ensure the soil is evenly moist. Avoid overwatering, as soggy soil can lead to rot.
Step 8: Provide the Right Environment
Place the pot in a warm, bright location with indirect sunlight. Direct sunlight can be too harsh for the cutting at this stage. To maintain humidity, you can cover the pot with clear plastic wrap or a plastic bag, creating a mini greenhouse effect.
Step 9: Monitor Growth
Check the soil regularly to ensure it remains moist but not waterlogged. In about 2-3 weeks, you should notice new growth, which is a sign that roots have developed.
Step 10: Transplant to a Larger Pot or Garden
Once your marigold cutting has established roots and started to grow new leaves, it’s ready for transplanting. Choose a sunny spot in your garden or a larger pot with good drainage.
Caring for Your Propagated Marigold Plants
After transplanting, proper care ensures that your marigolds thrive:
- Watering: Marigolds prefer moderately moist soil. Water them when the top inch of soil feels dry.
- Fertilizing: Use a balanced fertilizer once a month to encourage healthy blooms. Avoid over-fertilizing, as it can lead to excessive foliage with fewer flowers.
- Deadheading: Remove spent flowers regularly to promote continuous blooming.
- Pest Control: Marigolds are naturally pest-resistant, but occasional aphids or spider mites may appear. Use organic pest control methods if necessary.
Tips for Successful Propagation
- Timing is Key: Early morning or late evening is the best time to take cuttings, as the plant is well-hydrated during these periods.
- Clean Tools: Always use sterilized tools to prevent the spread of diseases.
- Humidity Matters: If your environment is dry, maintain humidity around the cutting to prevent wilting.
- Patience is Crucial: Not all cuttings will root successfully on the first try, so don’t be discouraged if some fail.
Benefits of Growing Marigolds at Home
Marigolds are not just beautiful; they are also incredibly beneficial for your garden:
- Pollinator Attraction: Bees and butterflies are drawn to their bright blooms.
- Pest Deterrence: They naturally repel nematodes, aphids, and whiteflies, making them excellent companion plants.
- Easy to Maintain: Marigolds are drought-tolerant and adapt well to various soil types.
Conclusion
Growing marigolds from cuttings is a rewarding and straightforward process, perfect for gardeners of all skill levels. With minimal effort, you can fill your garden with vibrant, pest-resistant blooms that brighten up any space. Whether you’re a seasoned gardener or a beginner, this method is an excellent way to propagate your favorite marigold varieties.
Start propagating marigolds today and share your journey with fellow gardeners. Let’s grow together!
#MarigoldPropagation #EasyGardening #GrowWithCuttings #VibrantBlooms #GardenLovers #GreenThumb #GardeningMadeEasy #DIYGardeningTips #MarigoldMagic #EcoFriendlyGardening