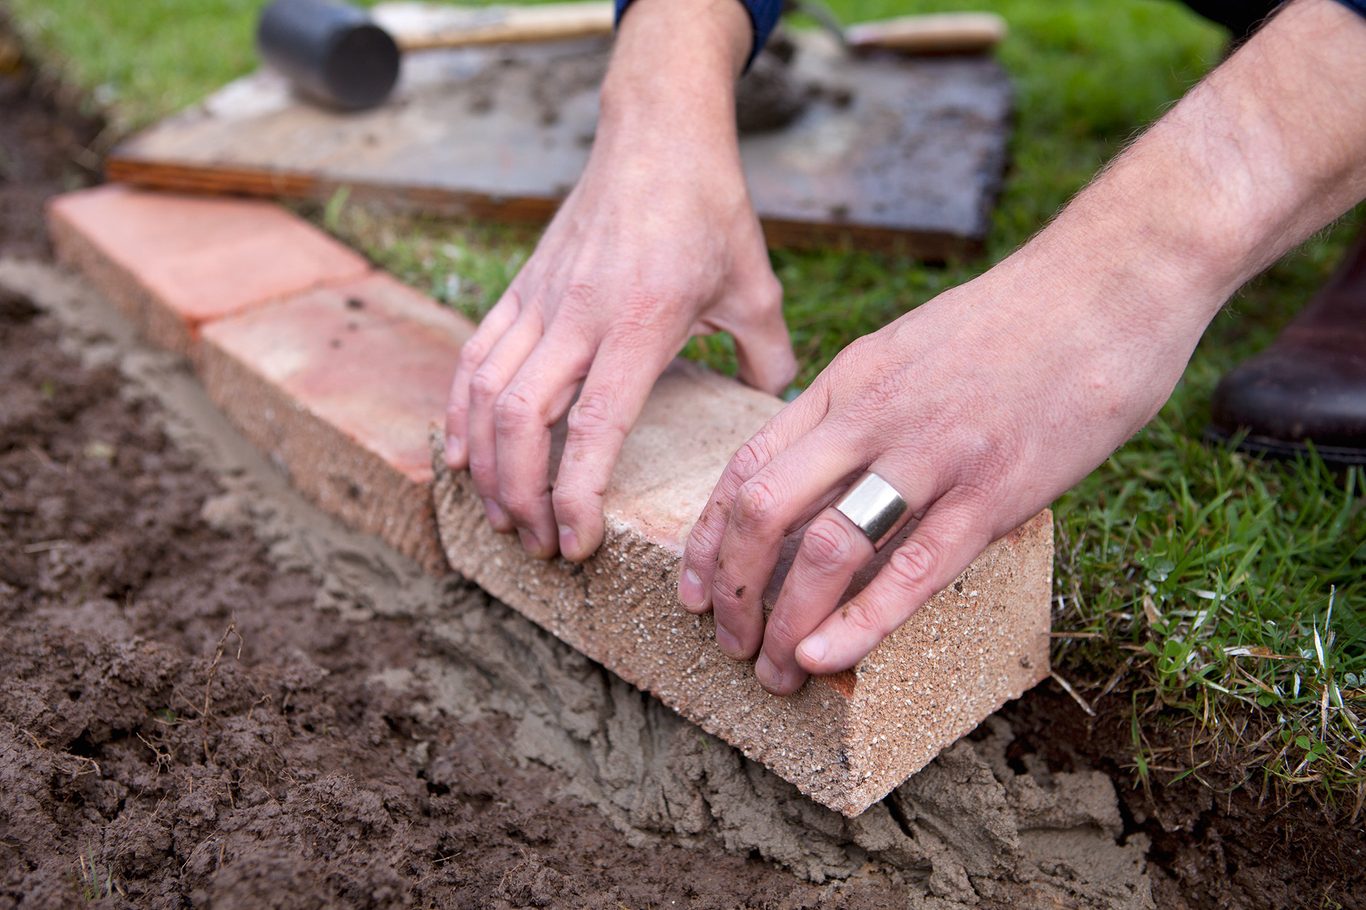
Garden edging is more than just a finishing touch—it defines your outdoor space, keeps plants neatly contained, and adds a polished look to any yard. Among the many edging options, brick garden edging stands out as timeless, durable, and incredibly versatile. Whether you want a classic border for flower beds, a rustic pathway edge, or a modern clean line, bricks can help you achieve the look with ease.In this guide, we’ll share 🔥 top tips for brick garden edging – simple and effective! From preparation to design ideas, you’ll discover how to transform your garden with just a few thoughtful steps.Why Choose Brick Garden Edging?Durability – Bricks withstand weather and last for decades.Low Maintenance – Once installed, they need minimal upkeep.Classic Style – Bricks complement any garden design, from traditional to contemporary.Affordability – Cost-effective compared to stone or concrete.Flexibility – Great for straight lines, curves, or unique patterns.Top Tips for Installing Brick Garden Edging1. Plan Your Design First ✏️Decide if you want straight, curved, or zigzag patterns.Sketch your edging on paper to visualize spacing and style.Measure the length of the area so you know how many bricks you’ll need.2. Choose the Right Bricks 🧱Standard clay bricks are affordable and classic.Paving bricks are sturdier for heavy-use areas like driveways.Reclaimed bricks add rustic charm and character.3. Prepare the Ground 🌍Mark the edge with string or a garden hose.Dig a shallow trench about 4–6 inches deep.Ensure the base is level for a neat finish.4. Lay a Solid Foundation ⚒️Add a layer of sand or gravel for drainage.Compact it firmly to prevent bricks from shifting.5. Position Bricks NeatlyPlace bricks snugly side by side.For extra stability, set them in a thin layer of mortar or landscape adhesive.Use a rubber mallet to tap bricks into place.6. Fill the Gaps 🌱Sweep sand or soil into the joints to lock bricks in.Water lightly to help the sand settle.Creative Ideas for Brick Garden Edging 🎨Classic RowLine up bricks horizontally for a timeless, neat border.Vertical Soldier Style 🚩Stand bricks upright for bold, raised edging that makes a statement.Herringbone PatternArrange bricks diagonally for a decorative and stylish look.Curved Borders 🌿Use flexible edging lines to create soft, natural curves around flower beds.Mixed Material EdgingCombine bricks with gravel, wood, or stone for a modern and unique touch.Maintenance Tips for Long-Lasting EdgingCheck yearly – Replace any bricks that shift or sink.Weed control – Use landscape fabric beneath the edging to block weeds.Keep clean – Power wash bricks occasionally to remove dirt or moss.Reapply sand – Refresh joints with sand if gaps appear.Common Mistakes to Avoid 🚫Skipping the foundation layer (bricks may sink or shift).Not leveling the trench properly.Using poor-quality bricks that can crack in frost.Leaving wide gaps that invite weeds.ConclusionInstalling brick garden edging is one of the simplest yet most effective ways to upgrade your outdoor space. By following these 🔥 top tips for brick garden edging – simple and effective!, you’ll create borders that are not only functional but also stylish.With just a little effort, your garden will look neat, organized, and timeless—whether you prefer a modern minimalist edge or a charming rustic vibe. Bricks truly prove that classic materials never go out of style! 🌿🧱✨