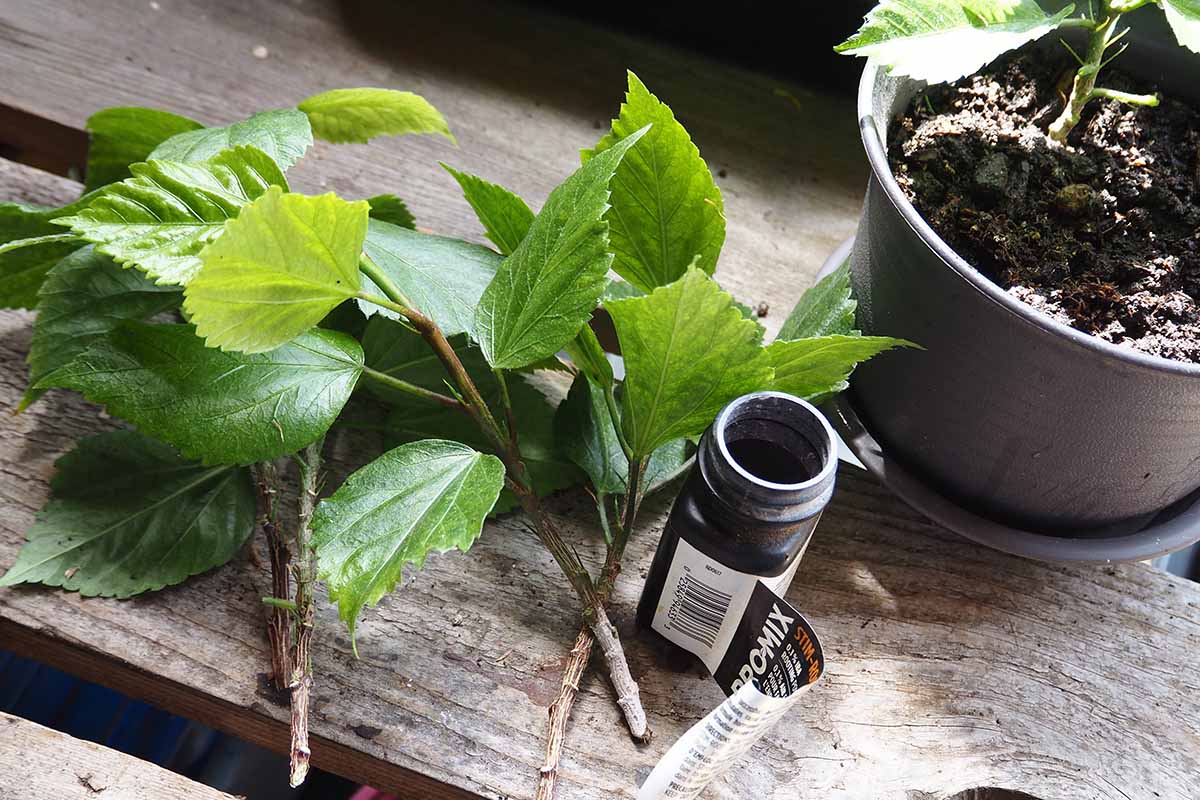
Hibiscus plants are loved for their bold, tropical blooms and glossy green leaves. The good news? You don’t need to buy new plants to expand your collection. With the right technique and timing, propagating hibiscus at home is simple, rewarding, and budget-friendly.That’s exactly why this article is your ultimate guide to how to propagate hibiscus plant!—a complete, beginner-friendly resource designed for gardeners in the United States, the United Kingdom, and Canada.Whether you’re growing hibiscus indoors, on a patio, or in the garden, this guide will walk you through everything step by step.Introduction: Why Propagate a Hibiscus Plant?Propagating hibiscus allows you to create new plants from a healthy parent without starting from seed. This method ensures the new plant keeps the same flower color, size, and growth habit as the original—something seeds can’t always guarantee.Learning how to propagate hibiscus plant is perfect if you want:More plants for freeIdentical blooms you already loveA thoughtful handmade giftHealthier, stronger plantsOnce you understand the basics, hibiscus propagation becomes an easy and satisfying gardening skill.H2: Understanding Hibiscus Propagation MethodsThere are a few ways to propagate hibiscus, but some methods are more reliable than others.H3: Propagating Hibiscus from Cuttings (Best Method)This is the most popular and successful technique for home gardeners. It’s fast, effective, and works for both tropical and hardy hibiscus varieties.H3: Propagation by SeedsSeeds are possible but unpredictable. Plants grown from seed may not resemble the parent plant and take much longer to flower.For consistent results, this guide focuses on cuttings—your ultimate guide to how to propagate hibiscus plant the easy way.H2: Best Time to Propagate HibiscusTiming matters when propagating hibiscus.H3: Ideal SeasonLate spring to early summer is bestWarm temperatures encourage root growthAvoid winter or cold periodsIn cooler regions of Canada or the UK, indoor propagation works well during spring.H2: Tools and Materials You’ll NeedBefore starting, gather these essentials:Sharp, clean pruning shearsSmall pots with drainage holesLight potting mix (or sand + peat mix)Rooting hormone (optional but helpful)Clear plastic bag or humidity domeWater spray bottleHaving everything ready makes the process smoother and stress-free.H2: Step-by-Step Instructions – How to Propagate Hibiscus PlantH3: Step 1 – Choose a Healthy StemSelect a green, semi-hardwood stem from a healthy hibiscus plant. It should:Be 4–6 inches longHave at least 2–3 leaf nodesBe free of flowers or budsAvoid woody or very soft new growth.H3: Step 2 – Take the CuttingCut just below a leaf nodeRemove the lower leavesLeave 1–2 small leaves at the topThis reduces moisture loss and helps the cutting focus on root development.H3: Step 3 – Apply Rooting Hormone (Optional)Dip the cut end into rooting hormone powder or gel. While not required, it significantly improves success rates, especially in cooler climates.H3: Step 4 – Plant the CuttingInsert the cutting about 1–2 inches deep into moist potting mix. Gently firm the soil around it to keep the cutting upright.H3: Step 5 – Create a Humid EnvironmentCover the pot with a clear plastic bag or dome to trap humidity. Keep it:Bright but out of direct sunlightWarm (65–80°F / 18–27°C)Mist lightly if the soil surface begins to dry.H3: Step 6 – Wait for Roots to DevelopRoots usually form within 3–6 weeks. You’ll know rooting has occurred when:New leaves appearThe cutting resists gentle tuggingThis patience is key in your ultimate guide to how to propagate hibiscus plant!H2: Propagating Hibiscus in Water (Alternative Method)Some gardeners prefer water propagation.H3: How It WorksPlace the cutting in a glass of clean waterSubmerge only the lower nodesChange water every 2–3 daysOnce roots reach 1–2 inches long, transfer the cutting to soil.H3: Pros and ConsPros: Easy to monitor rootsCons: Water roots can be weaker when transplantedSoil propagation remains the most reliable long-term option.H2: Aftercare for Newly Propagated HibiscusOnce roots develop, proper care ensures success.H3: TransplantingMove the cutting to a larger pot once roots are established. Use nutrient-rich, well-draining soil.H3: WateringKeep soil consistently moist but never soggy. Overwatering can cause root rot.H3: FeedingBegin light fertilizing after 4–6 weeks using a balanced liquid fertilizer.H2: Common Problems and How to Fix ThemH3: Cutting WiltingCause: Low humidityFix: Increase moisture and shadeH3: Rotting StemCause: Too much waterFix: Improve drainage and reduce wateringH3: No Root GrowthCause: Cold temperatures or weak cuttingFix: Move to warmer location and try againTroubleshooting is part of mastering how to propagate hibiscus plant successfully.H2: Practical Tips for Best ResultsAlways sterilize tools before cuttingLabel cuttings with datesPropagate multiple cuttings at onceAvoid direct sun during rootingBe patient—hibiscus rewards careThese tips make propagation more reliable and enjoyable.H2: Indoor vs Outdoor Hibiscus PropagationH3: Indoor PropagationIdeal for colder climates. Control temperature and humidity easily.H3: Outdoor PropagationBest in warm regions. Choose a shaded, protected area away from wind.Both methods work well when conditions are right.Conclusion: Grow More Hibiscus with ConfidencePropagating hibiscus doesn’t require advanced gardening skills—just the right steps and a little patience. By following this guide, you now truly have your ultimate guide to how to propagate hibiscus plant! from start to finish.With healthy cuttings, proper humidity, and consistent care, you can enjoy vibrant hibiscus blooms multiplied across your home or garden. Once you try it, you’ll see just how easy and rewarding hibiscus propagation can be.