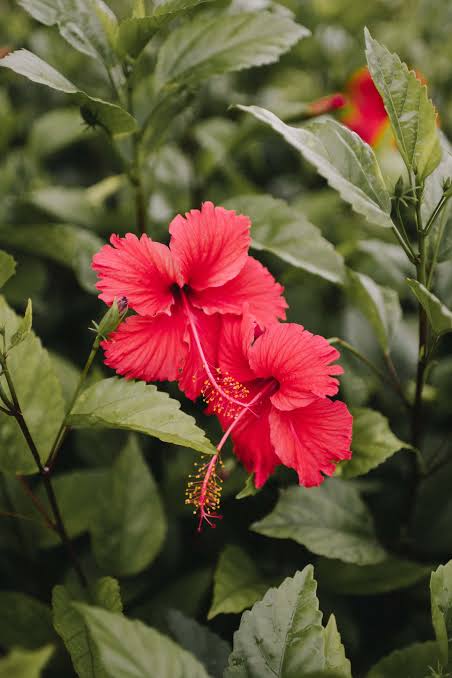
Hibiscus plants are loved worldwide for their stunning, tropical blooms, vibrant colors, and ability to brighten any garden, patio, or balcony. If you’ve ever admired these flowering beauties and wanted more of them in your home garden, you’ll be thrilled to learn how simple it is to create new plants. This guide is your ultimate resource on how to propagate hibiscus plants successfully, whether you’re a beginner gardener or an experienced plant enthusiast.Propagation allows you to expand your hibiscus collection, share plants with friends, or rejuvenate older plants. Let’s dive into the step-by-step process, tips, and tricks to ensure healthy new growth.Why Propagate Hibiscus?Hibiscus plants can be propagated for several reasons:Multiply your collection without buying new plantsShare with friends and familyRevitalize older plants by creating fresh, vigorous growthExperiment with different varietiesSave money on landscapingUnderstanding the propagation process gives you the confidence to produce thriving hibiscus plants that bloom beautifully year after year.H2: Choosing the Right Method of Hibiscus PropagationHibiscus plants can be propagated in multiple ways. The most reliable and common method is stem cuttings, but seeds and air layering are also options.H3: 1. Stem Cuttings (Most Popular)Fastest and easiest methodProduces plants genetically identical to the parentWorks with softwood, semi-hardwood, and hardwood cuttingsH3: 2. SeedsLess common for tropical hibiscusResults in variation (offspring may differ from the parent)Useful for rare hybrid experimentationH3: 3. Air LayeringIdeal for larger, established plantsProduces faster flowering than seedsRequires patience and careful attentionFor beginners, stem cuttings are the easiest and most reliable way to propagate hibiscus successfully.H2: Materials You’ll Need for PropagationBefore starting, gather these essentials:Sharp pruning shears or scissorsRooting hormone powder or gel (optional, but recommended)Small pots or containersWell-draining potting mixPlastic bag or clear plastic cover (for humidity)WaterLabels (to keep track of plant variety)Having everything ready makes the process smooth and increases your chances of success.H2: Step-by-Step Guide: How to Propagate Hibiscus Plant from Stem CuttingsH3: Step 1 – Select the Right StemChoose a healthy, disease-free stemSemi-hardwood stems (slightly mature but still flexible) are idealCut a 4–6 inch section just below a leaf nodeH3: Step 2 – Remove Lower LeavesStrip off leaves from the bottom 2–3 inchesLeave a few leaves at the top to continue photosynthesisH3: Step 3 – Apply Rooting HormoneDip the cut end into rooting hormone powder or gelThis step encourages faster root developmentH3: Step 4 – Plant the CuttingFill a small pot with well-draining potting soilMake a small hole and insert the cuttingFirm the soil gently around the stemH3: Step 5 – Create a Humid EnvironmentCover the cutting with a clear plastic bag or mini greenhouseKeep humidity high to reduce water lossH3: Step 6 – Provide Proper Light and WaterPlace the pot in bright, indirect sunlightKeep soil moist but not waterloggedMist leaves occasionally to maintain humidityH3: Step 7 – Monitor GrowthRoots usually develop in 4–6 weeksGently tug to check for resistance (indicates root growth)Once rooted, gradually remove the plastic coverH2: Tips for Successful Hibiscus Propagation⭐ Tip 1: Use Healthy Parent PlantsChoose a vigorous, flowering hibiscus for cuttings.Strong genetics = strong new plants.⭐ Tip 2: Cut at the Right TimeEarly summer is ideal for semi-hardwood cuttings. Avoid dormant or flowering periods.⭐ Tip 3: Keep the Soil Light and Well-DrainingMix perlite or sand with potting soil for optimal root development.⭐ Tip 4: Avoid OverwateringToo much water leads to rot. Soil should be moist, not soggy.⭐ Tip 5: Patience is KeySome cuttings take longer to root. Avoid transplanting prematurely.⭐ Tip 6: Fertilize Once EstablishedAfter the cutting develops roots, feed lightly with a balanced fertilizer to encourage growth and flowering.H2: Advanced Methods: Air Layering HibiscusFor larger plants or varieties that are difficult to root:Select a healthy stemMake a small upward cut about 1 inch deepWrap with moist sphagnum mossCover with plastic wrap to retain moistureCheck roots after 4–8 weeksCut below roots and plant in a potAir layering produces a mature plant faster than starting from cuttings.H2: Common Problems and SolutionsProblem Cause SolutionCutting rots Overwatering Reduce water, ensure drainageWilting Low humidity Cover with plastic to retain moistureNo root growth Old or woody cutting Use semi-hardwood cutting in summerPests (aphids, mites) Poor hygiene Inspect parent plant, treat if neededH2: When to Transplant Your New Hibiscus PlantOnce your cutting develops a healthy root system:Transplant to a larger pot or garden bedGradually acclimate to direct sunlightKeep watering consistent until establishedNewly propagated hibiscus usually blooms within the first year if given proper care.Conclusion: Your Ultimate Guide to How to Propagate Hibiscus PlantWith this step-by-step guide, you can confidently propagate hibiscus plants and enjoy a thriving collection in your garden. By selecting healthy cuttings, using rooting hormone, maintaining proper humidity, and giving patience and care, you’ll have new hibiscus plants that are strong, vibrant, and ready to bloom.Whether you live in the U.S., U.K., or Canada, these propagation techniques are simple, effective, and perfect for both indoor and outdoor gardeners. Start today and watch your tropical beauties multiply—your garden will thank you!