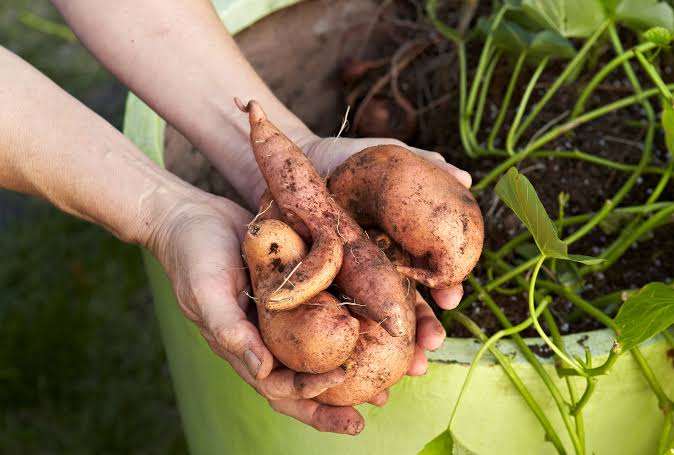
If you’ve ever dreamed of harvesting your own batch of warm, earthy, and naturally sweet potatoes straight from the garden, you’re in for a treat. These vibrant root vegetables aren’t just delicious and versatile — they’re also surprisingly easy to grow once you know the basics.In this article, Your Ultimate Guide to How to Plant Sweet Potatoes, we’ll cover everything you need to know — from choosing the right slips and preparing your soil to caring for your plants and enjoying your first harvest. Whether you’re an experienced gardener or a complete beginner, this guide will help you grow healthy, flavorful sweet potatoes successfully!🌿 Why Grow Sweet Potatoes?Before we get our hands in the soil, let’s talk about why sweet potatoes are such a wonderful crop to grow.Nutrient-rich: Sweet potatoes are packed with vitamins A and C, fiber, and antioxidants.Easy to store: Once cured properly, they last for months without refrigeration.Low-maintenance: They thrive in warm conditions and need little intervention once established.Beautiful plants: With their lush green vines and purple flowers, they look as good as they taste!No wonder sweet potatoes are a favorite for home gardeners in the U.S., U.K., and Canada (especially in warmer regions or greenhouses).🏡 Step 1: Understanding Sweet Potato BasicsSweet potatoes (Ipomoea batatas) are tropical root vegetables that love warmth, sunshine, and loose soil. They aren’t grown from seeds but from “slips” — small sprouts that grow from mature sweet potatoes.Each slip will eventually produce its own root system, which forms new sweet potatoes underground.🌞 Step 2: Choose the Right VarietyWhen planning how to plant sweet potatoes, choosing the right variety is key. Some do better in hot, long growing seasons, while others are suited for cooler climates.Here are a few popular varieties to consider:For Warm Climates (US South, Coastal UK, Canada’s West Coast):Beauregard: A fast-growing favorite with orange flesh and copper skin.Covington: Smooth, sweet, and great for baking.Jewel: Excellent flavor and high yield.For Cooler Climates:Georgia Jet: Early maturing and does well in shorter summers.Centennial: Resistant to disease and adaptable to different soils.✅ Pro Tip: If you live in a cooler region, choose early-maturing varieties or start your slips indoors to extend your growing season.🌱 Step 3: How to Make or Buy Sweet Potato SlipsYou can either buy sweet potato slips from a nursery or make your own at home — it’s easier than you might think!How to Grow Your Own Slips:Choose a healthy, organic sweet potato.Cut it in half (or leave it whole).Place it in a glass of water with half submerged. Use toothpicks to hold it in place.Put it in a warm, sunny location (around 75–80°F or 24–27°C).In about 2–3 weeks, small green sprouts (slips) will start to emerge.Once the slips are about 6 inches long, gently twist them off and place them in water until roots form. These rooted slips are ready to plant!🌾 Step 4: Prepare the SoilSweet potatoes love loose, well-draining, sandy soil with a slightly acidic to neutral pH (5.8–6.5). Heavy clay or compacted soil can stunt root growth.How to Prepare Your Garden Bed:Choose a sunny location (6–8 hours of direct sunlight daily).Loosen the soil at least 12 inches deep.Mix in compost or aged manure to boost nutrients.Create mounded rows about 10–12 inches high and 3 feet apart. These ridges help roots expand and prevent waterlogging.✅ Pro Tip: Avoid nitrogen-heavy fertilizers — they promote leafy growth but reduce tuber production.🌿 Step 5: How to Plant Sweet Potato SlipsNow that your slips are ready and your soil is prepped, it’s planting time!When to Plant:Wait until after the last frost, when soil temperatures are consistently above 60°F (15°C). In the U.S., that’s typically late spring; in the U.K. or Canada, early summer is ideal.How to Plant:Make holes about 12 inches apart in your prepared rows.Place each slip in the hole, burying about two-thirds of the stem.Firm the soil gently around the base.Water thoroughly right after planting.Sweet potatoes need room to spread, so give them plenty of space — they’ll form sprawling vines as they grow.💧 Step 6: Watering and MaintenanceSweet potatoes are fairly low-maintenance, but consistent care will boost your harvest.Watering Tips:Keep the soil consistently moist for the first month as roots establish.Once vines are growing well, water once a week (about 1 inch of water).Avoid overwatering, especially near harvest time, as soggy soil can cause rot.Weeding and Mulching:Weed carefully by hand to avoid disturbing the roots.Add a layer of straw or mulch to retain moisture and suppress weeds.☀️ Step 7: Feeding and FertilizingSweet potatoes don’t need much fertilizer, but a light feeding helps.Use a low-nitrogen, high-potassium fertilizer (such as 5-10-10).Apply it 4–6 weeks after planting.Stop fertilizing once vines start spreading heavily.✅ Pro Tip: Compost tea or seaweed extract works wonderfully for organic gardeners.🐛 Step 8: Pests and ProblemsKeep an eye out for common garden pests that can target your crop:Sweet potato weevils: Tiny insects that bore into roots. Rotate crops yearly to prevent infestations.Wireworms: Avoid planting sweet potatoes in freshly turned sod.Deer and rabbits: Protect vines with fencing if wildlife is common in your area.Disease prevention starts with well-drained soil, proper spacing, and clean slips.⏳ Step 9: Harvesting Sweet PotatoesThe most exciting part of Your Ultimate Guide to How to Plant Sweet Potatoes — harvest time!When to Harvest:Sweet potatoes are ready 90–120 days after planting, once the leaves start to yellow.How to Harvest:Gently loosen the soil with a garden fork.Lift the tubers carefully — they bruise easily when fresh.Shake off excess soil but don’t wash yet.🧺 Step 10: Curing and StoringTo make your sweet potatoes sweeter and last longer, they need curing.How to Cure:Place them in a warm (80–85°F / 26–29°C), humid environment for 7–10 days.A warm room with a humidifier or loosely covered box works well.After curing, store them in a cool, dry, dark place (55–60°F or 13–16°C). Properly cured sweet potatoes can last up to 6 months!🌱 Bonus: Growing Sweet Potatoes in ContainersNo garden? No problem! You can easily grow sweet potatoes in containers or grow bags.Choose a 20-gallon pot or larger with drainage holes.Fill with loose potting mix and compost.Plant 1–2 slips per container.Place in full sun and water regularly.Container-grown sweet potatoes are perfect for balconies, patios, or small spaces — and they look beautiful too!💡 Practical Tips for SuccessHere are a few extra tips to make your sweet potato-growing journey smooth and rewarding:Rotate crops each year to avoid soil diseases.Prune vines lightly to encourage tuber growth.Don’t harvest too early — the longer they grow, the sweeter they get.Use slips, not cuttings, to ensure proper root development.Keep soil warm with black plastic mulch if your region has cooler summers.🏁 ConclusionAnd there you have it — Your Ultimate Guide to How to Plant Sweet Potatoes!With the right preparation, a little patience, and a sunny patch of soil, you can enjoy a bountiful harvest of sweet, nutritious tubers by fall. Whether you’re planting them in your backyard garden or a few containers on your patio, sweet potatoes reward you with both beauty and bounty.So roll up your sleeves, grab your slips, and get ready to plant your own homegrown sweet potatoes — nature’s candy straight from the earth. 🌿🍠