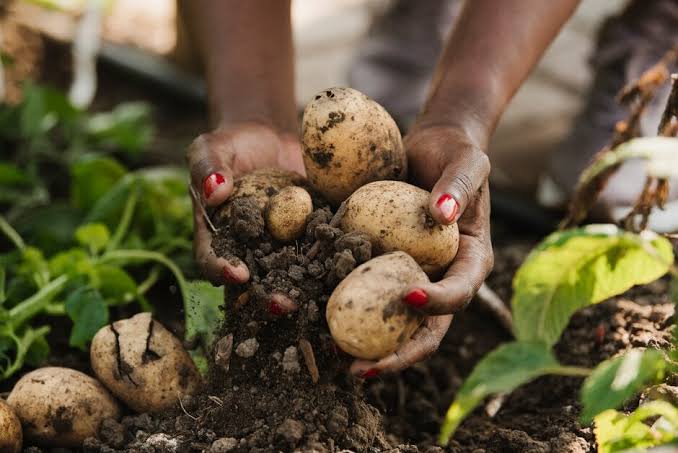
Few things are more satisfying than harvesting your own homegrown potatoes — earthy, fresh, and full of flavor. Whether you’re a beginner or an experienced gardener, learning how to plant potatoes in the ground is one of the easiest and most rewarding gardening projects you can try.This ultimate guide will walk you through everything you need to know — from choosing the right variety to soil preparation, planting, care, and harvest. By the end, you’ll be ready to grow your own crop of delicious spuds with confidence and ease. 🌿✨🌾 Why Grow Potatoes in the Ground?Potatoes are one of the most versatile and dependable crops for home gardeners. Here’s why planting them directly in the ground is such a great idea:High yield: You can grow many potatoes from just a few seed tubers.Storage-friendly: They keep for months when stored properly.Low maintenance: Potatoes require minimal care once planted.Versatile use: Perfect for mashing, roasting, frying, and soups.Improves soil: Their root system helps aerate and loosen the soil.Whether you have a large backyard or a small garden plot, this ultimate guide on how to plant potatoes in the ground will help you get excellent results.🥔 Step 1: Choose the Right Potato VarietyThe first step in growing potatoes successfully is choosing the best type for your region and culinary preferences.🌱 Common Potato Varieties:1. Early Potatoes (New Potatoes)Harvested 10–12 weeks after planting.Small, tender, and perfect for boiling or salads.Examples: Yukon Gold, Rocket, Swift.2. Maincrop PotatoesHarvested 18–20 weeks after planting.Larger, great for baking, frying, or mashing.Examples: Russet Burbank, King Edward, Maris Piper.💡 Tip: If you live in a cooler area like Canada or northern UK, choose early varieties for faster harvests.🌿 Step 2: Prepare the SoilPotatoes love well-draining, loose soil rich in organic matter. Dense or clay soil can stunt growth and cause rot.🧑🌾 Soil Preparation Tips:Choose a sunny location with at least 6–8 hours of sunlight per day.Remove weeds, rocks, and debris.Work in plenty of compost or aged manure to enrich the soil.Aim for a soil pH between 5.0 and 6.5 (slightly acidic).💡 If your soil is too compact, build a raised bed or use deep garden rows for better drainage.🥔 Step 3: Chit the Seed Potatoes“Chitting” means pre-sprouting your seed potatoes before planting. This helps them grow faster once in the ground.How to Chit Potatoes:Place seed potatoes in a cool, bright room (around 60°F / 15°C).Arrange them upright with the “eyes” facing upward.Allow them to sprout for 2–3 weeks until shoots are about 1 inch long.💡 Choose seed potatoes from a garden center — not grocery store potatoes — since store-bought ones may be treated to prevent sprouting.🌱 Step 4: How to Plant Potatoes in the GroundOnce your soil is ready and your seed potatoes have sprouted, it’s time to plant!🪴 Planting Steps:Dig trenches about 8–10 inches deep and 2–3 feet apart.Place seed potatoes in the trench with the sprouts facing upward, spacing them 12 inches apart.Cover with 4 inches of soil, keeping the trench partially open for hilling later.💡 Pro Tip: If the soil is still cool, cover with a thin layer of mulch or black plastic to retain warmth and encourage growth.🌾 Step 5: Hill Your Potatoes“Hilling” is the process of piling soil around the stems as the plants grow. This protects the developing tubers from sunlight (which turns them green and toxic) and encourages a higher yield.How to Hill:When plants are about 6–8 inches tall, mound soil around the base until only the top leaves are visible.Repeat every 2–3 weeks as the plants grow, keeping the soil about 4 inches above the forming tubers.💡 You can use compost, straw, or loose soil for hilling — just make sure the tubers stay covered.💧 Step 6: Watering and CarePotatoes need consistent moisture, especially when tubers begin forming.Watering Tips:Water deeply once or twice a week (about 1 inch of water).Avoid overwatering — soggy soil can cause rot.Mulch around plants to retain moisture and prevent weeds.💡 In hot climates, morning watering works best to reduce evaporation.🌿 Step 7: FertilizingUse a balanced organic fertilizer or compost tea every few weeks. Potatoes prefer nutrients like nitrogen, phosphorus, and potassium for healthy growth.Avoid excessive nitrogen — it encourages leafy growth instead of tubers.🐛 Step 8: Pest and Disease ControlWatch out for these common potato problems:Colorado Potato Beetles: Handpick or use neem oil.Aphids: Spray with a mild soapy water solution.Blight: Avoid overhead watering and rotate crops yearly.💡 Crop rotation is essential — don’t plant potatoes in the same spot for at least 2–3 years to prevent disease buildup.🥔 Step 9: Harvesting PotatoesThe best part! 🎉For Early Varieties:Harvest about 10–12 weeks after planting when flowers appear.Gently dig around the plant to collect small “new potatoes.”For Maincrop Varieties:Wait until the foliage turns yellow and dies back (about 18–20 weeks).Loosen the soil with a fork and lift the tubers carefully.💡 Allow harvested potatoes to dry for a few hours before storing them.🧺 Step 10: Storage TipsTo keep your potatoes fresh for months:Store them in a cool, dark, well-ventilated place (ideally 45–50°F / 7–10°C).Never store in the refrigerator — it turns starch into sugar.Keep them away from onions (which make them spoil faster).Properly cured and stored potatoes can last up to 6 months!🌸 Bonus Tip: Companion Planting for PotatoesGrow smarter by pairing potatoes with the right companions:✅ Good companions: Beans, cabbage, corn, and marigolds (help deter pests).❌ Avoid: Tomatoes, peppers, and eggplants — they share diseases like blight.🌿 Common Mistakes to AvoidEven experienced gardeners slip up! Watch out for these:Planting in cold, waterlogged soil.Not hilling enough to cover tubers.Overfertilizing with nitrogen.Using store-bought potatoes instead of certified seed potatoes.🥔 ConclusionAnd there you have it — your ultimate guide to how to plant potatoes in the ground! 🌿 Whether you’re growing a few rows or a whole patch, following these simple steps will reward you with a generous harvest of flavorful, homegrown potatoes.Remember: good soil preparation, consistent watering, and regular hilling are the secrets to plump, healthy tubers. Once you taste the difference between garden-fresh and store-bought potatoes, you’ll never go back!So grab your gloves, prepare your soil, and start planting — your garden-to-table potato adventure awaits! 🥔✨