
Winter sowing is an incredible gardening technique that allows you to start seeds during the colder months without the need for indoor grow lights, heating mats, or valuable indoor space. Instead, this method uses the natural winter weather and recycled milk jugs to create mini greenhouses. By the time spring rolls around, you’ll have strong, hardy seedlings that are ready to thrive outdoors. This process mimics nature’s way of cold stratification, which many seeds need to break dormancy and germinate successfully.
In this comprehensive guide, we’ll cover everything you need to know about winter sowing seeds in milk jugs. Whether you’re a seasoned gardener looking to expand your seed-starting repertoire or a beginner searching for a low-cost, low-maintenance way to grow plants, winter sowing could be the perfect solution for you.
What is Winter Sowing?
Winter sowing is the process of planting seeds in containers and leaving them outdoors during the winter. The seeds are exposed to the cold temperatures, and when conditions are right (usually in early spring), they begin to germinate naturally. The beauty of this method lies in its simplicity: you’re mimicking the natural cycle of seeds that fall to the ground in autumn and sprout when the warmth of spring arrives.
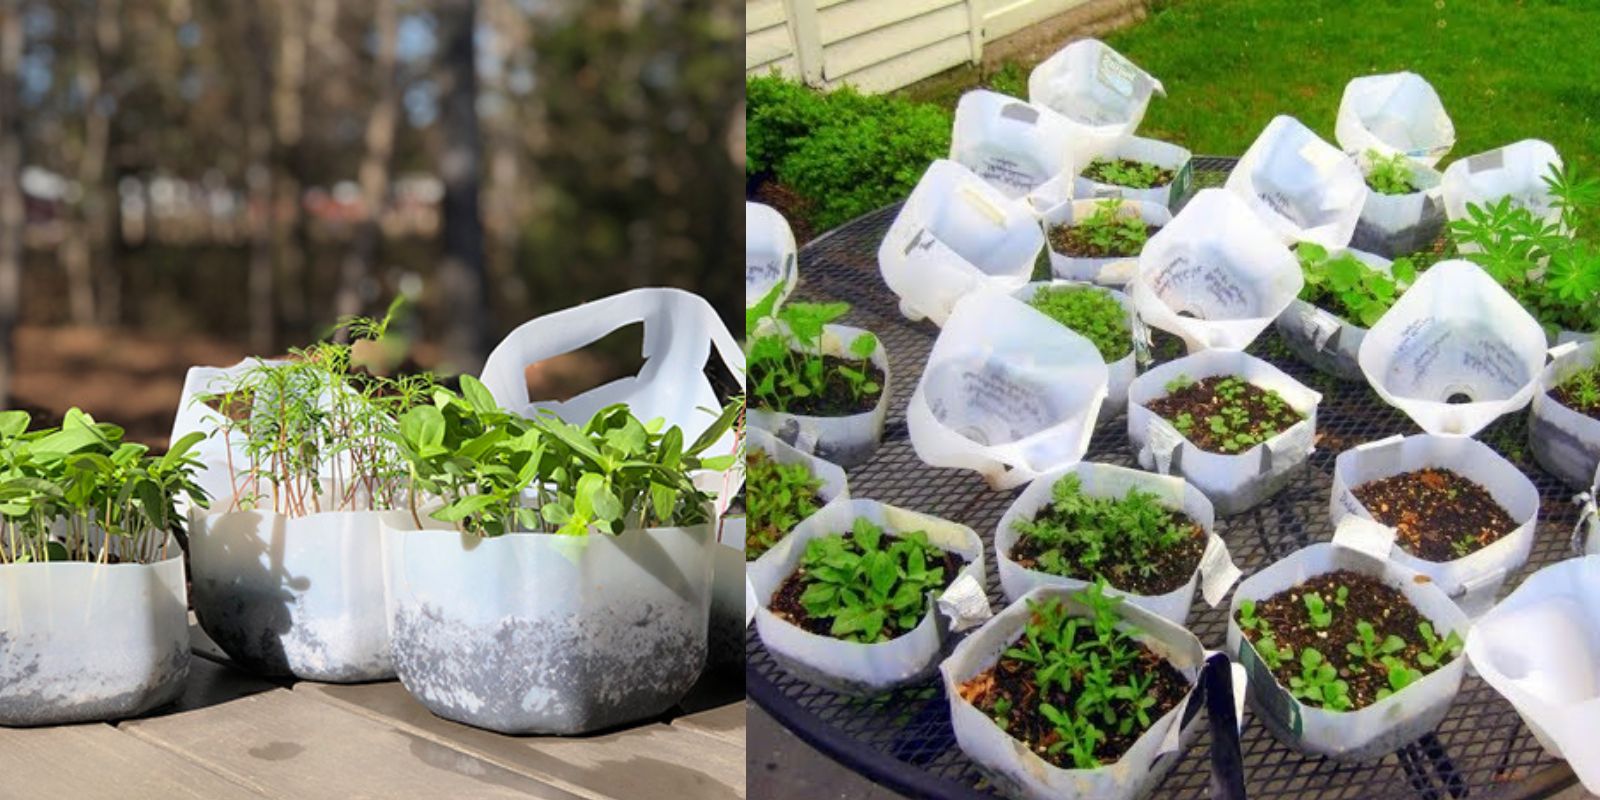
Milk jugs or other translucent containers work well as mini greenhouses because they protect the seeds from the harshest winter conditions while still allowing exposure to sunlight, rain, and fluctuating temperatures. The seeds are tricked into thinking they’re in the ground, which is exactly where they want to be!
Why Winter Sowing?
There are numerous benefits to winter sowing, particularly if you want a low-cost, environmentally friendly, and space-efficient way to start seeds. Here are some reasons to give it a try:
- No Indoor Setup Required: Winter sowing eliminates the need for indoor grow lights, seed trays, and valuable space in your home. The milk jugs stay outside throughout the winter.
- Cold Stratification: Many perennial and cold-hardy plants require cold stratification (a period of cold) to germinate properly. Winter sowing naturally provides this requirement.
- Low Maintenance: Once you set up your milk jugs, there’s very little you need to do other than check on them occasionally and water them if needed.
- Hardy Seedlings: Because winter-sown seedlings grow in outdoor conditions, they tend to be hardier and more resilient when transplanted into the garden in spring.
- Environmentally Friendly: Using recycled milk jugs is a sustainable way to reduce waste while creating perfect mini greenhouses.
The Best Seeds for Winter Sowing
While many seeds can be successfully started using the winter sowing method, it’s particularly effective for cold-hardy annuals, perennials, and vegetables. These seeds benefit from the cold stratification process and are tough enough to withstand outdoor conditions.
Some of the best seeds for winter sowing include:
- Perennials: Coneflowers (Echinacea), Black-eyed Susans (Rudbeckia), Lupines, Columbine, and Coreopsis.
- Annuals: Snapdragons, Cosmos, Marigolds, and Zinnias.
- Vegetables: Brassicas like kale, broccoli, cabbage, and cold-tolerant lettuce varieties.
- Herbs: Oregano, thyme, sage, and parsley.
Step-by-Step Guide to Winter Sowing in Milk Jugs
Now that you’re familiar with the concept of winter sowing, let’s dive into the step-by-step process. By following these simple instructions, you’ll be well on your way to starting seeds in winter with confidence.
1. Gather Your Materials
To get started, you’ll need the following materials:
- Clean, empty milk jugs (or other similar translucent containers like water jugs or soda bottles)
- Potting soil or seed-starting mix
- Seeds (choose cold-hardy or perennial varieties)
- Duct tape or clear packing tape
- Scissors or a utility knife
- A marker for labeling
- A spray bottle for watering
2. Prepare the Milk Jugs
First, clean and rinse the milk jugs thoroughly. Using scissors or a utility knife, cut the jug around its middle, leaving about 2-3 inches of plastic uncut near the handle to act as a hinge. You’ll need to open and close the jug, so having a hinge makes this process easier.
Next, poke several drainage holes in the bottom of the jug using a sharp object or a knife. These holes will allow excess water to drain out and prevent the seeds from becoming waterlogged.
3. Fill the Jug with Soil
Once your milk jugs are ready, fill the bottom half with about 3-4 inches of moist potting soil or seed-starting mix. Make sure the soil is evenly moist but not soaking wet. You can check this by squeezing the soil in your hand – it should hold together but not drip water.
4. Sow Your Seeds
Sprinkle your chosen seeds over the surface of the soil, following the recommended planting depth for each variety. Some seeds may need to be lightly pressed into the soil, while others can be covered with a thin layer of soil. Refer to your seed packets for specific instructions.
It’s a good idea to sow a few extra seeds in each jug, as not all may germinate. Since you’re planting them outdoors, nature will take its course, and the strongest seeds will emerge.
5. Close and Secure the Jug
After sowing your seeds, close the top half of the jug over the bottom half and secure it with duct tape or clear packing tape. Be sure to leave the cap off the jug to allow for airflow. The opening will help maintain the right balance of humidity and ventilation inside the jug.
6. Label Your Jugs
Using a waterproof marker, label each jug with the type of seed you planted and the date. This step is crucial because, once spring arrives, you may not remember what you sowed in each container! It’s also helpful for tracking how long it takes for each variety to germinate.
7. Place the Jugs Outside
Set your milk jugs in a sunny spot outdoors, where they can be exposed to sunlight, rain, and snow. Place them somewhere they won’t be disturbed by animals or high winds. Ideally, they should receive some direct sunlight each day to keep the soil warm enough for germination once the temperatures begin to rise.
Now, let nature take its course! Throughout the winter months, the seeds will remain dormant, waiting for the perfect conditions to germinate. You may need to check occasionally to make sure the soil hasn’t dried out, especially during dry spells. Use a spray bottle to moisten the soil if necessary.
8. Watch for Germination
As spring approaches and temperatures begin to warm up, you’ll start to notice tiny seedlings emerging from the soil. This is an exciting time, as it means your winter-sown seeds have survived the cold and are ready to grow! Keep the jugs outside as the seedlings grow, opening the tops occasionally on warm days to provide them with fresh air.
9. Transplanting Seedlings
When the seedlings have developed a few sets of true leaves and the risk of frost has passed, it’s time to transplant them into your garden or larger containers. Since they’ve been grown outdoors, they’ll be hardened off and ready to transition to their new environment without much shock.
To transplant, gently separate the seedlings and place them in your prepared garden bed, making sure to water them well after planting. They’ll continue to grow and thrive throughout the season.
Tips for Success with Winter Sowing
- Choose the right seeds: Focus on cold-hardy perennials and vegetables for the best results.
- Monitor moisture levels: Ensure the soil stays moist but not waterlogged during the winter months.
- Patience is key: Seeds will germinate when the conditions are right, usually in early spring.
- Thin seedlings: Once the seedlings sprout, thin them out if they’re too crowded to allow for proper growth.
Conclusion
Winter sowing is a simple, sustainable, and effective method for starting seeds early without the need for indoor growing setups. By recycling milk jugs as mini greenhouses, you can give your plants a head start and enjoy hardy, resilient seedlings when spring arrives. Whether you’re looking to grow vegetables, herbs, or flowers, winter sowing is an accessible and rewarding gardening technique.
So, gather your seeds and milk jugs, and let winter sowing transform the way you garden!
Get your garden growing early this year! 🌱 #WinterSowing #GardeningHacks #SeedStarting #GreenThumb #MilkJugSowing #EcoFriendlyGardening #DIYGarden #SustainableGardening