
Winter doesn’t have to mean the end of your gardening journey. With the innovative method of winter sowing, you can start your plants even in the coldest months and enjoy strong, hardy seedlings come spring. Winter sowing is a low-maintenance, eco-friendly, and affordable technique where seeds are started outdoors in mini-greenhouses made from recycled containers. It’s perfect for gardeners looking to save time and effort while letting nature do most of the work.
This guide will walk you through everything you need to know about winter sowing, from its benefits and materials to the step-by-step process of getting started.
What Is Winter Sowing?
Winter sowing is a gardening method where seeds are sown in containers and placed outside during the winter months. The containers act as mini-greenhouses, protecting the seeds while exposing them to the natural freeze-and-thaw cycles of winter. This process helps seeds germinate at the right time, mimicking their natural outdoor conditions.
Unlike indoor seed starting, winter sowing doesn’t require grow lights, heating mats, or extra space in your home. It’s an ideal way to prepare for spring planting with minimal fuss.
Benefits of Winter Sowing
- Eco-Friendly: Reuse materials like milk jugs, soda bottles, or plastic tubs as seed-starting containers.
- Saves Time: No need to monitor seeds indoors; nature takes care of germination.
- Space Saver: Perfect for those who lack indoor space for seed trays.
- Stronger Plants: The freeze-thaw cycle produces hardy seedlings that adapt well to outdoor conditions.
- Cost-Effective: Uses recycled containers and eliminates the need for fancy equipment.
- Earlier Start: Gives you a head start on the growing season, especially for cold-hardy plants.
What You’ll Need for Winter Sowing
Before you start, gather the following materials:
- Clear plastic containers (milk jugs, soda bottles, takeout containers)
- Potting soil or seed-starting mix
- Seeds (cold-hardy varieties like kale, spinach, broccoli, perennials, and wildflowers)
- Sharp scissors or a knife
- Waterproof tape or duct tape
- Permanent marker or plant labels
- A drill or screwdriver for making drainage holes
Step-by-Step Guide to Winter Sowing
1. Choose the Right Seeds
Not all seeds are suitable for winter sowing. Start with cold-hardy plants like:
- Vegetables: Spinach, kale, lettuce, broccoli, onions.
- Flowers: Snapdragons, hollyhocks, wildflowers, and perennials.
These plants can handle frost and require cold stratification (a period of cold to trigger germination).
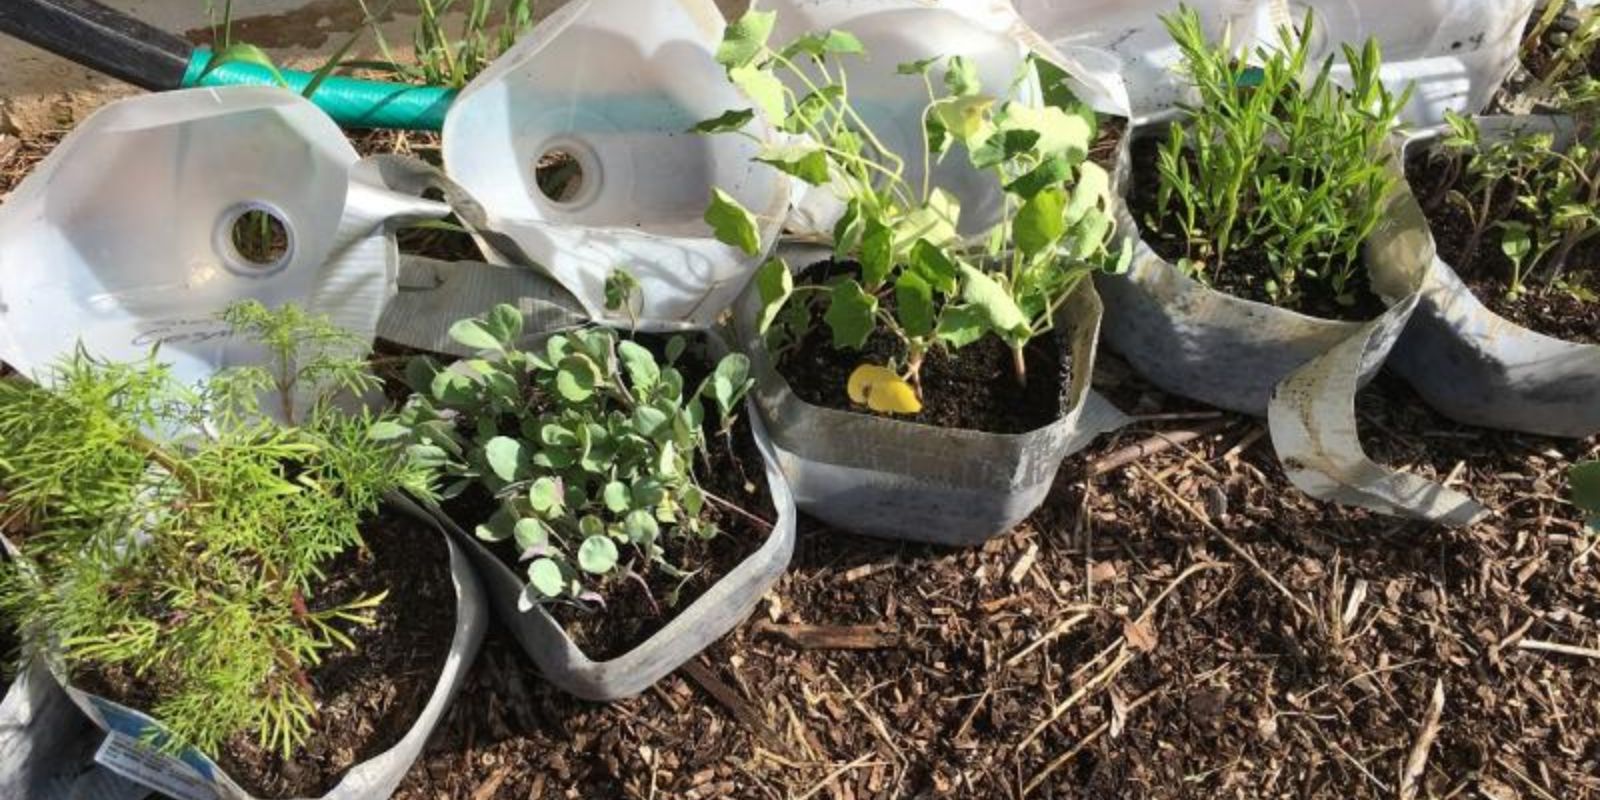
2. Prepare Your Containers
Recycling is key to winter sowing. Use transparent or translucent plastic containers that let in light.
- Cut the Container: Slice the container in half horizontally, leaving one side attached to act as a hinge.
- Create Drainage Holes: Drill or poke holes in the bottom of the container to prevent waterlogging.
3. Fill the Container with Soil
Add 2-3 inches of moist potting soil or seed-starting mix. Avoid using garden soil, as it may not drain well.
4. Sow the Seeds
Plant the seeds according to the depth recommended on the packet. Press them gently into the soil and cover lightly.
5. Label Your Containers
Use a waterproof marker or label to write the plant name and date. Place the label inside or on the outside of the container to avoid confusion later.
6. Seal the Containers
Tape the top and bottom halves of the container together, but leave the lid or cap off to allow airflow.
7. Place Containers Outdoors
Position your mini-greenhouses in a sunny, sheltered spot, such as a porch or deck. Snow, rain, and frost won’t harm the seeds—in fact, they help!
8. Wait for Germination
The beauty of winter sowing is that it requires little maintenance. Check periodically to ensure the soil remains moist but not waterlogged.
9. Transplant in Spring
Once the weather warms and your seedlings are strong enough, transplant them into your garden or larger pots.
Tips for Success
- Timing: Start winter sowing in late winter to early spring, depending on your climate.
- Check for Overheating: On warm winter days, the inside of the container may heat up. Move containers to the shade if necessary.
- Watering: Natural precipitation is usually sufficient, but water lightly if the soil dries out.
- Experiment: Try different seeds to see what works best in your area.
Why Winter Sowing Works
Winter sowing mimics the natural life cycle of plants. In the wild, seeds fall to the ground, endure the winter, and germinate when conditions are ideal. This method eliminates the need for artificial conditions and produces resilient seedlings that are better adapted to your local environment.
Common Mistakes to Avoid
- Using the Wrong Seeds: Not all seeds thrive with winter sowing. Stick to cold-hardy varieties.
- Skipping Drainage Holes: Without proper drainage, seeds may rot.
- Overcrowding: Avoid sowing too many seeds in one container to prevent overcrowding.
- Poor Labeling: Always label containers to avoid confusion.
The Best Seeds for Winter Sowing
- Vegetables: Carrots, cabbage, cauliflower, peas, and Swiss chard.
- Herbs: Parsley, dill, thyme, and chives.
- Flowers: Coneflowers, black-eyed Susans, lupines, and marigolds.
Conclusion: Start Winter Sowing Today!
Winter sowing is a game-changer for gardeners looking to extend their growing season and reduce indoor clutter. With just a few simple steps and some recycled materials, you can grow strong, healthy plants that thrive in your garden.
Are you ready to try winter sowing? Let us know your favorite seeds to grow in the comments below! 🌱❄️
#WinterSowing #GardeningTips #EcoFriendlyGardening #SeedStarting #GardeningLife #YearRoundGardening #DIYGarden #GrowWithNature #SustainableGardening