
Winter can often feel like a slow season for gardeners, with frosty weather and shorter days making it difficult to think about planting. However, winter sowing—particularly using milk jugs—is a simple and effective technique that allows gardeners to get a jump start on their growing season. Not only does this method save money on buying seedlings, but it also offers an opportunity to grow a wider variety of plants that may otherwise be difficult to start indoors.
In this article, we will walk through the process of winter sowing in milk jugs, discuss the benefits of this method, and explore some tips for success. If you’re looking for an easy, low-cost way to start seeds early, this may be the solution you’ve been searching for!
What is Winter Sowing?
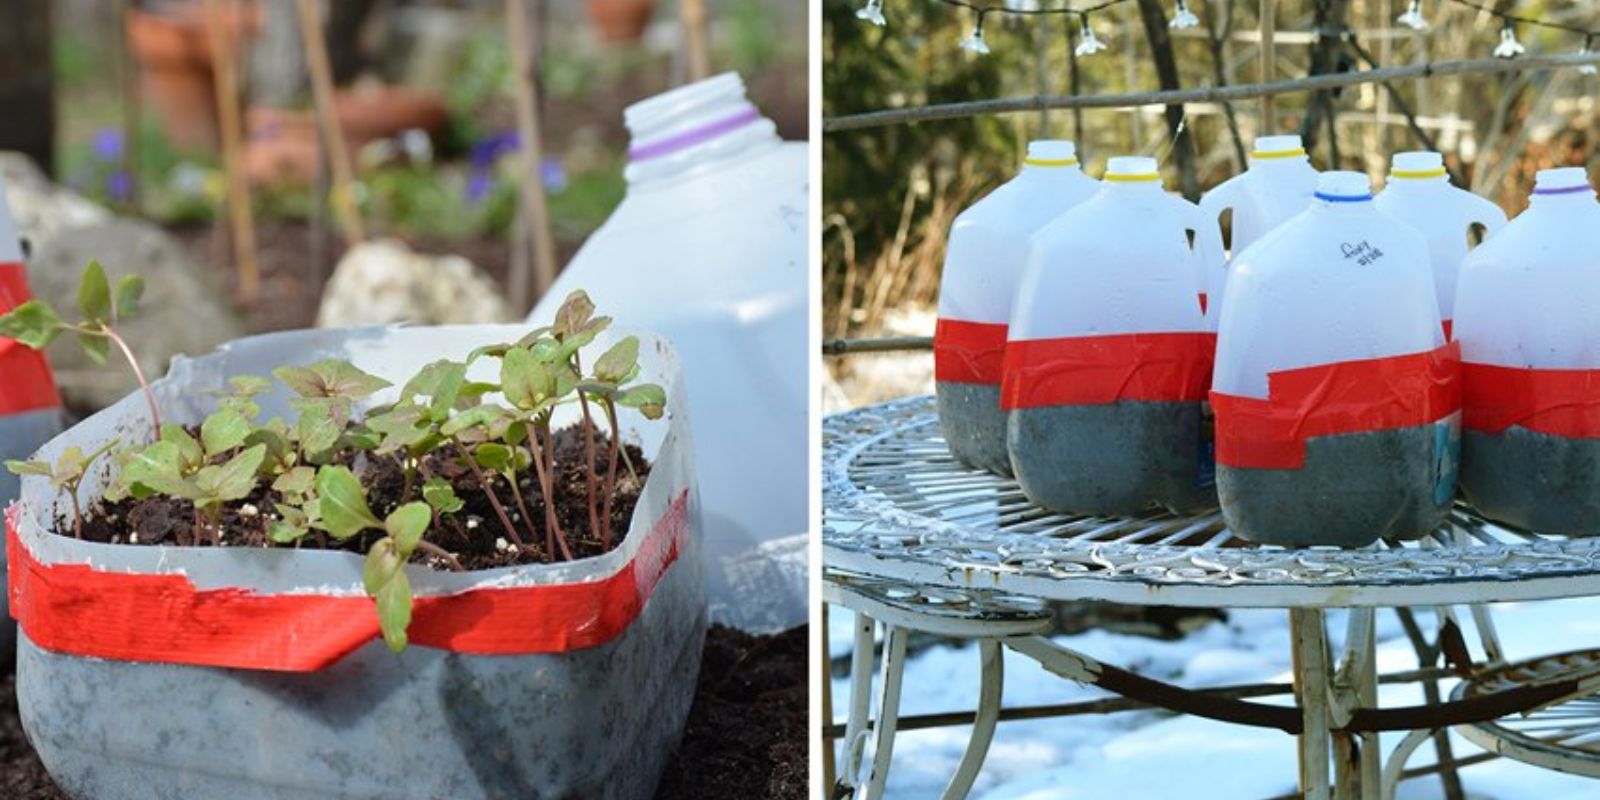
Winter sowing is the process of planting seeds outdoors during the winter months in a controlled environment that mimics the natural winter stratification process. This technique involves using containers (often recycled ones like milk jugs) to create a mini-greenhouse effect that keeps seeds warm, moist, and protected from the elements while they germinate.
By utilizing the natural cycles of winter, winter sowing allows you to start seeds outdoors without the need for grow lights or expensive indoor setups. As the weather warms up, the seedlings inside the jugs will begin to sprout and grow, ready to be transplanted into your garden once the danger of frost has passed.
Why Use Milk Jugs for Winter Sowing?
Milk jugs are an ideal container for winter sowing for several reasons:
- Recyclable: Milk jugs are easy to obtain and free, making them an eco-friendly option.
- Durable: Milk jugs are sturdy enough to withstand winter weather and can hold up against snow, rain, and wind.
- Ideal Size: The size of a gallon milk jug is perfect for starting seeds, providing ample space for root growth and preventing overcrowding.
- Mini Greenhouse Effect: The plastic jug creates a self-contained environment that keeps the seeds warm and protected while allowing natural sunlight to reach them.
Milk jugs are especially beneficial for gardeners with limited space, as they allow you to start multiple plants in a small, compact area.
Step-by-Step Guide to Winter Sowing in Milk Jugs
Now that you understand the basics of winter sowing, let’s dive into how to do it. Follow these simple steps to get your garden off to an early start:
1. Gather Your Supplies
Before you begin, make sure you have all the necessary materials:
- Empty milk jugs (preferably clear plastic ones, as they allow sunlight to pass through)
- A utility knife or scissors
- Seed-starting mix (a fine, well-draining soil is best)
- Seeds of your choice (cold-hardy vegetables, herbs, and flowers work best for winter sowing)
- A permanent marker (for labeling)
- A small watering can or spray bottle
- Duct tape (optional, for securing the jug)
2. Clean the Milk Jugs
Start by thoroughly rinsing out your milk jugs to remove any residue, such as milk or soap. This is important to ensure that your seeds won’t be exposed to any harmful chemicals or bacteria. Remove any labels to avoid confusion later, and dry the jug completely.
3. Cut the Jug
Using a utility knife or a pair of scissors, carefully cut the jug about 2-3 inches from the bottom. You want to leave the top of the jug attached so it can serve as a “lid” for your mini greenhouse. The opening should be large enough to allow you to add soil and seeds comfortably.
4. Prepare the Soil
Fill the bottom of the jug with a high-quality seed-starting mix. The soil should be lightweight, fine-textured, and well-draining to give your seeds the best chance for success. Make sure to leave about an inch of space from the top of the jug to allow room for watering and growth.
5. Plant the Seeds
Now it’s time to plant your seeds! Follow the instructions on your seed packets for the correct planting depth. Typically, seeds are planted about 1/8 to 1/4 inch deep. You can plant several seeds in each jug, but be sure to space them out to allow enough room for growth. Avoid overcrowding, as this can lead to weak plants.
6. Water the Seeds
Lightly water the soil using a watering can or a spray bottle. Make sure the soil is moist but not soaking wet. The moisture will help create the perfect germination conditions for your seeds. Be careful not to flood the jug, as excessive moisture can lead to mold growth.
7. Close and Secure the Jug
Carefully place the top of the jug back on, creating a “greenhouse” effect. Use duct tape to secure the edges if necessary, but leave the cap off to allow for ventilation. This helps prevent the buildup of excess moisture inside the jug, which could lead to mold or mildew.
8. Place the Jug Outdoors
Once your jugs are prepared, place them in a sunny location outdoors. They should be positioned where they can receive as much natural sunlight as possible. Ideally, this would be a south-facing spot. Be sure the jugs are sheltered from harsh winds and heavy snow to prevent them from tipping over or being damaged.
9. Monitor and Maintain
Throughout the winter, monitor the jugs to ensure they remain intact and free from pests. During thawing periods, check the moisture level inside the jug—if the soil feels dry, lightly water the seedlings. The milk jugs will act as insulation, keeping the seeds warm enough to germinate even during freezing temperatures.
Once the weather warms up, you’ll begin to see your seeds sprouting. At this point, you may want to carefully open the jug slightly to acclimate the plants to the outside conditions. When the risk of frost has passed, you can transplant the seedlings into your garden or larger containers.
Benefits of Winter Sowing in Milk Jugs
Winter sowing in milk jugs has several advantages that make it a great option for gardeners:
- Cost-Effective: Milk jugs are free, and the only other supplies you need are soil and seeds. This makes it an affordable way to start your garden.
- Minimal Equipment: No need for expensive grow lights, heating mats, or complicated indoor setups.
- Cold-Hardy Plants: Winter sowing is ideal for cold-hardy plants such as lettuce, kale, spinach, pansies, and certain herbs. These plants thrive in the cooler conditions provided by the milk jug setup.
- Easy to Monitor: Since the jugs are transparent, you can easily monitor the growth of your plants without opening them up constantly.
- Fewer Transplant Shock Issues: Seedlings grown in winter sowing setups are already accustomed to the outdoors, so they often experience less transplant shock compared to plants started indoors.
Which Plants Are Best for Winter Sowing in Milk Jugs?
Winter sowing works best for cold-hardy plants that can handle chilly temperatures and require a period of cold stratification to germinate. Some of the best plants for this method include:
- Vegetables: Lettuce, kale, spinach, peas, radishes, and other cool-season vegetables
- Herbs: Parsley, cilantro, thyme, and chives
- Flowers: Pansies, snapdragons, calendula, and foxgloves
- Perennials: Many perennials, including columbine, lupines, and coneflowers, can benefit from winter sowing
Avoid using milk jugs for plants that require warmer temperatures to germinate, such as tomatoes, peppers, or eggplants, as the cold will hinder their growth.
Final Thoughts
Winter sowing in milk jugs is an incredibly simple, sustainable, and efficient way to get a jump start on your garden. It allows you to grow more plants at home without the need for expensive equipment or a greenhouse. Best of all, it’s a free, eco-friendly option that uses materials you already have.
By following the steps outlined above, you can easily grow cold-hardy plants in the winter months and be ready to plant in the spring. So, the next time the temperatures drop and the ground freezes over, don’t put away your gardening gloves just yet. Grab a milk jug, some seeds, and start your garden early with the magic of winter sowing! Happy gardening!
#WinterSowing #MilkJugGardening #GardeningTips #SeedStarting #SustainableGardening #EcoFriendlyGardening #SpringGardening #ColdWeatherGardening #GreenThumb #DIYGardening #GardeningHacks