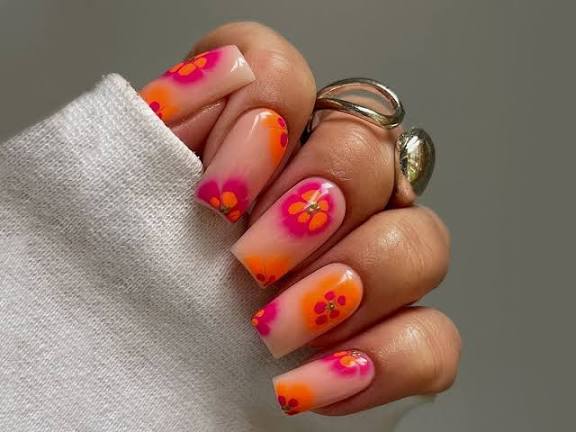
In the ever-evolving world of nail art, trends come and go—but some techniques capture attention and stay. One of the most talked-about nail trends in recent years is blooming gel flowers. From professional nail salons to at-home manicures, this technique has taken social media by storm, and it’s easy to see why.So, why everyone loves blooming gel flowers? The answer lies in their dreamy, watercolor-like effect, ease of use, and endless creative possibilities. Even beginners can create intricate floral designs that look hand-painted and luxurious. In this article, we’ll explore what blooming gel flowers are, why they’re so popular, how they work, and practical tips to help you master this stunning nail art trend.What Are Blooming Gel Flowers? (H2)Blooming gel flowers are nail art designs created using a special blooming gel that allows gel polish to spread and “bloom” across the nail surface. When dots or strokes of color are applied over blooming gel, they softly expand, forming petal-like shapes that resemble flowers.Why Blooming Gel Is Unique (H3)Unlike regular gel polish, blooming gel:Has a thinner, spreading consistencyCreates soft, blended edges automaticallyMimics watercolor or ink effectsRequires minimal brush controlThis innovation is a major reason why everyone loves blooming gel flowers—they look complex but are surprisingly easy to achieve.Why Everyone Loves Blooming Gel Flowers (H2)Blooming gel flowers have become a favorite for nail artists and clients alike.Effortless Elegance (H3)One of the biggest reasons blooming gel flowers are so popular is the effort-to-result ratio. With minimal technique, you get elegant, high-end designs that look professionally hand-painted.Beginner-Friendly Nail Art (H3)You don’t need advanced nail art skills. Even beginners can create beautiful results, making blooming gel flowers accessible to everyone.Social Media Appeal (H3)Blooming gel flowers are:Visually mesmerizingPerfect for Instagram, Pinterest, and TikTokInstantly eye-catchingThis viral appeal has fueled interest worldwide and explains why everyone loves blooming gel flowers.How Blooming Gel Flowers Work (H2)Understanding the process helps you achieve better results.The Science Behind the Bloom (H3)Blooming gel works by slowing down the drying process and allowing pigments to spread naturally. When gel polish is placed on top:The color disperses outwardSoft edges form automaticallyThe design evolves before your eyesThis natural movement creates organic floral shapes without detailed painting.Step-by-Step: How to Create Blooming Gel Flowers (H2)Step 1: Prep the Nails (H3)Shape and buff nailsApply base coat and cureApply your chosen base color and cureLight or nude bases are popular because they highlight the blooming effect.Step 2: Apply Blooming Gel (H3)Apply a thin, even layer of blooming gel and do not cure yet.Step 3: Create the Flower Design (H3)Use a dotting tool or fine brushAdd dots or small strokes of gel polishWatch as the color blooms into petal shapesYou can layer colors for depth and dimension.Step 4: Cure and Seal (H3)Once satisfied with the bloom:Cure under a UV/LED lampApply top coat and cure againThat’s it—this simplicity is exactly why everyone loves blooming gel flowers!Popular Blooming Gel Flower Designs (H2)Blooming gel flowers can be adapted to many styles.Soft Floral Nails (H3)Pastel colors like blush pink, lavender, and baby blue create romantic, delicate designs.Bold & Modern Flowers (H3)Use deep reds, blacks, or neon shades for dramatic, fashion-forward nails.Minimalist Floral Accents (H3)Single blooming flowers on accent nails are perfect for clean, modern looks.Seasonal Designs (H3)Spring: daisies, cherry blossomsSummer: tropical floralsFall: warm earthy tonesWinter: icy florals on dark basesVersatility is a key reason why everyone loves blooming gel flowers.Blooming Gel Flowers vs Hand-Painted Nail Art (H2)Blooming Gel Flowers (H3)Faster applicationSofter, blended finishBeginner-friendlyConsistent resultsHand-Painted Flowers (H3)Requires advanced skillMore time-consumingPrecise detailingBoth are beautiful, but blooming gel offers a shortcut to professional-looking nails.Practical Tips for Perfect Blooming Gel Flowers (H2)Use thin layers of blooming gelStart with small dots—they spread more than expectedWork one nail at a timeChoose highly pigmented gel polishPractice color combinations before curingThese tips help ensure clean, balanced designs every time.Common Mistakes to Avoid (H2)Applying too much blooming gelUsing thick gel polishCuring too quicklyOverloading colorTouching the design while it bloomsAvoiding these mistakes makes the technique far more enjoyable and predictable.Are Blooming Gel Flowers Safe for Natural Nails? (H2)Yes—when done properly.Nail Safety Tips (H3)Use quality gel productsAvoid over-filing the nail plateFollow proper curing timesRemove gel gently, never peelHealthy nails are essential for beautiful blooming gel designs.Why Blooming Gel Flowers Are Here to Stay (H2)Trends fade, but blooming gel flowers continue to evolve. New colors, techniques, and hybrid styles keep this nail art fresh and exciting. Because it balances simplicity and artistry, it appeals to professionals, DIY nail lovers, and trend-conscious clients alike.That lasting appeal is the ultimate reason why everyone loves blooming gel flowers.ConclusionBlooming gel flowers have transformed nail art by making intricate floral designs accessible to everyone. With minimal effort, endless customization, and stunning visual results, it’s no surprise this technique has become a global favorite.Whether you’re a nail artist, a beauty enthusiast, or someone looking to elevate their manicure game, blooming gel flowers offer creativity without complexity. Once you try them, you’ll quickly understand why everyone loves blooming gel flowers—and why this trend continues to bloom.✨🌸💅