
Introduction
Orchids are celebrated for their exotic beauty and delicate flowers, making them a favorite among plant enthusiasts. However, to ensure that these stunning plants continue to thrive and bloom, proper care is essential. One crucial aspect of orchid care is repotting. Repotting is necessary to refresh the plant’s growing environment, promote healthy growth, and prevent problems that can arise from an overcrowded or deteriorating pot. This article will explore when and why you should repot your orchids, including key signs that indicate it’s time to take action.
Understanding Orchid Growth and Repotting Needs
Orchids are unique in their growth patterns and potting requirements. Unlike many other plants, orchids do not grow in soil but in a specialized potting medium that supports their aerial roots. Over time, this medium breaks down and needs to be replaced. Additionally, as orchids grow, they may outgrow their current pot, leading to a need for repotting.
Key Signs That Your Orchid Needs Repotting
1. Root Overgrowth
Orchids are known for their vigorous root systems. If you notice roots growing out of the pot or even through the drainage holes, it’s a clear sign that your orchid is ready for a larger container.
- Action: Examine the roots to determine if they are densely packed or extending beyond the pot. If roots are circling the pot or coming out of the bottom, it’s time to repot.
2. Stagnant Growth
Healthy orchids should exhibit regular growth and flowering. If your orchid’s growth has slowed significantly or it hasn’t bloomed in a while, it could be due to overcrowding or a degraded potting medium.
- Action: Check for signs of stunted growth or poor flowering. If you see these symptoms along with a dense root system, repotting might help rejuvenate the plant.
3. Deteriorated Potting Medium
Orchid potting media, such as bark, sphagnum moss, or a commercial orchid mix, breaks down over time. When the medium becomes compacted or decomposed, it can hinder root growth and water drainage.
- Action: If the potting medium feels mushy, has an unpleasant odor, or has turned into a soggy mass, it’s time to refresh it with new material.
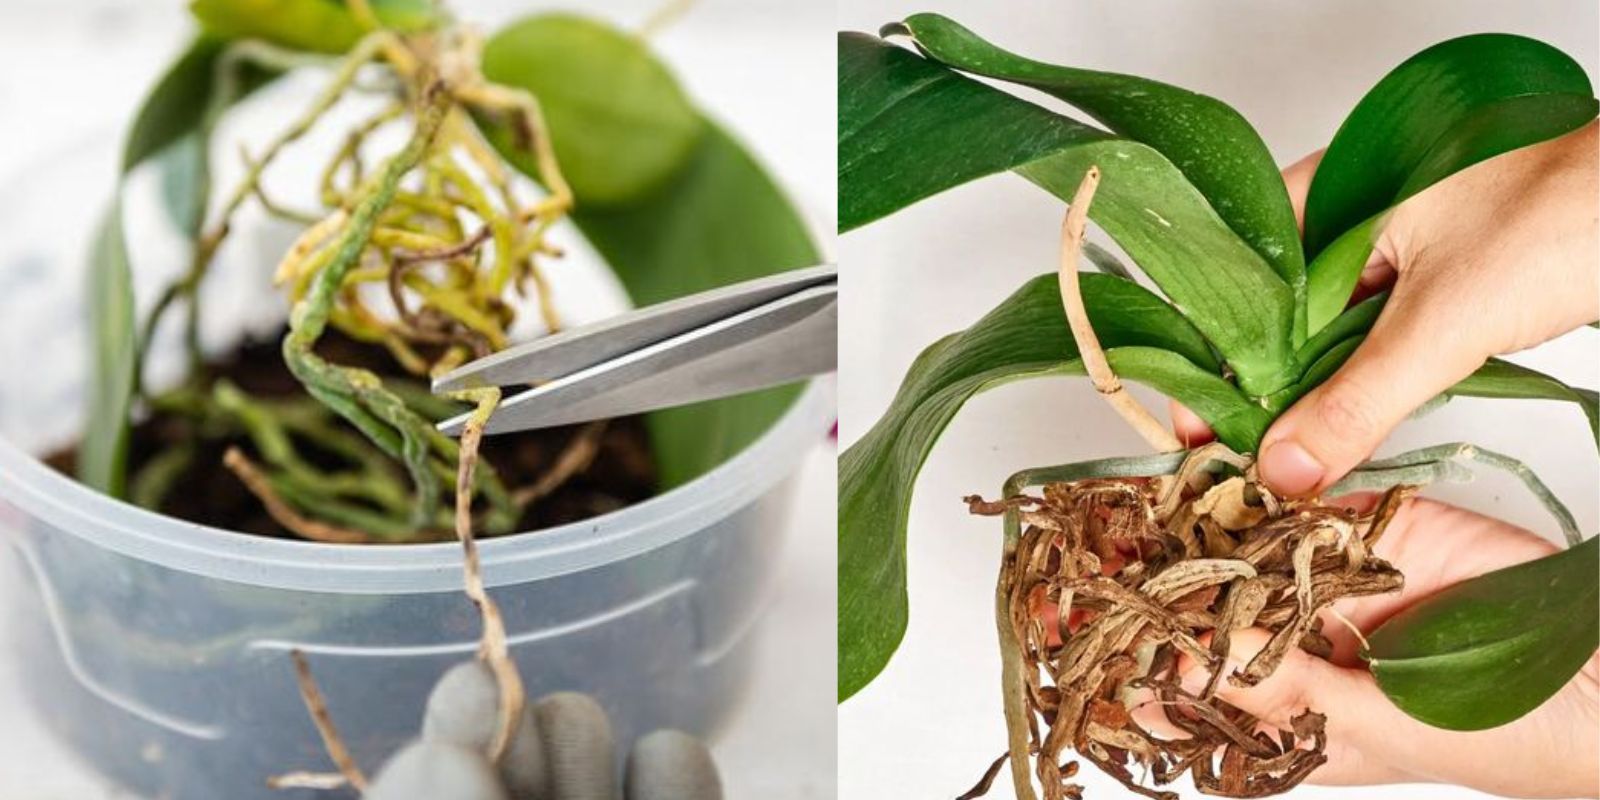
4. Root Health Issues
Healthy orchid roots are firm and white or green. If you notice roots that are black, brown, or mushy, they are likely suffering from rot, often caused by excess moisture or a lack of proper airflow.
- Action: Inspect the roots for signs of rot or disease. Trim off any damaged roots and repot the orchid in fresh, well-draining potting medium.
5. Pot Condition
Orchids need pots with good drainage to prevent waterlogging. Over time, pots can become damaged or inadequate for the plant’s needs.
- Action: If your pot is cracked, too small, or lacks proper drainage, consider repotting into a new container that supports healthy root growth.
Best Practices for Repotting Orchids
1. Choose the Right Time
The ideal time to repot orchids is just after they finish blooming, usually in late winter or early spring. Repotting during this period minimizes stress and allows the plant to acclimate before the next growing season.
- Tip: Avoid repotting during the orchid’s active blooming phase, as this can disrupt the plant’s energy and lead to poor flower development.
2. Select the Appropriate Pot
Choose a pot that is 1-2 inches larger in diameter than the current one. Ensure that the new pot has adequate drainage holes to prevent water accumulation.
- Tip: Consider using a pot with clear sides to monitor root health and prevent root rot.
3. Prepare the Potting Medium
Orchids require a specialized potting medium to support their roots and ensure proper drainage. Common mixes include orchid bark, sphagnum moss, or a combination of both.
- Tip: Avoid using standard potting soil, which retains too much moisture and can suffocate orchid roots.
4. Remove the Orchid from Its Current Pot
Gently remove the orchid from its existing pot, being careful not to damage the roots. Shake off or rinse away old potting medium from the roots.
- Tip: If the roots are tightly bound, use a pair of sterilized scissors to carefully trim any excessively long or damaged roots.
5. Repot the Orchid
Place the orchid in the center of the new pot and fill it with fresh potting medium, ensuring that the roots are well-distributed and the plant is stable.
- Tip: Gently tap the pot to settle the medium around the roots and avoid air pockets. Ensure that the base of the plant is level with the top of the potting medium.
6. Water and Care
After repotting, water the orchid thoroughly to help settle the medium and encourage root growth. Place the plant in a location with bright, indirect light and continue with your regular orchid care routine.
- Tip: Avoid fertilizing immediately after repotting, as the plant needs time to adjust to its new environment. Resume feeding once new growth appears.
Conclusion
Repotting orchids is a crucial part of their care, helping to ensure their continued health and vibrant blooming. By recognizing the key signs that your orchid needs repotting—such as root overgrowth, stagnant growth, deteriorated potting medium, root health issues, and pot condition—you can take timely action to maintain a thriving plant. With the right timing and techniques, your orchids will continue to flourish and add beauty to your home.
Motivation
Have you recently repotted your orchids or encountered any challenges with their care? Share your experiences and tips with us! Your insights can help fellow orchid enthusiasts keep their plants healthy and blooming beautifully. Let’s cultivate a community of passionate and knowledgeable orchid growers!