
Introduction
Orchids, with their exotic and vibrant blooms, are among the most beloved houseplants. Their beauty, however, comes with a set of care requirements that can be a bit tricky to master. One of the most crucial aspects of orchid care is watering. Proper watering ensures that orchids remain healthy, flourish, and produce their stunning flowers. In this article, we’ll explore the best practices for watering orchids to help you keep your plants in top condition and avoid common pitfalls such as root rot and dehydration.
Understanding Orchid Watering Needs
Orchids have unique watering needs compared to other houseplants, largely due to their natural habitats. Many orchids are epiphytes, meaning they grow on trees in their native environments, where they receive moisture from rain and humidity rather than from soil. Understanding this natural habitat is key to replicating their needs in a home setting.
- Orchid Potting Medium: Orchids typically grow in a potting mix that includes materials like bark, sphagnum moss, or perlite. These materials provide good aeration and drainage, essential for orchid health. The mix can dry out quickly, so it’s important to know when and how much to water.
- Water Quality: Orchids are sensitive to chemicals found in tap water, such as chlorine and fluoride. If possible, use distilled or rainwater for watering your orchids. If you must use tap water, let it sit out for 24 hours to allow some of the chemicals to dissipate before using it.
Best Practices for Watering Orchids
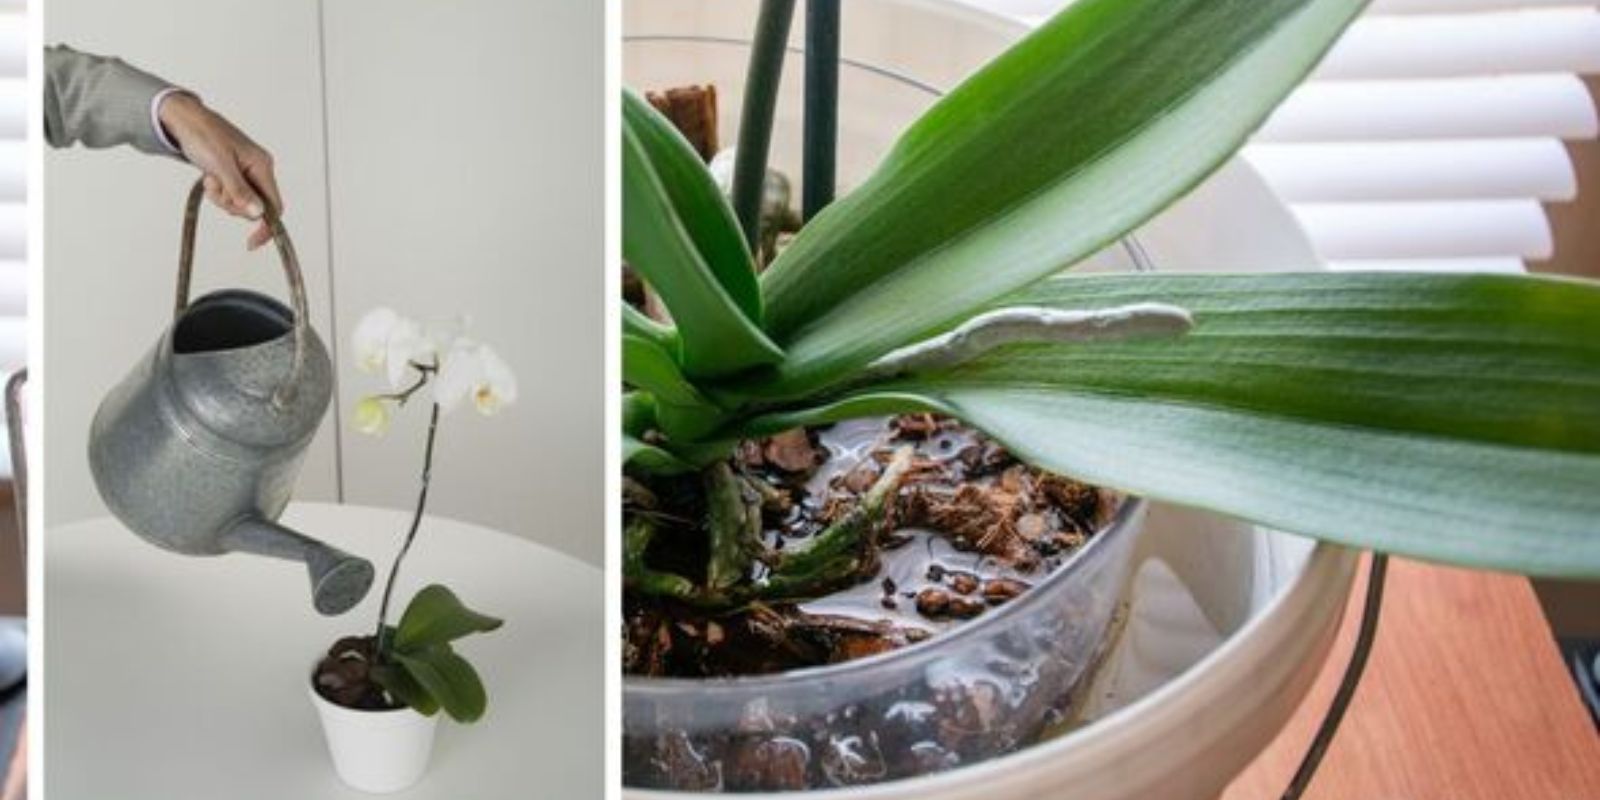
1. Check Soil Moisture
Before watering your orchid, always check the moisture level of the potting medium. Orchids prefer their roots to dry out slightly between waterings. Here’s how to assess soil moisture:
- Feel the Potting Medium: Stick your finger into the potting mix up to about an inch. If the medium feels dry at this depth, it’s time to water. If it still feels moist, wait a few more days before checking again.
- Use a Moisture Meter: For a more precise measurement, you can use a moisture meter. This tool will help you gauge the moisture level more accurately, particularly useful for beginners.
2. Water Thoroughly
When it’s time to water, make sure to do so thoroughly. Orchids need enough water to reach all the roots and ensure even moisture distribution. Follow these steps:
- Water Until It Drains: Water the orchid until you see water draining from the bottom of the pot. This ensures that the entire root system is receiving moisture.
- Avoid Overwatering: Be cautious not to overwater. Allow excess water to drain away and do not let the plant sit in standing water. Overwatering can lead to root rot and other issues.
3. Adjust for Humidity
Orchids thrive in a humid environment. If you live in a dry climate, you’ll need to take extra steps to increase humidity around your orchid:
- Use a Humidity Tray: Place a shallow tray filled with pebbles and water underneath the orchid pot. As the water evaporates, it increases the humidity around the plant.
- Employ a Room Humidifier: For more consistent humidity, use a room humidifier. This is especially helpful during winter months when indoor air tends to be drier.
- Misting: Light misting of the orchid’s leaves can help increase humidity, but be careful not to overdo it. Excess moisture on the leaves can lead to fungal problems.
4. Consider Environmental Factors
Several environmental factors can influence how often you should water your orchid:
- Light Levels: Orchids in brighter light will generally dry out faster and may require more frequent watering. Conversely, those in lower light conditions will stay moist longer.
- Temperature: Warmer temperatures cause the potting mix to dry out more quickly, so you may need to water more often during hotter months.
- Seasonal Changes: Watering needs can also change with the seasons. During winter, reduce watering as the plant’s growth slows down and the potting mix retains moisture longer.
5. Repotting and Watering
Repotting your orchid is an essential part of maintenance. It’s usually done every 1-2 years and can affect watering needs:
- After Repotting: Newly repotted orchids may need less frequent watering initially as the fresh potting mix retains more moisture. Monitor the plant closely and adjust your watering schedule as needed.
- Choosing the Right Pot: Ensure that the pot has adequate drainage holes. A pot with poor drainage can lead to waterlogged soil and root rot.
Common Mistakes to Avoid
1. Overwatering: One of the most common mistakes in orchid care is overwatering. This can lead to root rot and other fungal diseases. Always check the moisture level before watering and ensure proper drainage.
2. Watering with Cold Water: Avoid using very cold water, as it can shock the plant. Room temperature water is ideal for orchids.
3. Ignoring Water Quality: Using hard or chlorinated tap water can harm orchids over time. Opt for distilled or rainwater whenever possible.
4. Neglecting Humidity Needs: Orchids need a higher humidity level than most indoor environments provide. Make sure to address this by using humidity trays, humidifiers, or regular misting.
Conclusion
Mastering the art of watering orchids is crucial for keeping these stunning plants healthy and blooming. By understanding their unique needs and following best practices, you can ensure your orchids thrive and continue to bring beauty to your home. Remember to check soil moisture regularly, water thoroughly, and maintain the right humidity levels. With these tips, you’ll be well on your way to becoming an orchid care expert.
What’s your top tip for watering orchids? Share your experiences and help others achieve beautiful blooms! 🌺