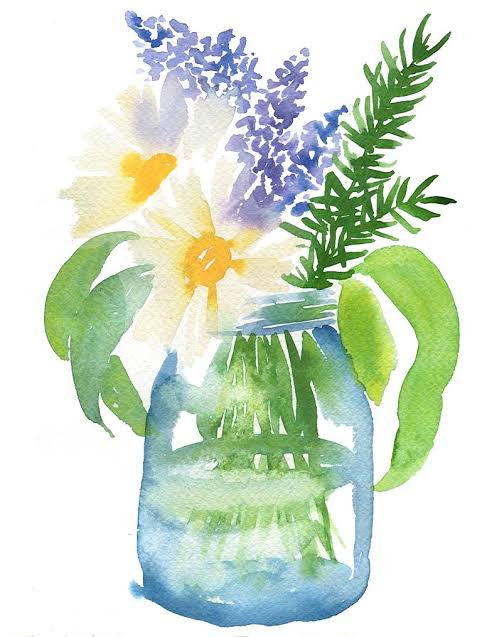
If you’ve ever admired the soft, dreamy beauty of watercolor flower paintings and wished you could create them yourself, you’re in the right place. Whether you’re a beginner or looking to refine your artistic skills, this “Boost Your Watercolor Flowers Tutorial!” will guide you through techniques, tools, and creative ideas to help your floral artwork truly bloom.Watercolor painting is loved for its spontaneity, transparency, and elegance. When it comes to painting flowers, the fluid nature of watercolor perfectly captures the organic shapes and delicate petals. Let’s explore how to elevate your watercolor flower art — with easy-to-follow steps, insider tricks, and inspiring tips!🌷 Why You’ll Love This Watercolor Flowers TutorialPainting watercolor flowers is more than just a relaxing hobby — it’s a way to express creativity and mindfulness. Here’s why this Boost Your Watercolor Flowers Tutorial! is perfect for you:Beginner-friendly: Simple techniques explained step-by-step.Creative freedom: Learn to loosen up your brushwork and embrace imperfection.Therapeutic benefits: Watercolor painting encourages calm and focus.Versatile uses: Use your floral paintings for prints, cards, or home décor.Whether you’re painting roses, tulips, or wildflowers, this guide will help you grow your skills and confidence.🖌️ Getting Started: Materials You’ll NeedBefore we dive into painting, make sure you have the right supplies. The key to success in this Boost Your Watercolor Flowers Tutorial! is using quality materials that let the paint shine.🎨 Essential Supplies:Watercolor paints: Choose artist-grade or high-quality student paints for vibrant results.Brushes: Round brushes (sizes 4–12) are perfect for petals and leaves.Paper: Cold-press watercolor paper (140 lb/300 gsm) gives the best texture and absorbency.Palette: A ceramic or plastic palette for mixing colors.Water containers: One for rinsing brushes and one for clean water.Paper towel: For blotting and lifting paint.🪶 Pro Tip: Avoid thin or low-quality paper—it can warp or tear when wet. Invest in good watercolor paper to boost your watercolor flowers tutorial results instantly!🌸 Understanding Watercolor BasicsBefore painting, it’s important to understand how water, pigment, and paper interact. Watercolor painting is all about control and flow.💧 Water ControlThe amount of water in your brush affects color intensity and blending.More water: Creates lighter, softer washes.Less water: Gives stronger, more defined strokes.🎨 Color MixingStart with primary colors (red, blue, yellow) and mix your own floral hues.For example:Red + Yellow = Warm Orange (great for marigolds or poppies)Red + Blue = Violet (perfect for irises)Yellow + Blue = Green (for leaves and stems)🌤️ LayeringWatercolor is transparent, so you can build depth through layering (also called glazing). Let each layer dry before adding another to avoid muddy colors.🌼 Step-by-Step: Painting Simple Watercolor FlowersNow that your tools are ready, it’s time to begin! This Boost Your Watercolor Flowers Tutorial! breaks down the process into clear, achievable steps.🌿 Step 1: Sketch LightlyStart with a light pencil sketch to outline your flower shapes — roses, daisies, peonies, or even abstract blooms. Keep lines soft; watercolor will define the forms later.🌺 Step 2: Apply the First WashWet the petal areas with clean water using a round brush. Then, drop in diluted color (like pink or yellow). Let the pigment spread naturally.This creates those soft, luminous gradients that watercolor is known for.🌻 Step 3: Add Depth and ShadowsOnce the first layer dries, add a slightly darker shade to the base of each petal.Use gentle strokes to suggest curvature and dimension. Remember — less is more!🎨 Pro Tip: Mix a touch of complementary color (like green into red) to create realistic shadows without turning muddy.🌸 Step 4: Paint the Leaves and StemsUse shades of green mixed with a little blue or brown for variety. Paint leaves with quick, confident strokes — try flicking your brush outward for a natural leaf shape.🌼 Step 5: Final Details and HighlightsOnce everything dries, add fine details like veins, pollen dots, or tiny buds.Use a dry brush or white gouache to add subtle highlights that make the petals pop.You’ve now completed a stunning watercolor flower painting! With practice, each piece will look more fluid and expressive.🌹 Boost Your Watercolor Flowers Tutorial with Advanced TechniquesReady to level up? These creative techniques will make your florals truly stand out.🌀 1. Wet-on-Wet TechniqueApply paint onto a wet surface to create dreamy, flowing effects. Perfect for soft petals or backgrounds.🖋️ 2. Wet-on-Dry TechniquePaint on a dry surface for crisp, defined edges — great for fine details or leaf veins.🌫️ 3. Color BleedingLet two colors blend into each other while wet (for example, pink and orange petals) to add natural color transitions.✨ 4. LiftingUse a clean damp brush or tissue to lift paint and create highlights or light textures.🌾 5. SplatteringAdd spontaneous color splashes by tapping your loaded brush over the painting for a lively, energetic effect.🎨 Color Palette Ideas for Watercolor FlowersChoosing the right colors is key to capturing mood and harmony. Here are some palettes to inspire your next piece:Romantic Rose Garden: Rose pink, crimson, sap green, and gold.Sunny Field: Yellow ochre, olive green, and burnt sienna.Lavender Dreams: Violet, ultramarine, and soft gray.Tropical Vibes: Coral, turquoise, and lime green.Experiment with warm and cool contrasts to make your flowers pop — one of the best ways to boost your watercolor flowers tutorial results!🪻 Common Mistakes and How to Avoid ThemEven seasoned artists make mistakes. Here’s how to keep your artwork fresh and beautiful:Overworking the paint: Stop before the paper gets soggy; let watercolor breathe.Using too much water: Dilution can wash out colors — control the water ratio.Skipping test swatches: Always test color mixes before applying to the final piece.Neglecting white space: Leave bits of paper showing for natural highlights.Rushing layers: Patience is key — let each layer dry completely!💡 Remember: Watercolor is about letting go. Embrace the unpredictable nature of the medium.🌻 Practical Tips to Boost Your ProgressPaint regularly — even short daily sessions build skill.Study real flowers or reference photos for structure and shading.Keep a watercolor flower sketchbook for practice and inspiration.Try different paper textures to see how they affect blending.Watch your lighting — natural daylight reveals true colors.Consistency and curiosity are the real secrets to mastering watercolor florals.💐 Creative Project Ideas Using Your Watercolor FlowersOnce you’ve created your floral masterpieces, here are some ways to use them:Greeting cards and stationery setsFramed wall art for home décorPrintable calendars or plannersFabric patterns for craftsDigital designs for social media or blogsYour unique floral art can be shared, gifted, or even sold — proving how far you’ve come since starting this Boost Your Watercolor Flowers Tutorial!🌸 Conclusion: Time to Boost Your Watercolor Flowers Tutorial!Watercolor flowers are timeless, expressive, and endlessly inspiring. With patience, practice, and creativity, anyone can paint stunning florals that capture the light and life of nature.This “Boost Your Watercolor Flowers Tutorial!” has given you everything you need — from basic techniques and tools to advanced effects and color ideas. Now it’s time to pick up your brush, mix your favorite hues, and let the water guide you.Every petal you paint is a step toward mastering this elegant art form. So breathe, relax, and let your creativity bloom — one watercolor flower at a time. 🌷✨🔍 SEO Keywords Used Naturally:Boost your watercolor flowers tutorial, watercolor flowers painting, beginner watercolor tutorial, floral watercolor art, watercolor techniques, watercolor painting tips, painting flowers with watercolor, easy watercolor flowers, watercolor art ideas.