
Orchids, with their exotic beauty and intricate blooms, have captivated plant enthusiasts for centuries. While these plants are renowned for their elegance, they often intimidate newcomers with their seemingly complex care requirements. The good news is that with a few essential tips, you can easily nurture and grow any orchid variety. This article will uncover the secret to successful orchid care, offering a straightforward guide to ensure your orchids thrive.
Understanding Orchids
Orchids are diverse plants, with thousands of species and hybrids available. Despite their variety, most orchids share common care needs. The key to successful orchid cultivation lies in understanding and meeting these needs. By addressing light, water, humidity, and nutrients appropriately, you can create the ideal environment for your orchids.
1. Choosing the Right Orchid
The first step in successful orchid care is selecting the right type for your home environment. Orchids can be broadly categorized into two groups: epiphytic and terrestrial. Epiphytic orchids, like Phalaenopsis and Cattleya, grow on trees or rocks in their natural habitat and are more commonly kept as houseplants. Terrestrial orchids, such as Paphiopedilum and Cypripedium, grow in the soil. For beginners, epiphytic orchids are often easier to manage due to their adaptability to indoor conditions.
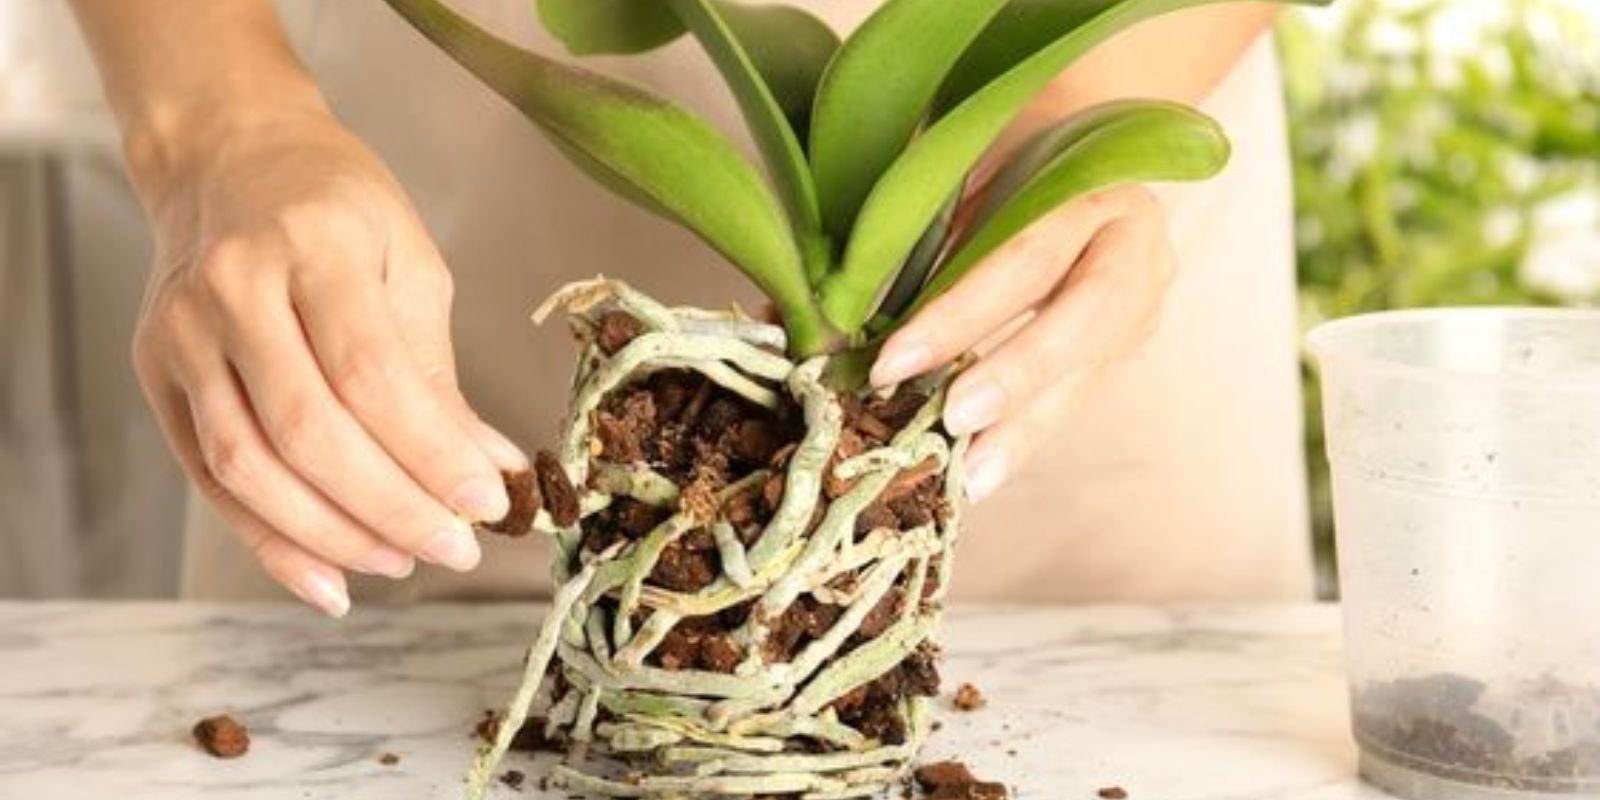
2. Preparing the Growing Medium
Orchids require a special growing medium that mimics their natural environment. Unlike typical houseplants that grow in soil, orchids need a well-draining medium. A standard potting mix won’t work for orchids; instead, use an orchid-specific mix which often includes components like bark, perlite, and sphagnum moss. This mix ensures good air circulation around the roots and prevents waterlogging, which is crucial for preventing root rot.
- Orchid Potting Mix: Choose a mix designed for your specific type of orchid. For example, Phalaenopsis orchids thrive in a mix of bark and perlite, while Dendrobiums might need a coarser mix.
3. Providing Proper Light
Light is crucial for orchid health, but the requirements vary among species. Most orchids prefer bright, indirect light. Direct sunlight can scorch their leaves, while too little light can hinder growth and blooming.
- Placement: Place your orchid near a window that receives filtered light, such as through sheer curtains. A south or east-facing window is ideal. If natural light is insufficient, consider using grow lights to supplement.
4. Watering Correctly
Watering is often the most challenging aspect of orchid care for beginners. Orchids generally need less water than you might expect. Overwatering is a common mistake and can lead to root rot.
- Watering Frequency: Water your orchid only when the top inch of the growing medium feels dry. Depending on humidity and light levels, this could be once a week or less frequently.
- Water Quality: Use room-temperature water and avoid using softened water, which can harm orchids. Rainwater or distilled water is preferred.
5. Maintaining Humidity
Orchids thrive in high humidity, which can be a challenge in many homes. They generally prefer humidity levels between 40% and 60%. Dry air can lead to problems such as dry leaf tips and poor growth.
- Humidity Solutions: Use a humidity tray, which can be a shallow container filled with water and pebbles placed under the orchid pot. Alternatively, use a room humidifier to increase the moisture in the air.
- Misting: Lightly misting the orchid can also help increase humidity, but be cautious not to overdo it, as excessive moisture on leaves can lead to fungal issues.
6. Fertilizing Wisely
Orchids benefit from regular feeding, but it’s important to use the right type of fertilizer and to follow a balanced schedule. Over-fertilizing can harm the plant.
- Fertilizer Type: Use a balanced orchid fertilizer with equal parts nitrogen (N), phosphorus (P), and potassium (K), such as a 30-30-30 formula.
- Application: Fertilize your orchid every 2-4 weeks during the growing season (spring and summer). Reduce feeding during the winter months when the plant’s growth slows down.
7. Repotting as Needed
Orchids generally need to be repotted every 1-2 years or when they outgrow their pot. Repotting helps refresh the growing medium and provides more space for the roots to grow.
- When to Repot: Repot your orchid when you notice that the roots are crowded or if the growing medium has broken down and is no longer providing adequate drainage.
- Repotting Process: Carefully remove the orchid from its pot, trim any dead or damaged roots, and place it in a new pot with fresh orchid mix. Water lightly after repotting.
Conclusion
By following these essential steps, you’ll be well on your way to growing beautiful, healthy orchids. Understanding the specific needs of your orchid, from light and water to humidity and nutrients, will enable you to provide the ideal conditions for these stunning plants.
Embrace the joy of orchid care and watch as your orchids flourish and bloom, transforming your home into a vibrant, green sanctuary. Remember, with patience and the right techniques, anyone can master the art of growing orchids. 🌿🌺