
Orchids are one of the most elegant and captivating plants, adored for their exotic blooms and ability to brighten any space. However, many orchid owners find themselves wondering why their plant has stopped blooming after its first flush of flowers. The truth is, with the right care and attention, your orchid can flower not just once but again and again. This comprehensive guide will show you how to unlock the full potential of your orchid and enjoy continuous blooms year-round.
Understanding Orchids: Why They Stop Blooming
Before diving into how to make your orchid rebloom, it’s essential to understand its natural growth cycle. Orchids, particularly popular varieties like Phalaenopsis (moth orchids), go through three stages:
- Growth Phase: When the plant develops new leaves and roots.
- Resting Phase: A period of dormancy where the orchid conserves energy.
- Blooming Phase: When the plant produces flowers.
After blooming, orchids naturally enter a resting phase to prepare for their next cycle. The key to encouraging reblooming is to support the plant during its resting and growth phases with proper care.
Steps to Make Your Orchid Rebloom
1. Provide the Right Amount of Light
Light is crucial for an orchid to produce blooms. Orchids prefer bright, indirect light. Here’s how to achieve the perfect lighting:
- Location: Place your orchid near an east or south-facing window where it can get plenty of light without direct sun exposure, which can scorch its leaves.
- Leaf Test: Healthy orchid leaves should be a vibrant green. Dark green leaves indicate insufficient light, while yellow or red-tinged leaves suggest too much.
- Supplement with Grow Lights: In low-light conditions, especially during winter, consider using a full-spectrum grow light to mimic natural sunlight.
2. Water Sparingly but Consistently
Overwatering is the most common mistake orchid owners make. Orchids thrive in a “wet and dry cycle.”
- Water Only When Needed: Check the roots—if they’re silver-gray, it’s time to water. Green roots mean the plant still has sufficient moisture.
- Method: Water thoroughly, allowing excess to drain completely. Never let the plant sit in standing water, as this can lead to root rot.
3. Maintain the Ideal Temperature
Orchids are sensitive to temperature changes, which can trigger reblooming.
- Daytime Temperature: 65–75°F (18–24°C).
- Nighttime Drop: A 10°F (5°C) drop at night encourages flower spike development.
- Avoid Drafts: Keep orchids away from vents, air conditioners, and heaters.
4. Control Humidity Levels
Orchids originate from tropical environments and love humidity. Aim for 50–70% humidity.
- Use a Humidifier: This is the easiest way to maintain consistent humidity.
- DIY Solutions: Place a tray of water with pebbles beneath the orchid pot. As the water evaporates, it increases humidity around the plant.
- Group Plants Together: Grouping orchids and other houseplants can create a mini humid microclimate.
5. Feed Your Orchid Properly
Orchids require a steady supply of nutrients to rebloom.
- Fertilizer Choice: Use a balanced orchid fertilizer (20-20-20 or 10-10-10) during the growth phase.
- Feeding Schedule: Fertilize every two weeks during active growth and once a month during dormancy.
- Dilute the Fertilizer: Always use a diluted solution to avoid burning the roots.
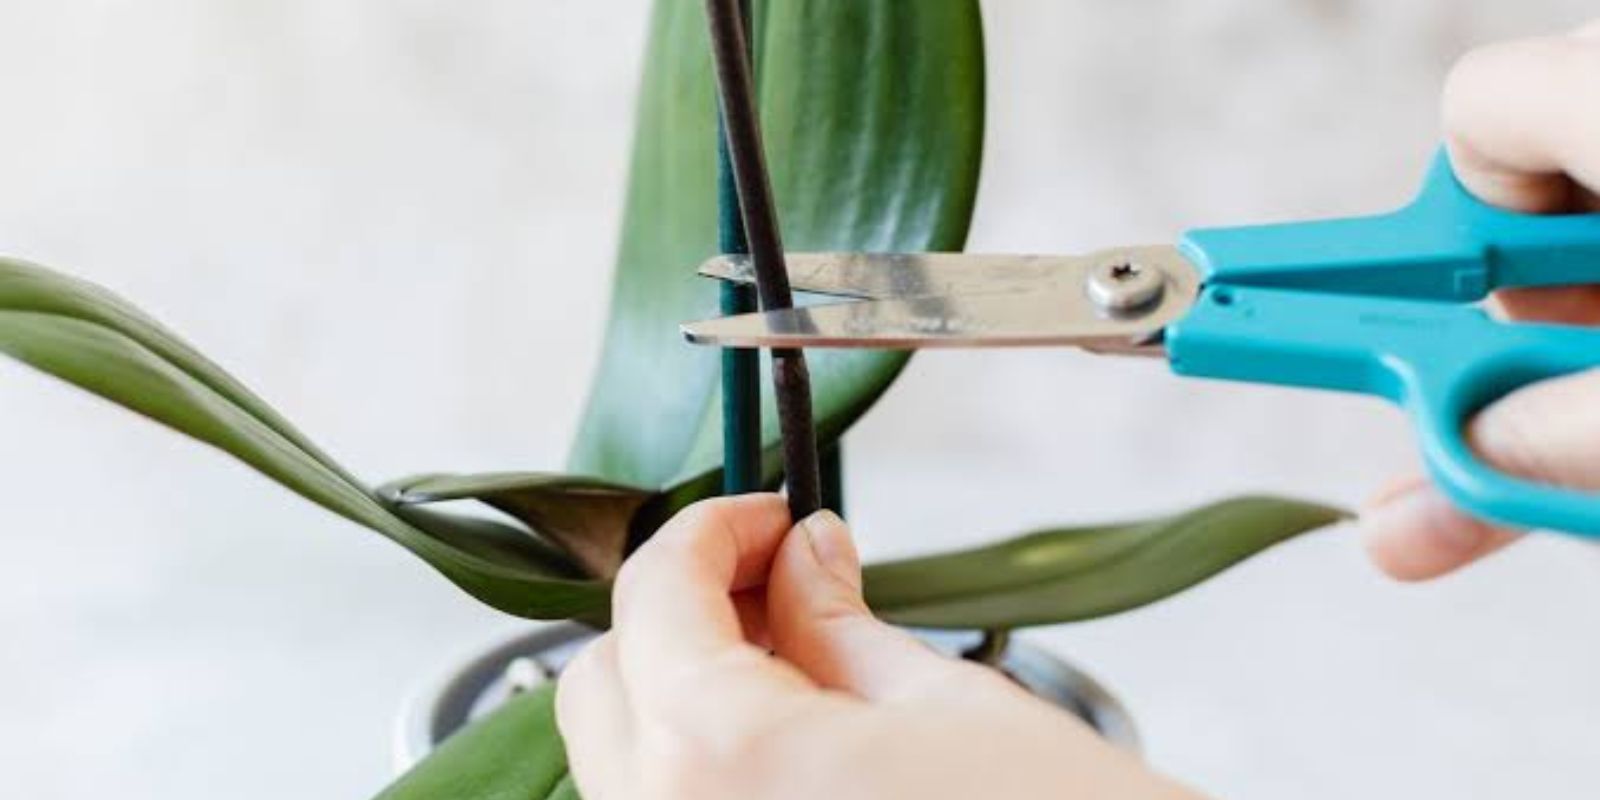
6. Prune the Flower Spike
What you do after the flowers fade can significantly impact reblooming:
- For Phalaenopsis Orchids: If the flower spike is green and healthy, cut it just above a node (the small bump on the spike). This can encourage a secondary bloom.
- If the Spike is Brown: Trim it off entirely at the base, as it won’t produce more flowers.
7. Repot When Necessary
Orchids don’t need frequent repotting, but every 1–2 years is essential for optimal health.
- Signs It’s Time to Repot:
- The potting medium has broken down.
- Roots are overcrowded or growing out of the pot.
- Water isn’t draining properly.
- How to Repot: Use a specialized orchid mix (bark, sphagnum moss, or a combination). Choose a pot with good drainage and repot during the growth phase, not when the orchid is blooming.
Common Mistakes to Avoid
Even experienced gardeners can make errors when caring for orchids. Here are some pitfalls to watch out for:
- Overwatering: Root rot is the biggest orchid killer. Always let the roots dry slightly before watering.
- Improper Lighting: Too much or too little light can prevent flowering.
- Neglecting Dormancy: Orchids need a resting phase to build energy for their next bloom.
- Using the Wrong Potting Medium: Regular soil is too dense for orchids. Always use a breathable mix like bark or moss.
Additional Tips for Thriving Orchids
Encourage New Flower Spikes
- After the resting phase, orchids often need a temperature drop to signal it’s time to bloom. Move your orchid to a cooler spot at night (55–60°F or 12–15°C) for a few weeks.
- Be patient! Orchids may take several months to develop a new spike.
Monitor Root Health
Healthy roots are green and firm. If roots appear mushy or brown, trim the damaged parts and repot the orchid in fresh medium.
Patience is Key
Reblooming an orchid can take time and consistent care. Each variety has its own rhythm, so don’t be discouraged if blooms don’t appear immediately.
The Benefits of Orchid Reblooming
Making your orchid bloom again is not just about aesthetics—it’s a rewarding process that teaches patience and precision. Orchids add beauty and sophistication to your home, and seeing them thrive under your care is deeply satisfying.
Why Orchids are Worth the Effort
Orchids symbolize love, luxury, and strength, making them a favorite among plant enthusiasts. While they may seem high-maintenance, they’re surprisingly resilient with the right care. By following these steps, you can enjoy your orchid’s captivating blooms for years to come.
💬 Have your orchids rebloomed? Share your tips and success stories below!