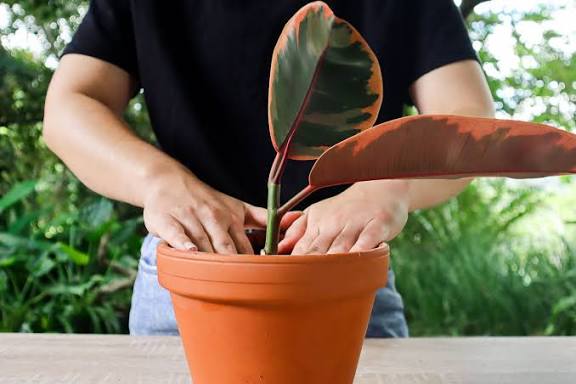
If you love houseplants, you’ll be amazed at how simple it is to multiply one of the most popular indoor plants. Unbelievable how to propagate rubber plant varieties (Ficus elastica) at home—it’s easy, budget-friendly, and incredibly rewarding. Whether you want a fuller plant or a gift for a friend, rubber plant propagation is a skill every plant lover should master.This guide is perfect for beginners and experienced gardeners in the United States, United Kingdom, and Canada.Why Propagate a Rubber Plant?Rubber plants are loved for their glossy leaves, air-purifying qualities, and low-maintenance care. Propagating them offers several benefits:🌱 Create new plants for free✂️ Control the size and shape of your plant🎁 Share plants with friends and family🪴 Rejuvenate leggy or overgrown plantsBest Time to Propagate a Rubber PlantThe ideal time is spring to early summer, when the plant is actively growing. Propagation can work year-round indoors, but warmer months give faster and stronger results.Tools and Supplies You’ll NeedHealthy rubber plantClean, sharp pruning shears or knifeSmall pot with drainage holesWell-draining potting mixWater or moist soilOptional: rooting hormoneGloves (rubber plant sap can irritate skin)Method 1: Propagating Rubber Plant in Water (Beginner-Friendly)Step 1: Take a Healthy CuttingChoose a healthy stem with 2–3 leavesCut just below a node (where leaves attach)Wipe off the milky sap with a damp clothStep 2: Prepare the CuttingRemove the lower leavesYou can roll large leaves gently and secure with a rubber band to reduce moisture lossStep 3: Place in WaterSubmerge the node in clean waterKeep leaves above the water linePlace in bright, indirect lightStep 4: Wait for RootsChange water every 3–4 daysRoots usually appear in 3–6 weeksStep 5: Pot the CuttingOnce roots are 1–2 inches long, plant in soilWater lightly and keep warmMethod 2: Propagating Rubber Plant in Soil (Most Reliable)Step 1: Take a CuttingCut a healthy stem below a nodeRemove lower leavesStep 2: Use Rooting Hormone (Optional)Dip the cut end in rooting hormone to encourage faster growthStep 3: Plant in SoilInsert the cutting into moist, well-draining soilFirm the soil gently around the stemStep 4: Create HumidityCover loosely with a plastic bagKeep in bright, indirect lightStep 5: Monitor GrowthRoots form in 4–6 weeksGently tug to feel resistanceMethod 3: Air Layering (Best for Large Plants)This method works great for tall or woody rubber plants.Make a small cut on the stem below a nodeApply rooting hormoneWrap with moist sphagnum mossCover with plastic wrapRoots form in 4–8 weeksCut below the roots and pot the new plantEssential Care After PropagationLight: Bright, indirect lightWater: Keep soil slightly moist, not soggyTemperature: 65–80°F (18–27°C)Humidity: Moderate to highCommon Mistakes to AvoidOverwatering new cuttingsUsing dull or dirty toolsPlacing cuttings in direct sunlightForgetting to clean off the sapAvoiding these mistakes makes propagation almost foolproof.Why Everyone Is Surprised by Rubber Plant PropagationMinimal effort, big resultsHigh success rateWorks in water or soilPerfect for beginnersIt’s truly unbelievable how to propagate rubber plant cuttings with just a few simple steps.Final ThoughtsLearning how to propagate a rubber plant is one of the most satisfying plant skills you can develop. With patience, proper care, and the right method, you’ll soon have healthy new plants thriving in your home.