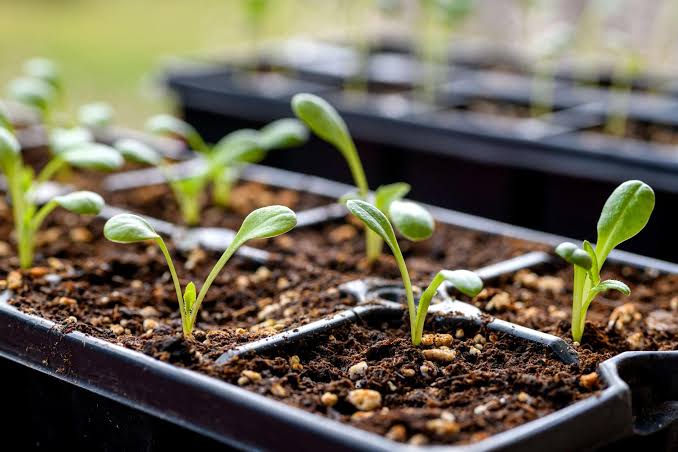
If you’ve ever dreamed of starting your own garden, growing flowers, herbs, or vegetables from seeds is one of the most rewarding experiences you can have. Watching a tiny seed sprout and turn into a thriving plant feels like magic — and the best part? It’s easier than you think!Whether you live in the United States, United Kingdom, or Canada, this guide will show you how to plant seeds the smart, simple way — plus share amazing tips and hacks inside to boost germination, save time, and help your garden grow beautifully. 🌿🌞🌾 Why Start from Seeds?Starting plants from seeds isn’t just budget-friendly — it’s a deeply satisfying way to connect with nature.Here’s why gardeners love it:🌱 Cost-effective: A single seed packet can produce dozens of plants.🌸 More variety: Choose from rare or heirloom seeds not found in stores.🌍 Eco-friendly: Skip plastic pots and packaging.💚 Personal satisfaction: Nothing beats saying, “I grew this from seed!”💡 Hack Inside: Save seeds from your favorite fruits, vegetables, or flowers — you can replant them next season for free!🪴 Step-by-Step: How to Plant SeedsHere’s an easy, beginner-friendly guide to planting seeds that grow strong and healthy.🌿 Step 1: Choose the Right SeedsPick seeds suited for your local climate and growing season.Examples:Vegetables: Lettuce, tomatoes, zucchini, carrotsHerbs: Basil, cilantro, parsley, mintFlowers: Marigolds, sunflowers, zinnias, cosmos💡 Pro Tip: Read the seed packet! It tells you how deep to plant, how much sun they need, and how long they take to germinate.🌞 Step 2: Gather Your SuppliesYou don’t need fancy tools — just the basics:Seed trays, pots, or recycled containers (like egg cartons or yogurt cups)Quality seed-starting mix or light potting soilSpray bottle or watering canPlastic wrap or humidity dome (optional)Plant labels or popsicle sticks💡 Hack Inside: Poke small drainage holes in the bottom of containers to prevent waterlogging — seeds love moisture, not soggy soil!🌾 Step 3: Prepare the SoilUse a seed-starting mix instead of garden soil — it’s lighter, well-draining, and free of pests or weeds.Steps:Fill your containers with moist (not wet) seed-starting mix.Gently pat down to remove air pockets.Smooth the top layer before planting.💡 Pro Tip: Warm the soil slightly before planting — seeds germinate faster in warm conditions.🌱 Step 4: Plant Your SeedsCheck your seed packet for depth instructions — most small seeds only need to be covered lightly with soil, while larger ones (like beans or peas) should go deeper.General Rule:Tiny seeds → sprinkle and lightly press into soilMedium seeds → plant about ¼ inch deepLarge seeds → ½ to 1 inch deep💡 Hack Inside: Use the tip of a pencil or your finger to make planting holes — it’s quick and precise!💧 Step 5: Water GentlyAfter planting, mist the soil with a spray bottle until it’s evenly moist. Avoid pouring water directly — it can wash away small seeds.💡 Pro Tip: Cover the tray lightly with plastic wrap or a humidity dome to keep the moisture in — just remove it once you see sprouts!🌞 Step 6: Give Them Light and WarmthSeeds need warmth to sprout and light to grow strong.✅ Place near a sunny window with 6–8 hours of light daily.✅ Use grow lights if you’re starting seeds indoors in winter.✅ Keep soil temperature around 65–75°F (18–24°C) for most plants.💡 Hack Inside: Too cold? Place your trays on top of the fridge — the gentle heat helps seeds germinate faster!🌱 Step 7: Watch Them GrowWithin days or weeks (depending on the seed), you’ll see little green shoots! 🌿When seedlings appear:Remove covers to prevent mold.Rotate trays daily so they grow evenly toward the light.Keep soil consistently moist but not soggy.💡 Pro Tip: Use a fan on low speed for a few minutes each day — it strengthens stems and prevents fungal growth.🌾 Step 8: Transplant with CareOnce seedlings have 2–3 sets of true leaves, they’re ready to move to bigger pots or the garden.Steps:Harden them off — place outdoors for a few hours a day for 5–7 days to adapt.Choose a mild day for transplanting.Dig holes slightly larger than the root ball.Plant gently and water well.💡 Hack Inside: Transplant in the early morning or evening to avoid stress from midday heat.🌻 Bonus: Creative Seed-Starting IdeasWant to make it even more fun? Try these eco-friendly, clever ideas!🌿 Eggshell Planters: Fill cracked eggshells with soil and seeds. When ready, plant the shell directly into the garden — it decomposes and feeds the soil!🌱 Paper Rolls or Newspaper Pots: Roll up old paper into mini pots — great for herbs and small flowers.🍋 Fruit Peel Starters: Use lemon or orange peels as natural seed cups. Compost-friendly and fragrant!💡 Hack Inside: Label each container — you’ll thank yourself later when seedlings start looking alike!🌞 Common Mistakes to AvoidEven seasoned gardeners make these, so here’s how to skip them:🚫 Overwatering — soggy soil suffocates seeds.🚫 Planting too deep — small seeds need light to sprout.🚫 Ignoring temperature — cold soil slows germination.🚫 Skipping labels — you’ll forget which seed is which!💡 Pro Tip: Keep a mini seed journal — note planting dates, germination time, and results for next season’s reference.🌸 Benefits of Growing from Seeds🌿 Save money — one packet can last multiple seasons.🌼 Enjoy full control — from soil choice to organic care.🌱 Learn patience and mindfulness — gardening is great for mental well-being.🌍 Support biodiversity — grow native or heirloom species.💡 Hack Inside: Swap seeds with friends or join a local seed exchange group — it’s fun and sustainable!🌼 Final ThoughtsNow that you know how to plant seeds the easy, smart way, it’s time to roll up your sleeves and start growing! With just a few minutes of care each day, you’ll watch your tiny seeds transform into strong, beautiful plants.Remember — gardening is all about experimenting, learning, and enjoying the process. 🌿So grab your seeds, soil, and a bit of sunshine — and try this amazing “how to plant seeds” idea today! 🌻✨

