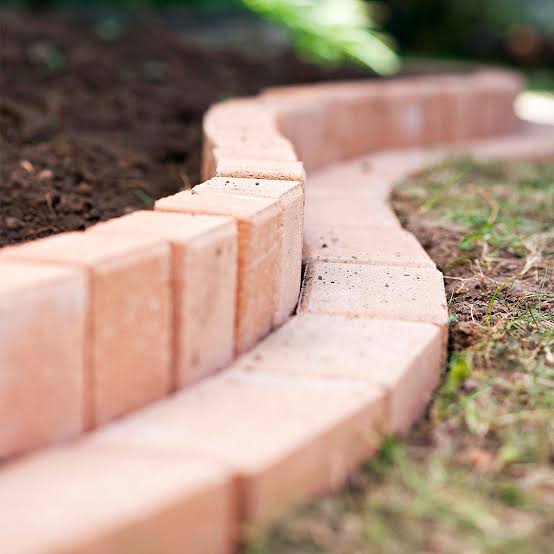
Before we jump into the how-to, here’s why this brick garden edging idea is worth trying:Neat and tidy look: It creates a clear line between your lawn and flower beds, making everything look intentional.Low maintenance: Bricks won’t rot like wood, and they’re easy to clean or reset if one shifts.Budget-friendly: You can often use reclaimed bricks or buy a few packs from a local DIY store.Customizable: Lay them flat, on their side, or at an angle to match your style.In short: it’s a small DIY project with a big “wow” factor.What You’ll NeedTo try this amazing brick garden edging idea, gather:Bricks (standard size, all roughly the same)String and stakes (or pegs) to mark the lineMeasuring tapeSpade or edging shovelHand trowelRubber mallet (or a regular hammer with a block of wood)Sand or fine gravel (for leveling)Soil or topsoil (for backfilling)Gloves and safety glasses (always a good idea)Optional but helpful:Landscape fabric to reduce weedsLevel to keep everything straightHose if you want a curved line instead of straightStep 1: Plan Your Edging LineFirst, decide where you want your new brick border:Around a flower bedAlong a path or drivewayAs a curve around a tree or shrub bedFor straight edges:Hammer stakes into the ground at each end.Tie string tightly between them to mark your line.For curves:Lay a garden hose in the shape you want.Adjust until it looks good, then mark along the hose with spray paint or flour.Take a minute to step back and look at the shape from different angles—front door, patio, main path. Once you’re happy, you’re ready for the fun part.Step 2: Dig the TrenchNow you’ll create a shallow trench where the bricks will sit.Using your spade or edging shovel, cut along your marked line.Dig a trench just wider than your bricks and about half as deep as a brick if you want them partly buried, or deeper if you want them almost fully set into the ground.Remove grass, roots, and stones as you go.You’re aiming for a flat, even base. Don’t stress if it’s not perfect yet—we’ll smooth it out with sand.Step 3: Add a Sand (or Gravel) BaseA good base helps keep your bricks stable and level.Pour a thin layer (about 1–2 cm / ½ inch) of sand or fine gravel into the bottom of the trench.Use your hand, trowel, or a scrap piece of wood to smooth and gently compact the sand.This base makes it easier to tap bricks into place and adjust them if needed.Step 4: Choose Your Brick PatternHere’s where this brick garden edging idea gets creative. You can:Lay bricks flat – neat, low edging, easy to mow over if set level with the grass.Stand bricks on edge – taller, more dramatic border.Lay bricks at a diagonal (“soldier” or “sawtooth” style) – gives a cool zig-zag look.Pick the style that fits your garden vibe:Modern or minimal? Flat and straight.Cottage or rustic? Angled or slightly uneven can look charming.Step 5: Start Laying the BricksNow the satisfying part: actually building your border.Place your first brick at one end of the trench on the sand base.Use the rubber mallet to tap it down gently until it’s stable and at your desired height.Add the next brick snug against it.Keep going along the trench, checking every few bricks to make sure:They’re level side-to-side (use a small level if you have one).They follow your line or curve neatly.If a brick sits too high, tap it down more. Too low? Lift it, add a bit more sand, and reset.Step 6: Backfill and Secure the EdgingOnce all your bricks are laid and you’re happy with how they look:Push soil or topsoil up against both sides of the bricks—especially on the garden-bed side.Firm the soil down with your hands or the back of the trowel to help “lock” the bricks in place.Water the soil lightly so it settles around the bricks.If you’re edging a lawn, you can re-lay any removed turf right up to the brick edge, trimming as needed to fit.Step 7: Add Finishing TouchesTo really make this brick garden edging idea shine:Mulch the garden bed behind the bricks to reduce weeds and make the colors pop.Sweep or hose off the bricks so they look clean and sharp.Consider adding low groundcovers or small flowers along the inside edge for a soft, pretty transition.Step back again and enjoy the view—you’ve basically given your garden a mini makeover.Practical Tips for Long-Lasting Brick Edging1. Use Similar-Sized BricksIf you’re using reclaimed bricks (which can look amazing), try to choose ones that are roughly the same size so your edging doesn’t become too wobbly or uneven.2. Mind the MowerIf you want to run the lawnmower wheels right over the edge:Set the bricks almost level with the soil/grass.Lay them flat, not on edge, for a smoother ride.3. Weed ControlFor less weeding:Lay landscape fabric under the soil on the garden-bed side before backfilling.Mulch generously behind the bricks.4. Dealing with Frost and ShiftingIn colder parts of Canada, the northern US, or chilly parts of the UK:Ground freezing and thawing can shift bricks a bit.The good news: brick edging is easy to fix. Just lift a wobbly brick, adjust the sand, and tap it back in place.5. Take Your Time on CurvesCurves look gorgeous but need a bit more patience:Use smaller bricks, or leave tiny gaps between full bricks on tight curves.Stand back often and adjust the angle slightly as you go so the line stays smooth.Variations on This Brick Garden Edging IdeaOnce you’ve mastered the basic method, you can try:Double-row edging: Two rows of bricks side by side for a wider, bolder border.Mixed materials: Brick edge with gravel path or wood chips inside.Color contrast: Use red bricks around dark mulch or grey bricks around bright green grass.Pattern play: Alternate brick directions (one flat, one on edge) for a unique look.ConclusionIf you’ve been wanting to tidy up your garden borders or add a bit of character without diving into a huge project, this brick garden edging idea is honestly perfect. It’s:Simple enough for beginnersCustomizable to your styleDurable in most climates across the US, UK, and CanadaWith a few basic tools, some bricks, and an afternoon of effort, you can create a clean, stylish edge that makes your plants, paths, and lawn look instantly more polished.