
The idea of turning waste into something useful is not only eco-friendly but also incredibly satisfying. With the growing emphasis on sustainability, repurposing everyday items like plastic bottles into planters is a trend that aligns with both environmental conservation and creative home decor. This guide explores how you can transform an old plastic bottle into a beautiful planter, bringing greenery into your home while reducing waste.
Why Choose Plastic Bottles for Planters?
Plastic bottles are one of the most abundant forms of waste in the world. Recycling them into planters is a small yet impactful way to contribute to the environment. Here are some reasons to embrace this idea:
- Cost-Effective: Repurposing plastic bottles eliminates the need to buy expensive pots.
- Customizable: You can design your planters in any shape, size, or color to match your decor.
- Lightweight: Unlike traditional pots, plastic bottles are lightweight and easy to move.
- Eco-Friendly: It reduces the waste that ends up in landfills and helps promote sustainable living.
Now, let’s dive into the step-by-step process of creating your own plastic bottle planter!
Materials You’ll Need
- An empty plastic bottle (any size)
- Scissors or a sharp knife
- A marker
- Small stones or gravel
- Potting soil
- A small plant or seeds
- Optional: Paint, stickers, or other decorative items
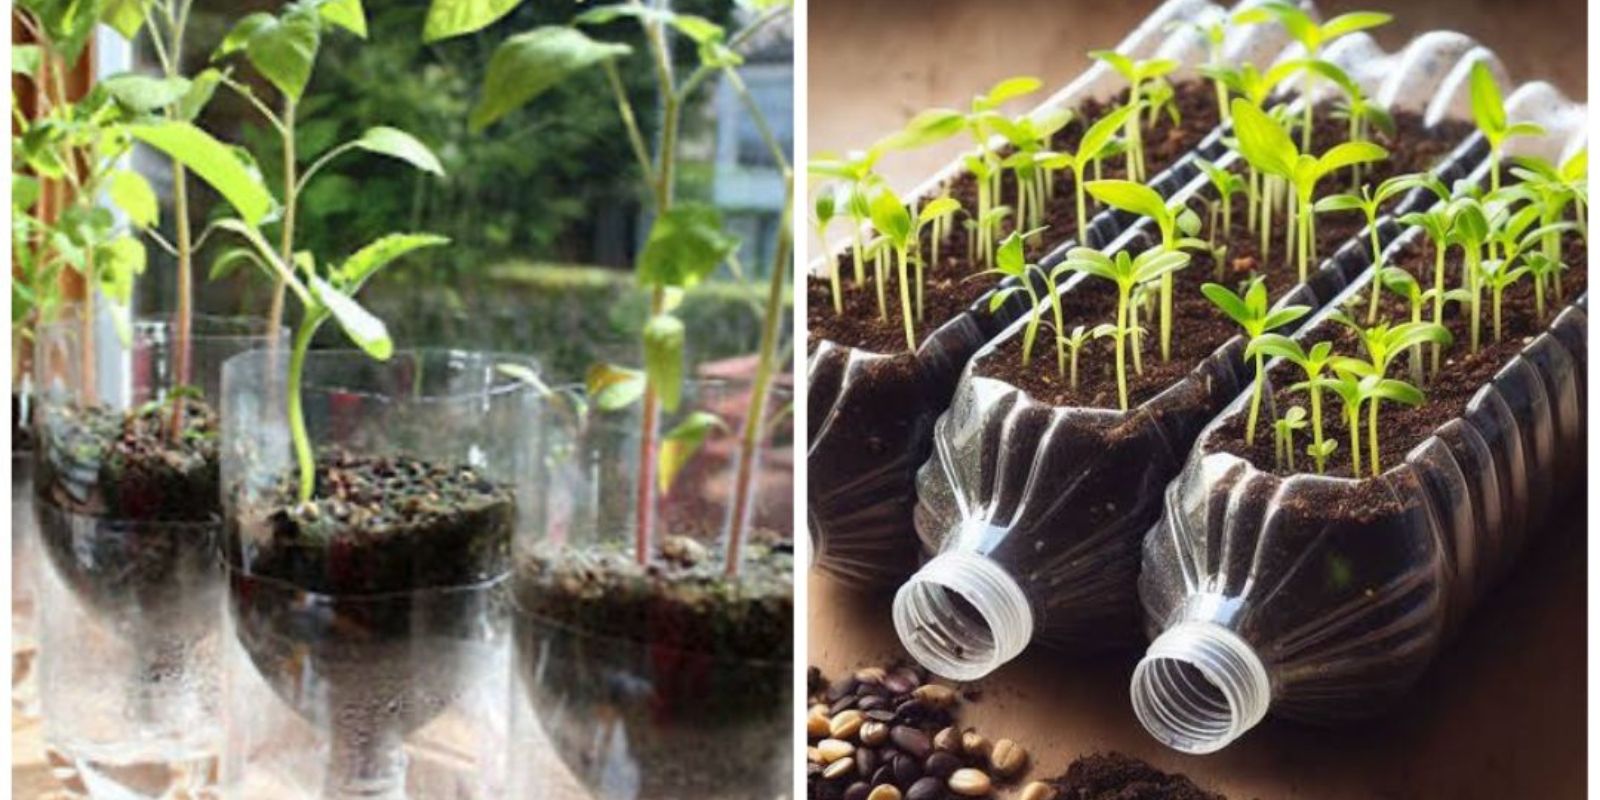
Step 1: Preparing the Bottle
Start by thoroughly washing the plastic bottle to remove any residue or labels. Allow it to dry completely.
Step 2: Cutting the Bottle
Using a marker, draw a cutting line around the bottle. You can cut it in two different styles:
- Straight Cut: Cut the bottle in half for a simple planter.
- Creative Shape: Design unique shapes like animals, faces, or patterns for a decorative touch.
Carefully cut along the line using sharp scissors or a knife.
Step 3: Creating Drainage Holes
To prevent water from pooling at the bottom, poke several small holes in the base of the bottle. This will ensure proper drainage and keep your plant roots healthy.
Step 4: Adding a Drainage Layer
Place a layer of small stones or gravel at the bottom of the planter. This helps improve drainage and prevents soil from clogging the holes.
Step 5: Filling with Soil
Add potting soil to the bottle, leaving about 2 inches from the top. Make sure the soil is suitable for the type of plant you’re growing.
Step 6: Planting
Place your chosen plant or seeds in the center of the soil. Gently press the soil around the roots to secure the plant in place.
Step 7: Watering
Water your plant according to its needs. Ensure that excess water drains through the holes at the bottom.
Step 8: Decorating Your Planter (Optional)
Unleash your creativity by decorating the bottle planter. You can paint it in bright colors, add stickers, or wrap it in twine for a rustic look.
Tips for Successful Plastic Bottle Planters
- Choose the Right Plant: Small plants like herbs, succulents, or flowers work best for bottle planters.
- Avoid Overwatering: Since plastic retains moisture, ensure you don’t overwater your plants.
- Keep It Sun-Friendly: Place your planter in a spot that gets adequate sunlight, depending on the plant’s requirements.
- Repurpose Larger Bottles for Bigger Plants: Use larger bottles for growing vegetables like tomatoes or peppers.
- Use Vertical Gardening Techniques: Hang your bottle planters on walls or fences to save space and create an eye-catching garden display.
Benefits of Plastic Bottle Planters
- Promotes Sustainability: Repurposing plastic bottles reduces waste and supports the environment.
- Accessible Gardening: Perfect for small spaces, apartments, or balconies.
- Creative Outlet: Designing planters allows you to express your artistic side.
- Gardening for Stress Relief: Tending to plants in these unique planters is a therapeutic activity.
- Perfect for Kids: It’s an engaging DIY project that can teach kids about recycling and gardening.
Ideas for Using Plastic Bottle Planters
- Herb Garden: Grow herbs like basil, mint, or parsley in small bottle planters for your kitchen.
- Hanging Garden: Create a vertical garden by attaching several bottle planters to a wall or fence.
- Succulent Collection: Use miniature bottles for growing succulents or cacti.
- Outdoor Decor: Paint and decorate large bottles to use as garden accents.
- Educational Tool: Use the planters in schools to teach children about plants and sustainability.
Overcoming Challenges
While using plastic bottle planters is simple, here are some challenges you may encounter and how to address them:
- Drainage Issues: Ensure you create adequate drainage holes to prevent root rot.
- Sun Exposure: Monitor your plants to ensure they are getting the right amount of sunlight.
- Durability: If the plastic starts to degrade, replace it with a new bottle to avoid harming the plant.
Conclusion
Repurposing plastic bottles into planters is an excellent way to combine gardening with sustainability. It’s a cost-effective, creative, and environmentally friendly solution for anyone looking to reduce waste and add greenery to their space. Whether you’re a seasoned gardener or a beginner, this project is perfect for all skill levels.
Have you tried making plastic bottle planters? Share your tips, photos, or questions in the comments below!