
Gardening doesn’t have to mean vast plots of land or fancy, expensive planters. Sometimes, all it takes is a little creativity and resourcefulness to turn something old into something beautiful. One of the most charming ways to reimagine your gardening space is by transforming an old cart into a miniature garden homestead. This clever project not only recycles unused items but also creates a stunning focal point in your garden, balcony, or patio. In this article, we will walk you through how to transform a neglected cart into a thriving miniature garden, one that will capture the attention of all who visit your home.
The Charm of Upcycling: Why Choose an Old Cart?
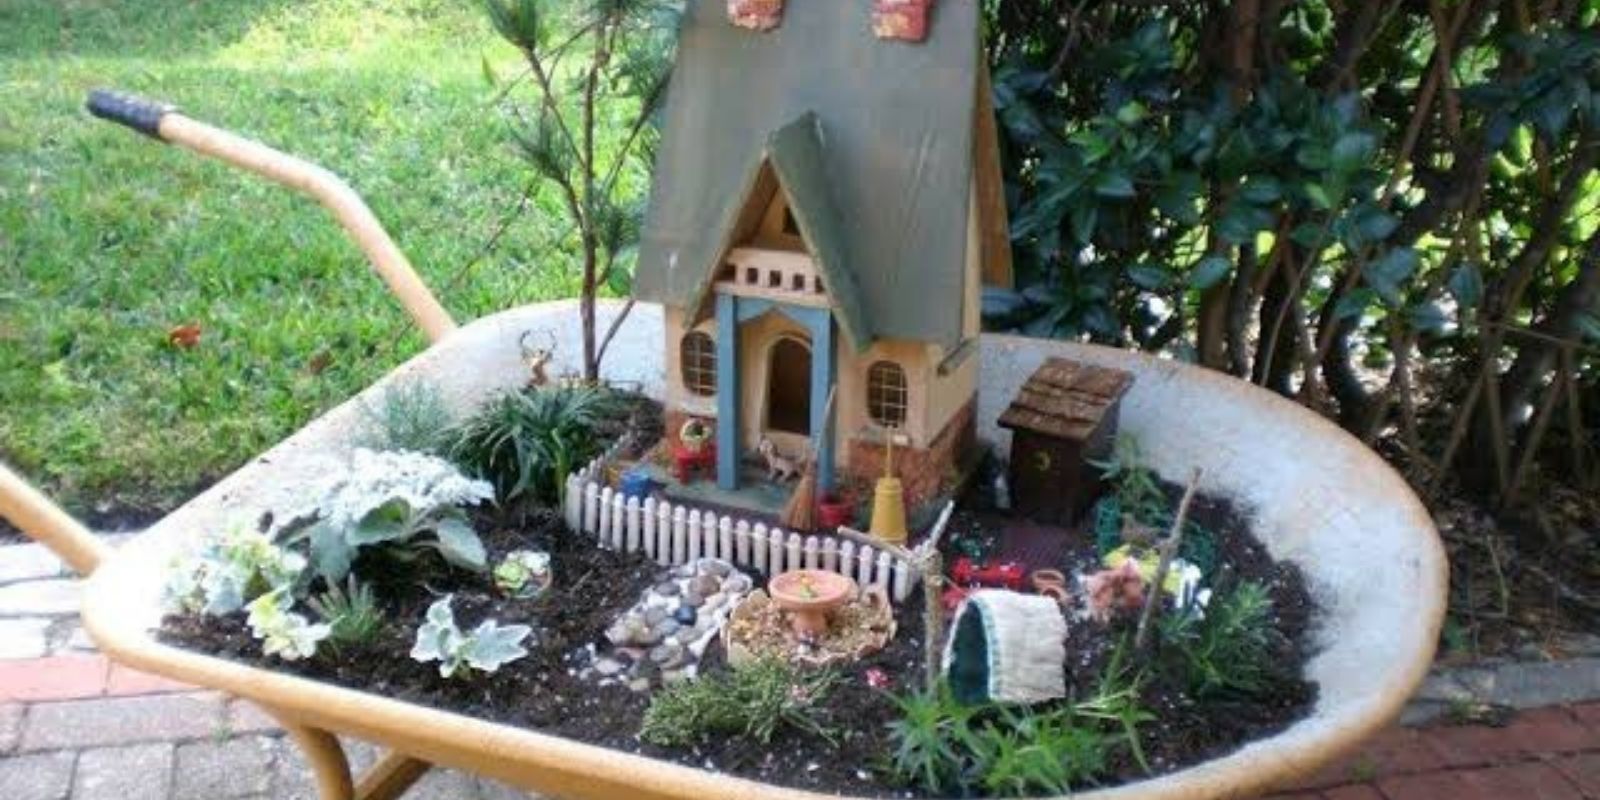
In a world that’s growing increasingly conscious of waste, upcycling is an ideal way to give new life to old objects. An old cart, whether it’s a vintage wooden wheelbarrow or a metal garden cart, can easily be turned into a charming garden homestead. These carts have character and bring a touch of nostalgia, evoking a sense of history and rustic charm to any garden. By incorporating one into your garden space, you create not only a functional planting space but also a decorative, vintage-inspired accent.
The best part about this project is that it’s highly customizable. You can choose plants that match the cart’s aesthetic, as well as make it as big or small as you like. Whether you’re looking to add herbs to your porch, create a small flower garden, or start a vegetable garden, an old cart can be transformed into the perfect mini-homestead.
Step-by-Step Guide: Turning an Old Cart into a Miniature Garden Homestead
1. Finding the Perfect Cart
The first step in your garden homestead transformation is finding the right cart. Luckily, carts come in all shapes, sizes, and materials, so you have many options. You can use:
- Wooden Wheelbarrows: These have a classic look and can add a touch of rustic charm to your garden. You can find them at thrift stores, yard sales, or even in your own garage.
- Metal Carts: Whether it’s an old shopping cart, a vintage farm cart, or a metal garden cart, these types of carts are perfect for outdoor use and often come with a lot of character.
- Wooden or Plastic Crates: If you don’t have an old cart, you could use a large crate with wheels to mimic the look of a cart.
Look for a cart that has a sturdy base and can comfortably hold soil and plants. It should also be easy to move around your garden or home, which is the beauty of a cart – its mobility!
2. Clean and Prepare the Cart
Once you’ve found your cart, it’s time to clean and prepare it for gardening. Start by removing any dirt, debris, or old paint. If it’s a wooden cart, you might want to give it a quick sanding to smooth rough edges. For metal carts, check for rust. If there’s significant rust, you may want to use a wire brush or sandpaper to remove it.
After cleaning the cart, you can paint it to give it a fresh, updated look. Use outdoor paint or a rust-resistant primer if you’re working with metal. You can also keep it rustic and natural, especially if you’re going for a vintage look. Feel free to get creative with color choices – a bright color can make it pop, while neutral tones can blend seamlessly with your outdoor décor.
3. Add Drainage Holes
One of the most important aspects of container gardening is ensuring proper drainage. Without drainage, water can accumulate in the bottom of the cart, leading to root rot and other plant health issues. To prevent this, drill several small holes at the bottom of the cart. If your cart already has gaps in the base (such as in a metal cart or wooden crate), you can skip this step.
If the cart doesn’t have any sort of drainage system, drilling holes ensures that excess water will flow out easily, giving your plants the best chance to thrive.
4. Prepare the Base: Add Gravel for Drainage
Now that your cart is ready for planting, you need to set up a proper base for the soil. Start by adding a thin layer of gravel or small stones to the bottom of the cart. This will act as a drainage layer, ensuring that water flows freely through the soil and out of the cart. This also helps keep the soil from becoming waterlogged.
You can also add a layer of landscaping fabric or burlap over the gravel to prevent soil from sinking into the gaps and allowing better airflow to the roots.
5. Fill the Cart with Soil
Once the base is prepared, it’s time to fill the cart with soil. Choose a high-quality, well-draining potting mix to give your plants the best chance to grow. Depending on the size of your cart, you may need several bags of potting soil. If your cart is larger, consider mixing in some compost to enrich the soil and provide extra nutrients.
Fill the cart with soil until it’s about an inch or two from the top. This will allow space for watering and will help prevent water from spilling over the sides.
6. Choose the Right Plants
Choosing plants for your miniature garden homestead is perhaps the most fun part of this project. The type of plants you select will depend on your climate, the amount of sunlight your cart receives, and the aesthetic you’re going for. Here are a few ideas:
- Herbs: If you love cooking, an herb garden is a great option for your cart. You can grow basil, mint, parsley, thyme, and rosemary – all of which thrive in containers.
- Succulents: Succulents are low-maintenance and come in a variety of colors and textures. They’re perfect for a miniature garden and can tolerate dry conditions.
- Flowers: Add pops of color by planting annuals like petunias, marigolds, or geraniums. These flowers bloom prolifically and create a vibrant display.
- Vegetables: For those with limited garden space, a cart is a great place to grow small vegetables like lettuce, spinach, or tomatoes. Just be sure to pick varieties that are compact enough to grow in containers.
- Climbers and Vines: If you’re looking to add height and dimension to your cart, consider growing climbing plants like peas, morning glories, or sweet peas.
7. Add Decorative Elements
Once your plants are in place, it’s time to make your miniature garden even more unique. You can add decorative elements such as:
- Fairy lights: String some lights around the cart for a magical effect, especially in the evening.
- Small figurines or garden gnomes: These add personality and charm to your new garden.
- Garden markers: Use cute labels or wooden stakes to identify your plants.
Feel free to get creative with your garden homestead décor! The more personality you add, the more unique and appealing it will be.
8. Water and Care for Your Miniature Garden Homestead
Now that your miniature garden homestead is complete, it’s important to care for it properly. Be sure to water your plants regularly, especially during hot, dry weather. Since the cart may dry out faster than traditional garden beds, check the soil’s moisture level frequently.
Fertilize your plants once a month with a balanced liquid fertilizer to encourage growth. Keep an eye out for pests, and be proactive about treating any plant diseases that may arise.
Conclusion: Your Beautiful Garden Awaits!
Transforming an old cart into a miniature garden homestead is an incredibly rewarding project. Not only does it provide you with a unique and personalized gardening space, but it also gives new life to old items that would otherwise be discarded. Whether you’re growing flowers, herbs, vegetables, or succulents, your mini homestead will be a beautiful addition to any outdoor or indoor space.
The best part is, you can tailor your cart garden to reflect your personal style and the needs of your plants. Plus, it’s a fantastic conversation starter and a great way to make the most of your available gardening space.
So, if you’re looking to add a little charm and creativity to your garden or home, try transforming an old cart into a mini garden homestead. You’ll be amazed by the beauty and character it adds to your space!