
Gardening enthusiasts and urban dwellers alike are discovering the joys of vertical gardening as a creative solution for maximizing space and adding a touch of greenery to their environments. A DIY vertical garden planter not only beautifies your space but also offers practical benefits for those with limited gardening areas. This comprehensive guide will walk you through the process of creating your own vertical garden planter, providing tips, materials lists, and step-by-step instructions to help you achieve a thriving, lush garden.
Introduction
In an age where urban living often means limited space, finding innovative ways to incorporate nature into our surroundings is more important than ever. Vertical gardening is an ingenious method that allows you to grow plants upwards rather than outwards, making the most of vertical surfaces like walls and fences. A DIY vertical garden planter can be a striking focal point in your home or garden, and with a bit of creativity and effort, you can build one that suits your style and space. This article will guide you through the entire process, from planning and assembling your planter to planting and maintaining it.
Benefits of Vertical Gardens
Before diving into the how-to, it’s worth noting why vertical gardens are so popular:
- Space Efficiency: Ideal for small spaces, vertical gardens use vertical surfaces to maximize planting area.
- Aesthetic Appeal: They create a stunning green wall, enhancing the visual appeal of any space.
- Improved Air Quality: Plants help filter the air, making indoor environments healthier.
- Accessibility: Easier to reach for maintenance and harvesting, especially for herbs and small vegetables.
Materials Needed
- Wood Planks or Pallets: Choose durable wood that can withstand outdoor conditions if you’re placing your planter outside. Pallets are a popular choice for a rustic look.
- Landscape Fabric or Chicken Wire: Used to create pockets for planting. Landscape fabric is ideal for smaller planters, while chicken wire works well for larger structures.
- Potting Mix: A high-quality mix suitable for the plants you choose. Ensure it has good drainage and aeration.
- Plants: Select plants that thrive in vertical gardens. Herbs, succulents, and trailing vines are excellent choices.
- Screws or Nails: For assembling the frame.
- Hanging Hardware: Hooks, brackets, or wall mounts to securely attach your planter to a wall or fence.
- Tools: Saw (if cutting wood), drill, hammer, screwdriver, and scissors.
Step-by-Step Guide
1. Plan Your Design
Consider the Space:
- Measure the area where you plan to hang your vertical garden. This will help you determine the size and dimensions of your planter.
Choose the Plants:
- Decide on the types of plants you want. For example, if you’re growing herbs, consider basil, mint, and parsley. For succulents, choose varieties like echeveria and sedum.
Design the Layout:
- Sketch a design of your vertical garden. Consider the arrangement of the pockets and how you want the plants to be displayed.
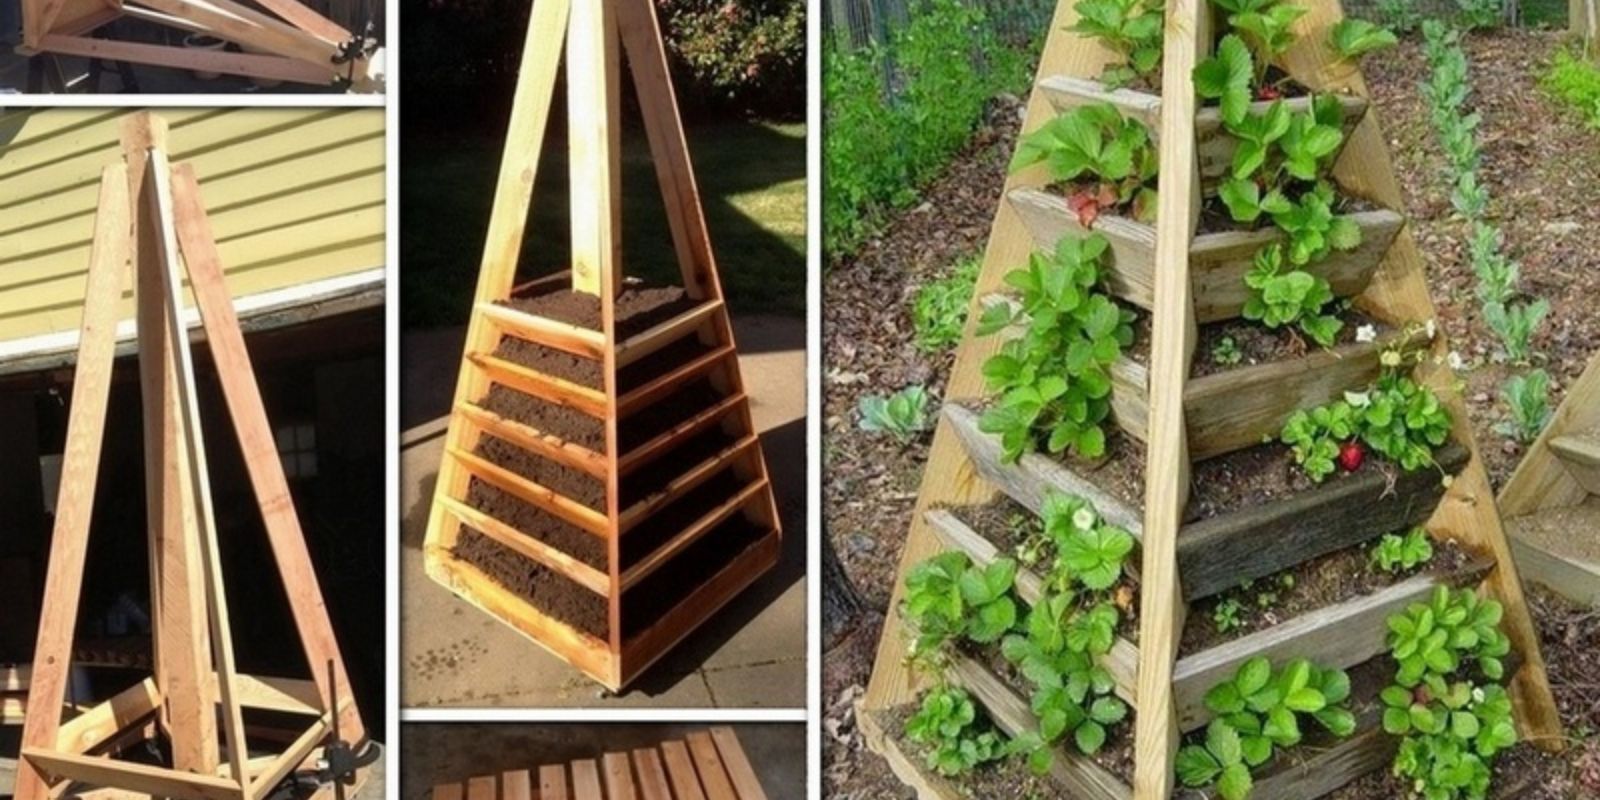
2. Assemble the Frame
Cut the Wood:
- If using wood planks, cut them to your desired size. Typically, a vertical planter might be around 2-3 feet wide and 4-6 feet tall, depending on your space.
Build the Frame:
- Assemble the wood planks or pallets into a rectangular or square frame. Use screws or nails to secure the corners and ensure stability.
Attach Planting Pockets:
- Secure landscape fabric or chicken wire to the back of the frame. For landscape fabric, staple it to the frame, leaving space between each staple to form pockets. If using chicken wire, wrap it around the frame and secure it with wire or staples.
3. Prepare and Add Soil
Prepare the Soil:
- Mix potting soil with compost or other organic matter to improve fertility and drainage.
Fill the Pockets:
- Carefully fill each pocket with the prepared potting mix. Avoid overfilling to ensure there’s room for plant roots.
4. Plant Your Selection
Planting:
- Gently place your chosen plants into the pockets. For herbs and small plants, space them out to allow for growth. For trailing plants, ensure they have enough space to cascade.
Watering:
- Water the plants thoroughly after planting. Ensure the soil is evenly moist but not waterlogged.
5. Mount the Planter
Choose the Location:
- Select a location that receives adequate sunlight for the plants you’ve chosen. Most vertical gardens thrive in a spot with 4-6 hours of direct sunlight.
Secure the Planter:
- Use hanging hardware, such as hooks or brackets, to mount your vertical garden planter to the wall or fence. Ensure it is securely fastened to prevent accidents.
6. Maintain Your Vertical Garden
Water Regularly:
- Check the moisture level of the soil regularly and water as needed. Vertical gardens can dry out faster than traditional gardens due to their elevated position.
Fertilize:
- Apply a balanced, water-soluble fertilizer every 4-6 weeks to provide essential nutrients to your plants.
Prune and Harvest:
- Regularly prune your plants to encourage healthy growth and prevent overcrowding. Harvest herbs and vegetables as they mature to promote continued production.
Conclusion
Creating a DIY vertical garden planter is a rewarding project that enhances both the beauty and functionality of your space. By following the steps outlined in this guide, you can build a stunning green wall that showcases your favorite plants and makes the most of your available space. Whether you’re a seasoned gardener or a beginner, a vertical garden is a fantastic way to add a touch of nature to your home or garden.
Call to Action
Ready to transform your space with a vertical garden? Gather your materials, follow these steps, and watch your garden grow upwards! 🌿🌟 #VerticalGarden #DIYGarden #GreenThumb #GardenInspiration #UrbanGardening #SpaceSaver #PlantLove #HomeGardening #CreativeGardening