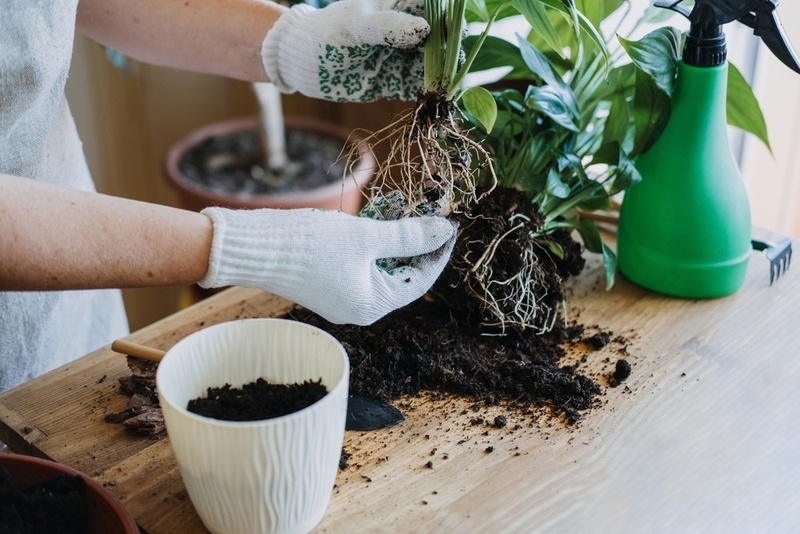
If your plants are looking tired, roots are peeking from the bottom of the pot, or growth has slowed — it might be time for a little change of scenery! Learning how to repot a plant is one of the most rewarding skills any gardener can master.Whether you’re a beginner or a seasoned plant lover, knowing when and how to repot correctly can transform your garden by giving plants the space, nutrients, and energy they need to grow stronger and healthier.In this guide, you’ll learn the secret to how to repot a plant the right way — with step-by-step instructions, expert tips, and creative ideas to keep your garden flourishing year-round.🌿 Why Repotting MattersRepotting isn’t just about aesthetics — it’s about plant health. Over time, roots outgrow their containers, nutrients deplete, and soil becomes compacted. When this happens, your plants can’t breathe, drink, or feed properly.By repotting your plants, you:🪴 Refresh the soil with new nutrients.🌱 Encourage root growth and prevent overcrowding.💧 Improve drainage and aeration.🌸 Boost overall health and blooming potential.🌼 Pro Tip: Most houseplants need repotting every 12–18 months. For fast-growing plants, check every 6 months.🌼 When to Repot Your PlantsTiming is everything. So, how do you know when it’s time to repot a plant? Watch for these clear signs:Roots are growing out of the drainage holes.The plant looks top-heavy or keeps tipping over.Water drains too quickly or pools on top of the soil.The soil looks dry, compacted, or pale.Growth has slowed even with proper care.🌿 Best time to repot: Spring or early summer — when plants are in their active growing phase and can quickly recover from the move.🌷 Step-by-Step Guide: How to Repot a PlantRepotting might sound intimidating, but it’s actually simple once you know the process. Here’s how to do it safely and effectively:🌱 Step 1: Choose the Right PotPick a pot 1–2 inches larger in diameter than the current one.Ensure it has drainage holes to prevent root rot.Terracotta pots are great for moisture control, while plastic ones retain water longer.🌿 Step 2: Prepare Fresh SoilUse high-quality potting mix suited for your plant type:Succulents and cacti: Fast-draining sandy mix.Tropical plants: Rich, loamy mix with good moisture retention.Herbs and vegetables: Organic compost-enriched soil.🪴 Bonus Tip: Mix in perlite or peat moss for extra aeration and drainage.🌼 Step 3: Remove the Plant GentlyWater your plant lightly an hour before repotting.Turn the pot sideways and tap the bottom to loosen the soil.Gently slide the plant out — avoid pulling on the stem!If the roots are tightly wound (root-bound), tease them apart carefully with your fingers.🌷 Step 4: Trim and Inspect the RootsHealthy roots should be white or light tan.Trim any dark, mushy, or rotten roots using clean scissors.Prune long, circling roots to encourage new growth.🌿 Step 5: Add Soil and ReplantAdd a layer of fresh potting mix to the bottom of the new pot.Position your plant in the center.Fill around the roots with soil, pressing gently to remove air pockets.Leave about 1 inch of space from the rim for watering.🌸 Pro Tip: Don’t pack the soil too tightly — roots need air!🌱 Step 6: Water and Settle InWater the plant thoroughly until moisture drains from the bottom.Place it in a shady or indirect light area for a few days to let it adjust.Avoid fertilizing for 2–3 weeks after repotting; the new soil already contains nutrients.🌼 Common Mistakes to Avoid When RepottingEven experienced gardeners make these simple mistakes. Avoid them to keep your plants happy and healthy:❌ Choosing a pot that’s too big — this leads to overwatering.❌ Using garden soil — it’s too heavy and compact for pots.❌ Forgetting drainage holes — roots can drown!❌ Overhandling roots — causes transplant shock.❌ Placing in direct sunlight immediately — let plants rest first.🌿 Grow smarter: Gentle handling, the right soil, and patience are your best tools.🌷 Creative Ideas for Repotting and Garden TransformationRepotting doesn’t have to be boring — it’s a great opportunity to transform your garden creatively!🌿 1. Use Decorative PotsChoose colorful ceramic, clay, or patterned pots to add personality. Matching planters can tie your garden design together beautifully.🌼 2. Try UpcyclingUse old tins, baskets, or wooden crates as unique plant containers. Just make sure they have drainage!🌸 3. Mix Plant HeightsCombine tall, trailing, and bushy plants in one space for visual variety and lush texture.🌷 4. Add Garden AccessoriesPlace repotted plants alongside garden statues, bird baths, or fairy lights to create a magical, cohesive look.🌿 5. Group Plants by NeedsArrange plants with similar light and watering requirements together — easier care, healthier growth.🌼 Post-Repot Care: Keeping Plants HappyAfter you’ve repotted your plants, it’s important to give them the right care while they settle in.🌿 Water carefully: Keep soil slightly moist but not soggy.🌸 Provide indirect sunlight: Avoid harsh rays for at least a week.🌱 Avoid fertilizer: Wait 2–3 weeks before feeding again.🌼 Watch for stress signs: Slight drooping is normal; yellow leaves may indicate overwatering.💚 Remember: Repotting is a fresh start — patience will reward you with lush, thriving plants.🌿 ConclusionNow that you’ve learned how to repot a plant, you’re ready to transform your garden into a thriving, beautiful oasis. Repotting may seem simple, but it’s a vital part of plant care — one that brings new life, growth, and color to your home or garden space.From refreshing tired soil to giving your plants room to stretch their roots, every repotting session is an act of renewal. So grab your gloves, your favorite potting mix, and get ready to give your plants the love they deserve!Let your garden thrive — one pot at a time. 🌱💚